Designing Federated Views and Data Relationships
Power BI Analysis with Federated Views and Data Exchange Relationships
Federated views let you create a unified view of data from multiple sources without physically combining them into a single dataset. By establishing relationships between different data sources, you can analyze and report on the combined data as if it were a single dataset. With "Federated Models," you can create a dashboard by selecting multiple exchanges simultaneously. The viewer will also display the geometry of all the selected data exchanges. Choose federated views for their efficiency, flexibility, scalability, and real-time analysis. They save you time and storage by avoiding data duplication, allow you to create dynamic models with defined relationships, handle large data volumes, and enable real-time reporting without merging processes. Leverage these benefits in Power BI for effective data analysis and reporting. To work with federated views in Power BI, you need to create relationships between the Data Exchanges loaded. Using federated viewer mapping, you establish connections between different data sources without merging them. Power BI enables you to define relationships between tables from various sources, creating a unified view for analysis and reporting. This approach is especially useful for large and diverse datasets.
Here is how you can create relationships using federated viewer mapping in Power BI.
Open Power BI desktop.
Load two different Data Exchanges into Power BI.
Navigate to the Model View tab. You will see the tables loaded.
Click the Manage relationships.

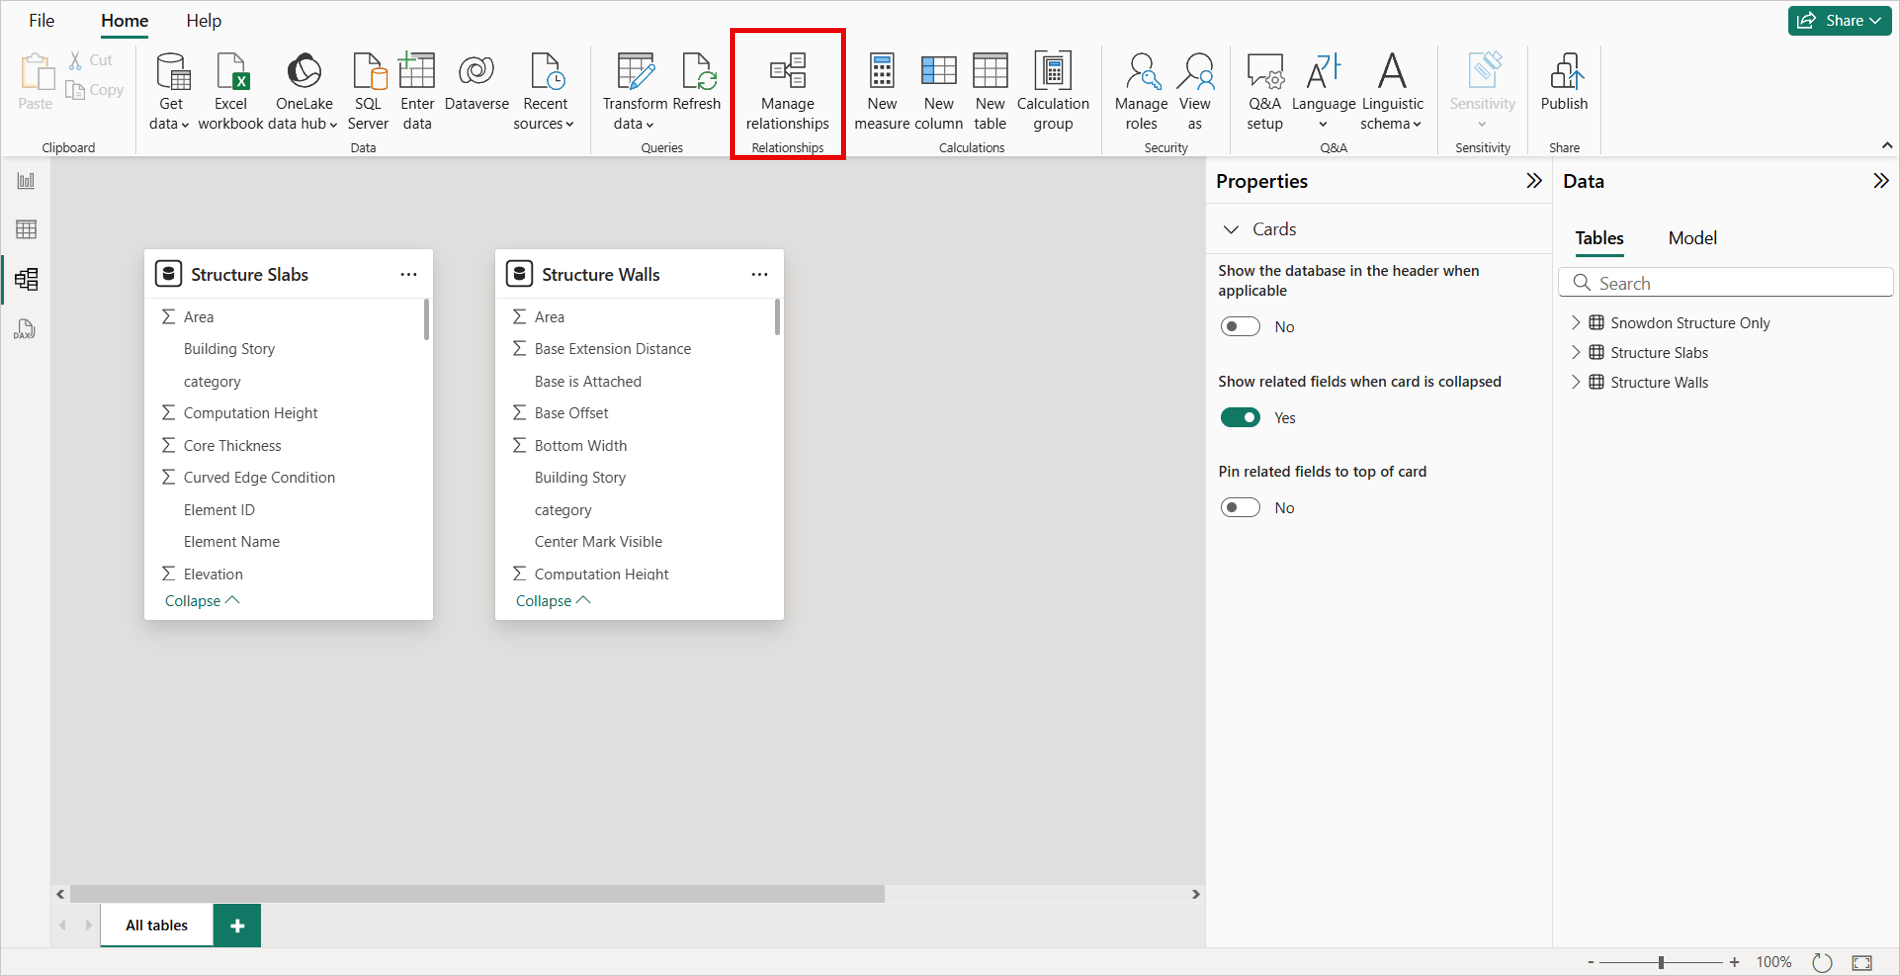
Click the New relationship.
Select the tables from the drop-down menus between which you want to create the relationship.
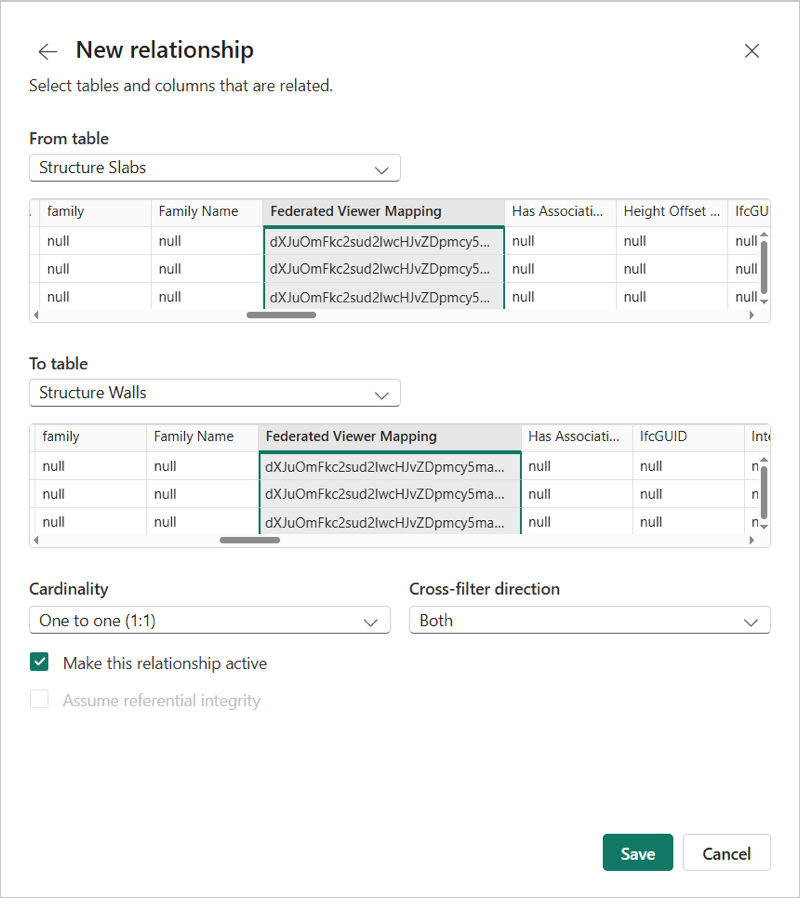
In the table preview, find the "Federated Viewer Mapping" columns and select columns from both table previews.
Select "One to One" Cardinality and save the relationship. it will successfully create a relationship between the Data Exchanges.
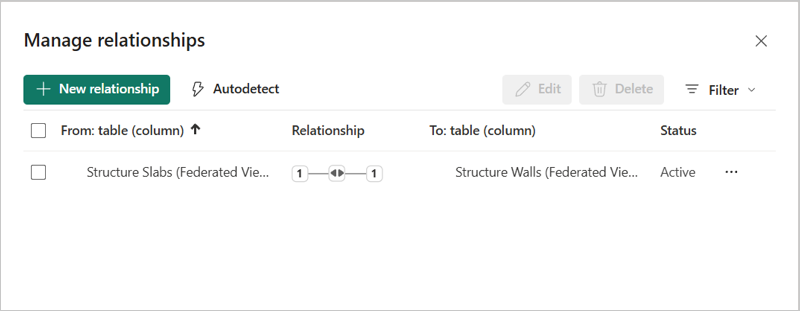
Advanced-Data Relationships in Power BI
To enable comprehensive data aggregation across all Power BI visuals—including but not limited to the Autodesk Viewer—you can implement advanced relationships using a star schema. This approach centers around a fact table that consolidates data from multiple exchanges into a unified, federated view.
Open Power BI and go to Model View.
Select New Table.
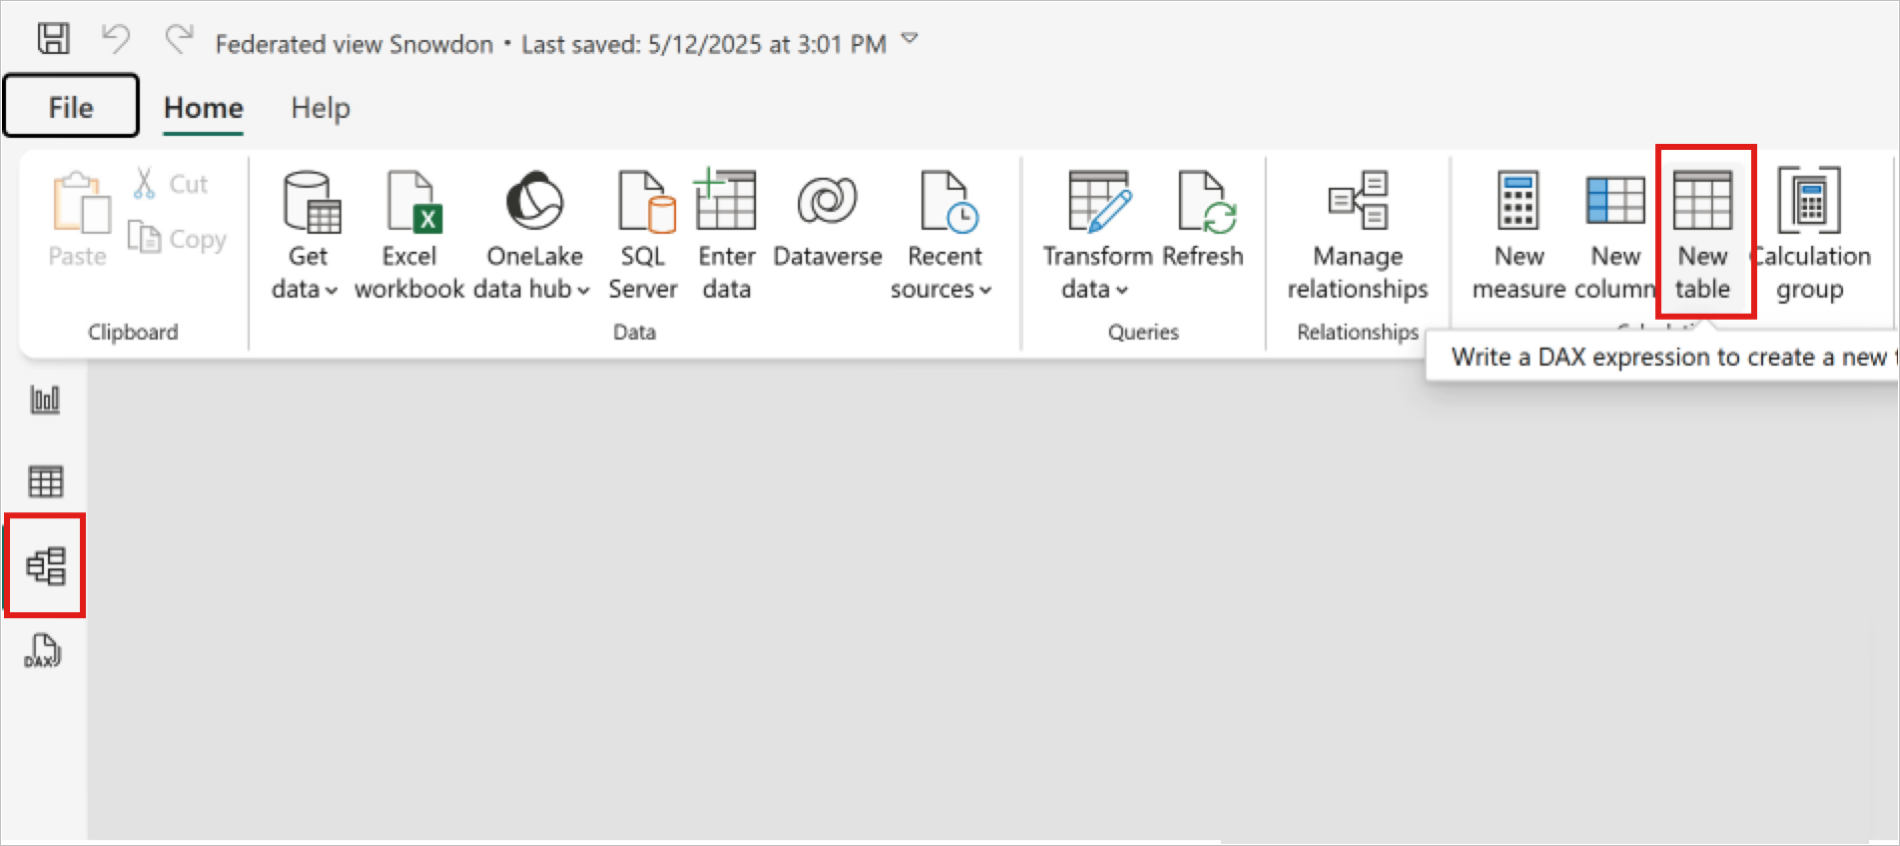
Use the following DAX formula to create a unified table named Elements. This table merges data from two models—3D HVAC Layout and Structure Only—and includes:
- Revit Category Type Id
- Federated Viewer Mapping
- A Discipline keyword to indicate the source exchange such as HVAC or Structure
Note: You can use ChatGPT or other large language models (LLM) to help generate or validate DAX formulas.Elements = FILTER ( UNION ( SELECTCOLUMNS( '3D HVAC Layout', "RevitCategory", '3D HVAC Layout'[Revit Category Type Id], "FederatedViewerMapping", '3D HVAC Layout'[Federated Viewer Mapping], "Discipline", "HVAC" ), SELECTCOLUMNS( 'Structure Only', "RevitCategory", 'Structure Only'[Revit Category Type Id], "FederatedViewerMapping", 'Structure Only'[Federated Viewer Mapping], "Discipline", "Structure" ) ), NOT ISBLANK([RevitCategory]) )After creating the Elements table, re-establish relationships between the Federated Viewer Mapping columns in your model. This ensures that visuals can interact with the new fact table and reflect aggregated data correctly.
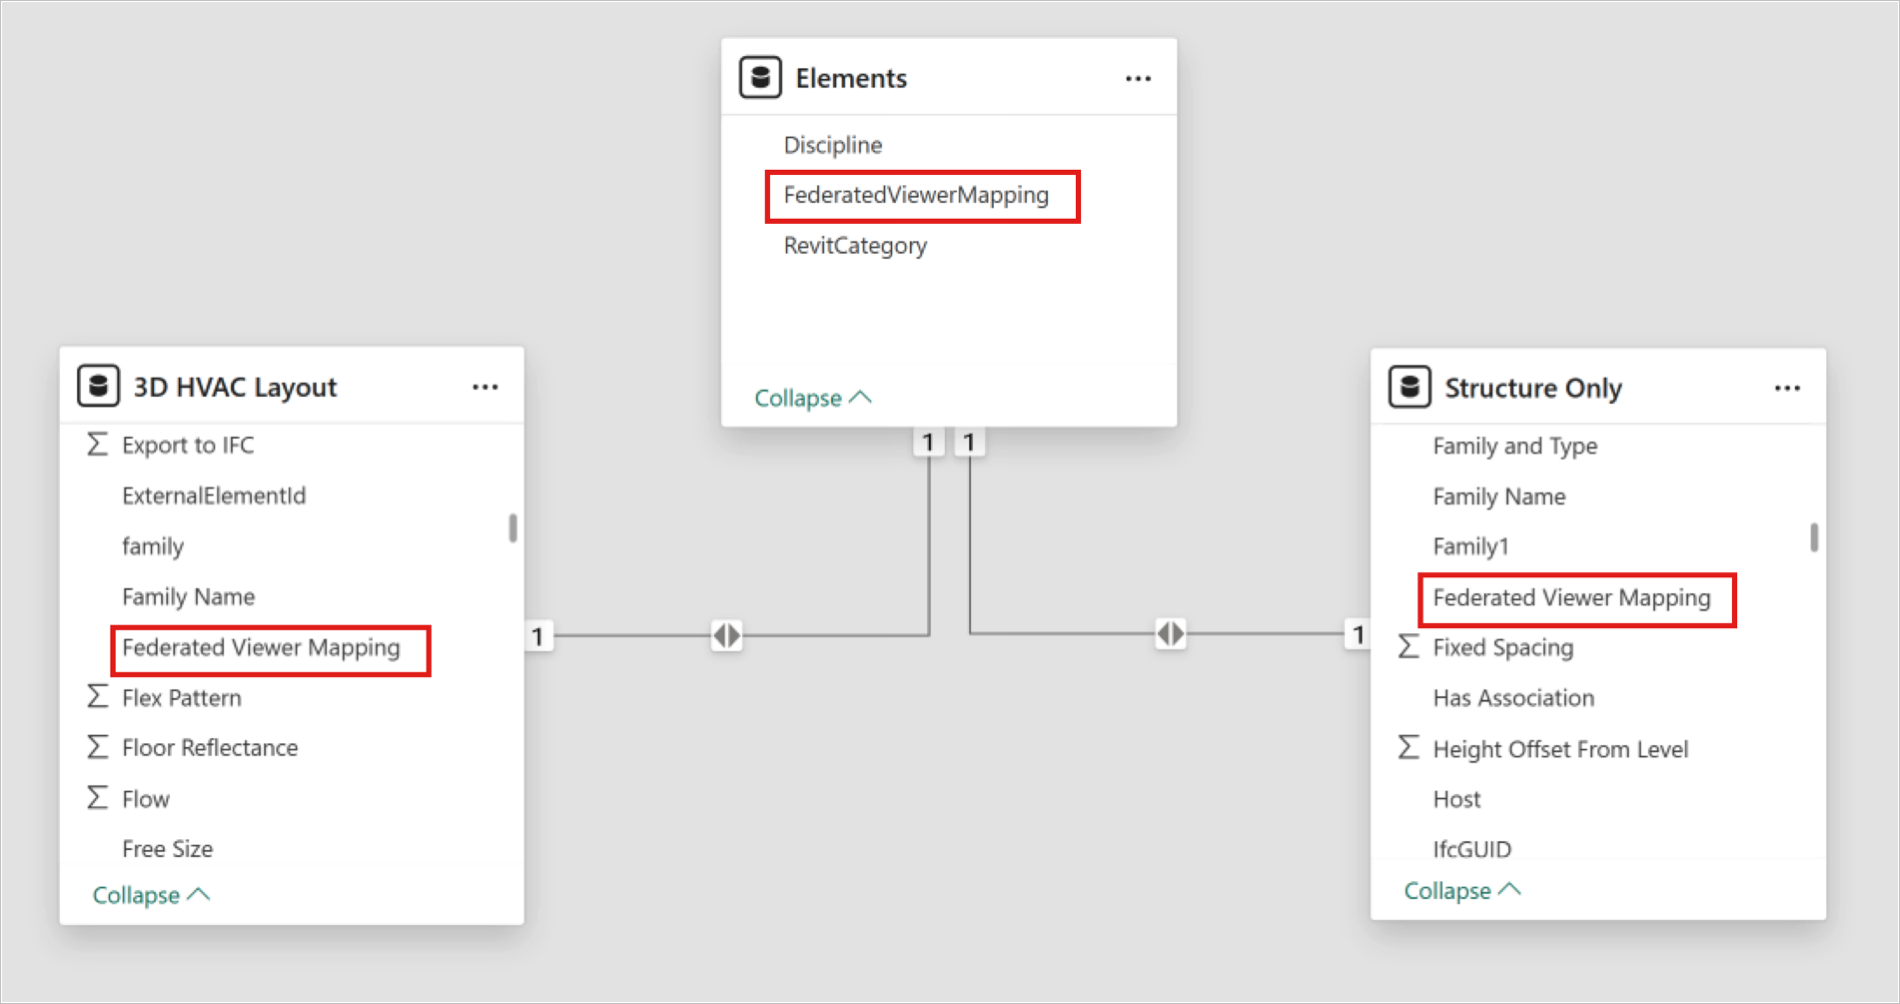
Once relationships are in place, you can use fields from the Elements table to:
Create interactive visuals
Filter by Discipline (For example: HVAC or Structure)
Slice data by Revit Category Type Id
Display aggregated views in the Autodesk Viewer or other Power BI visuals
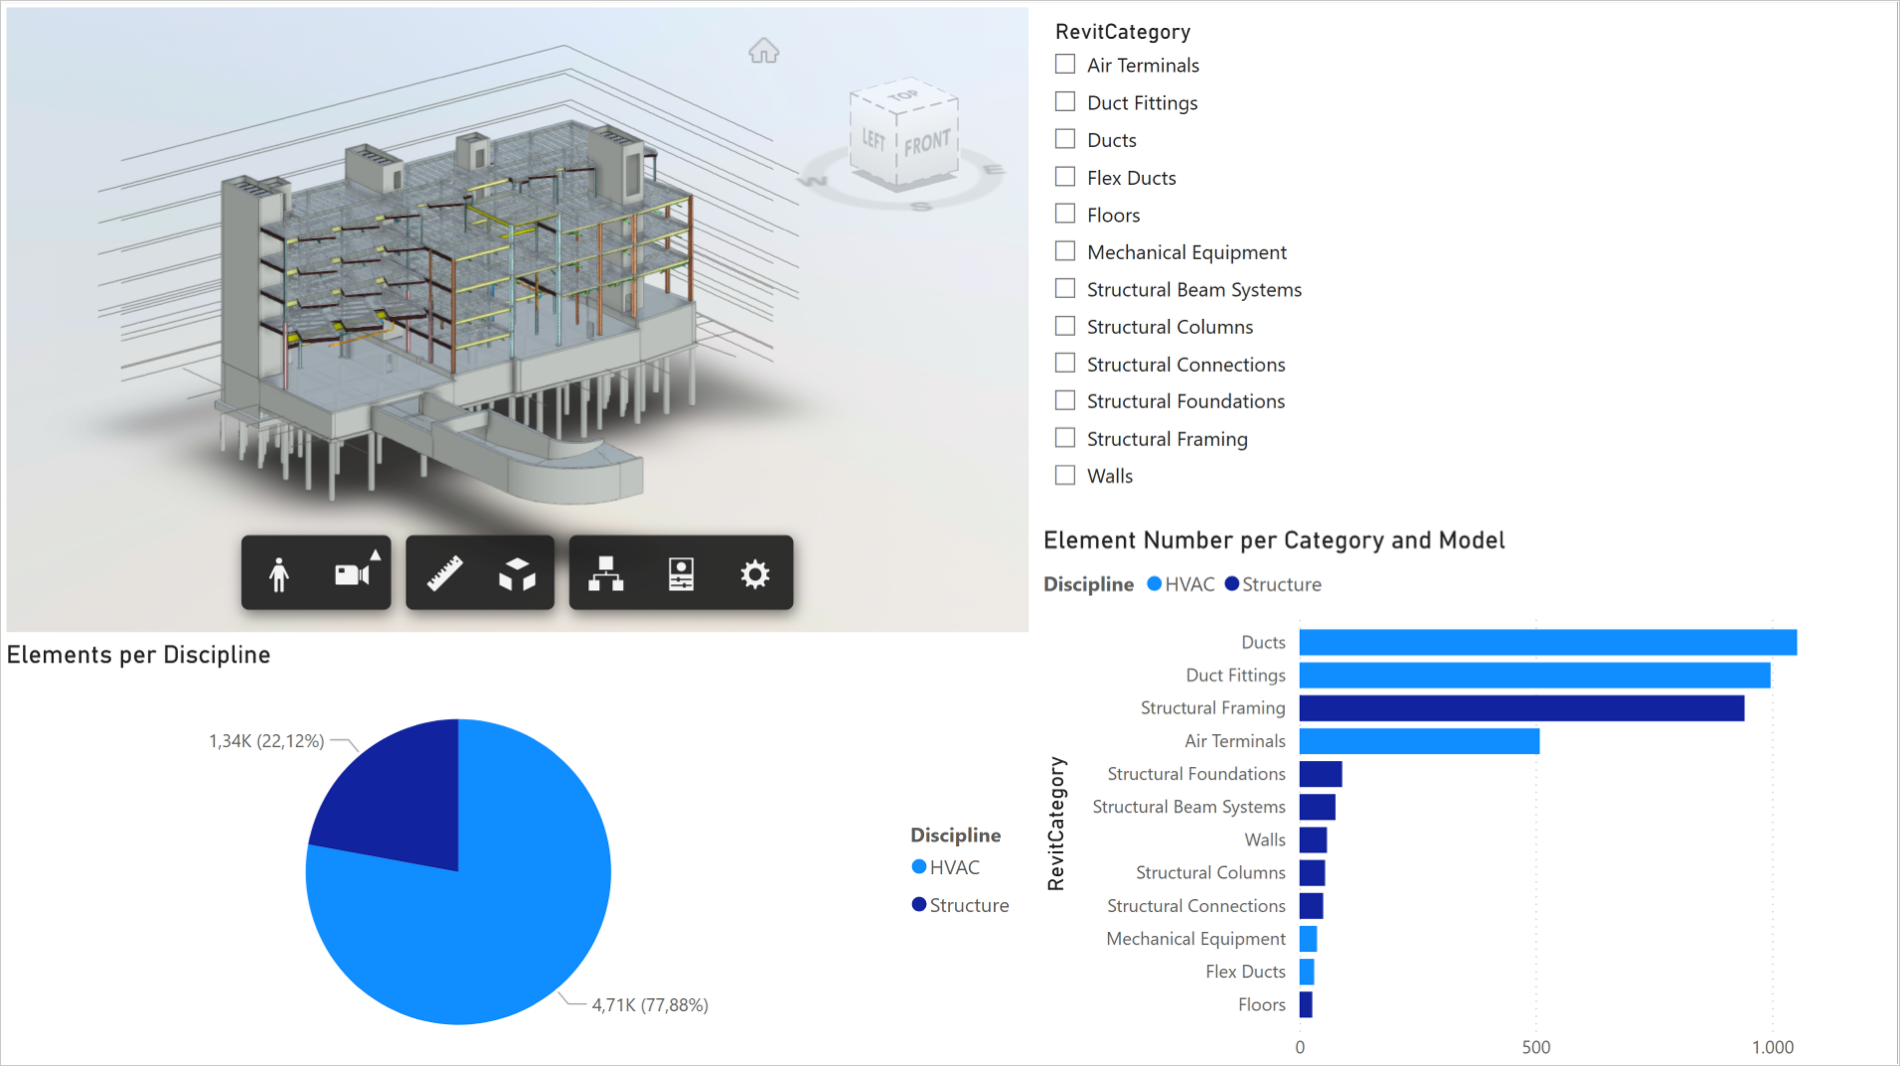
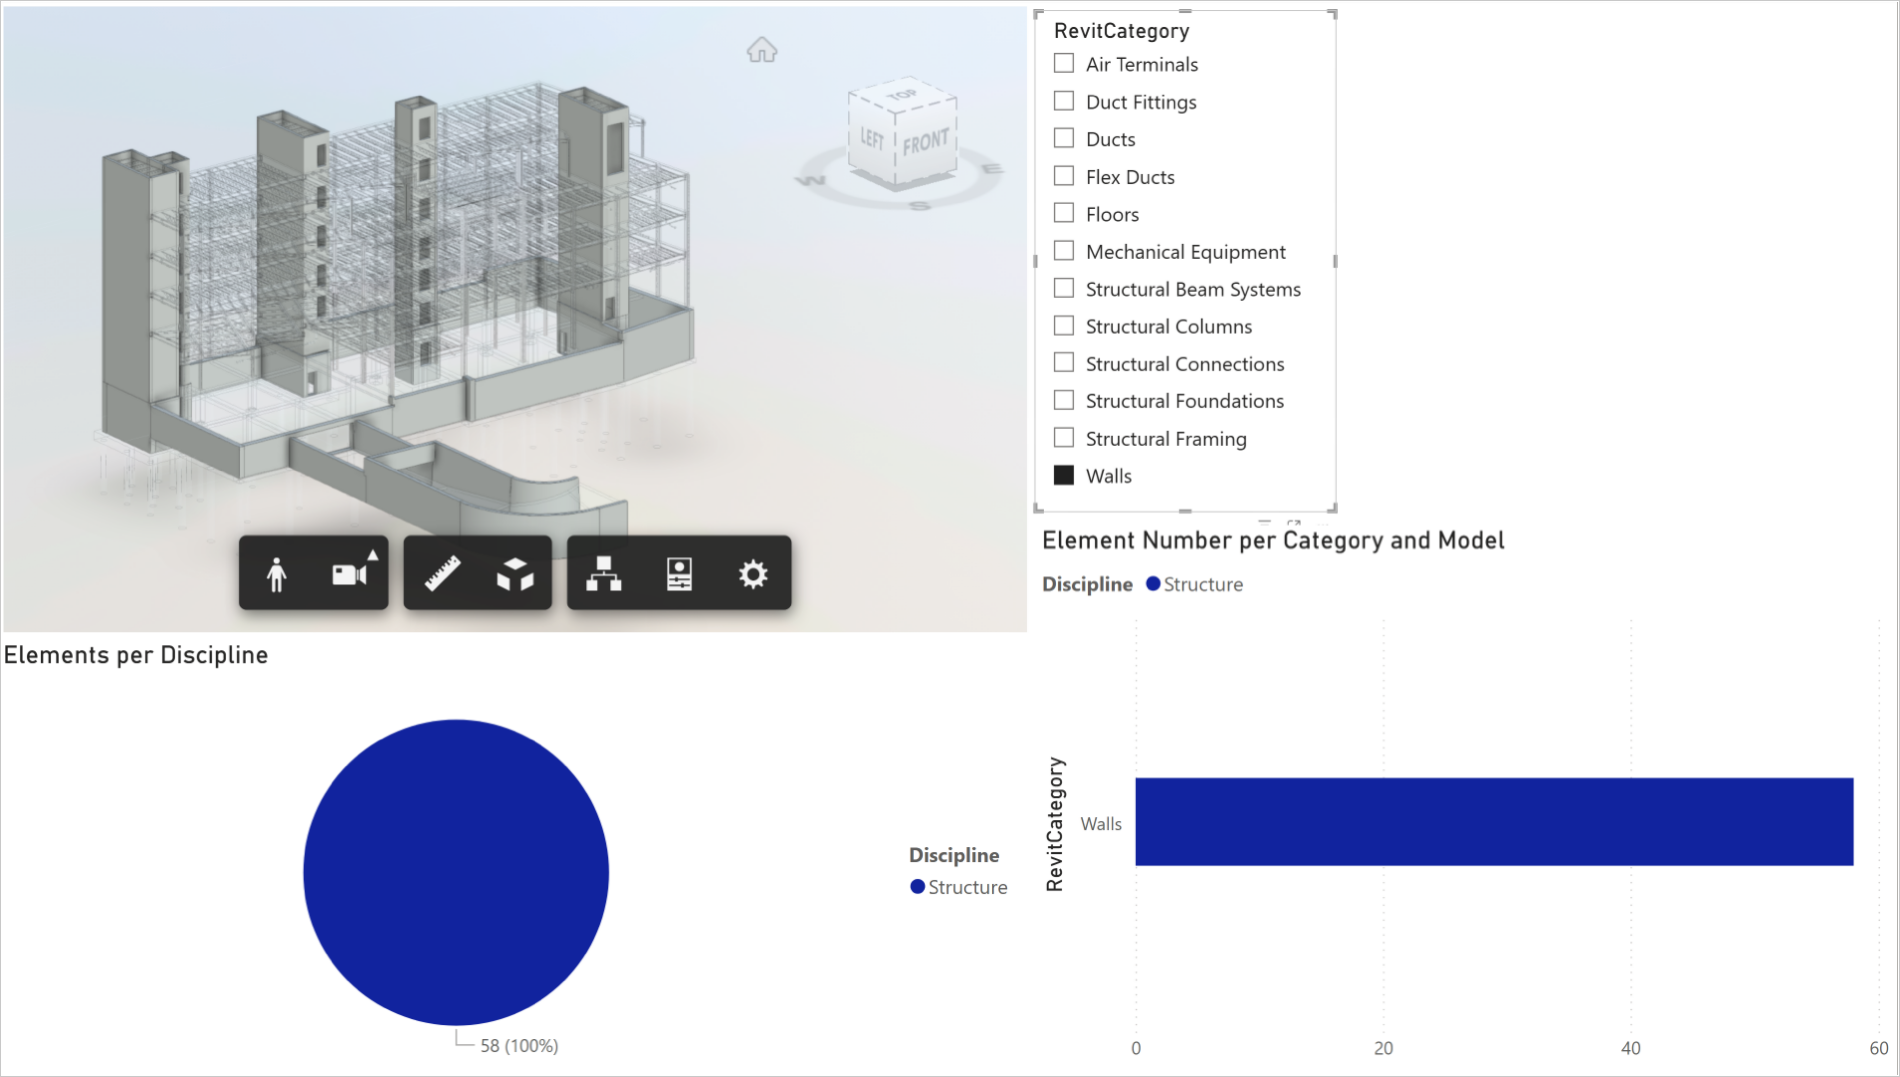
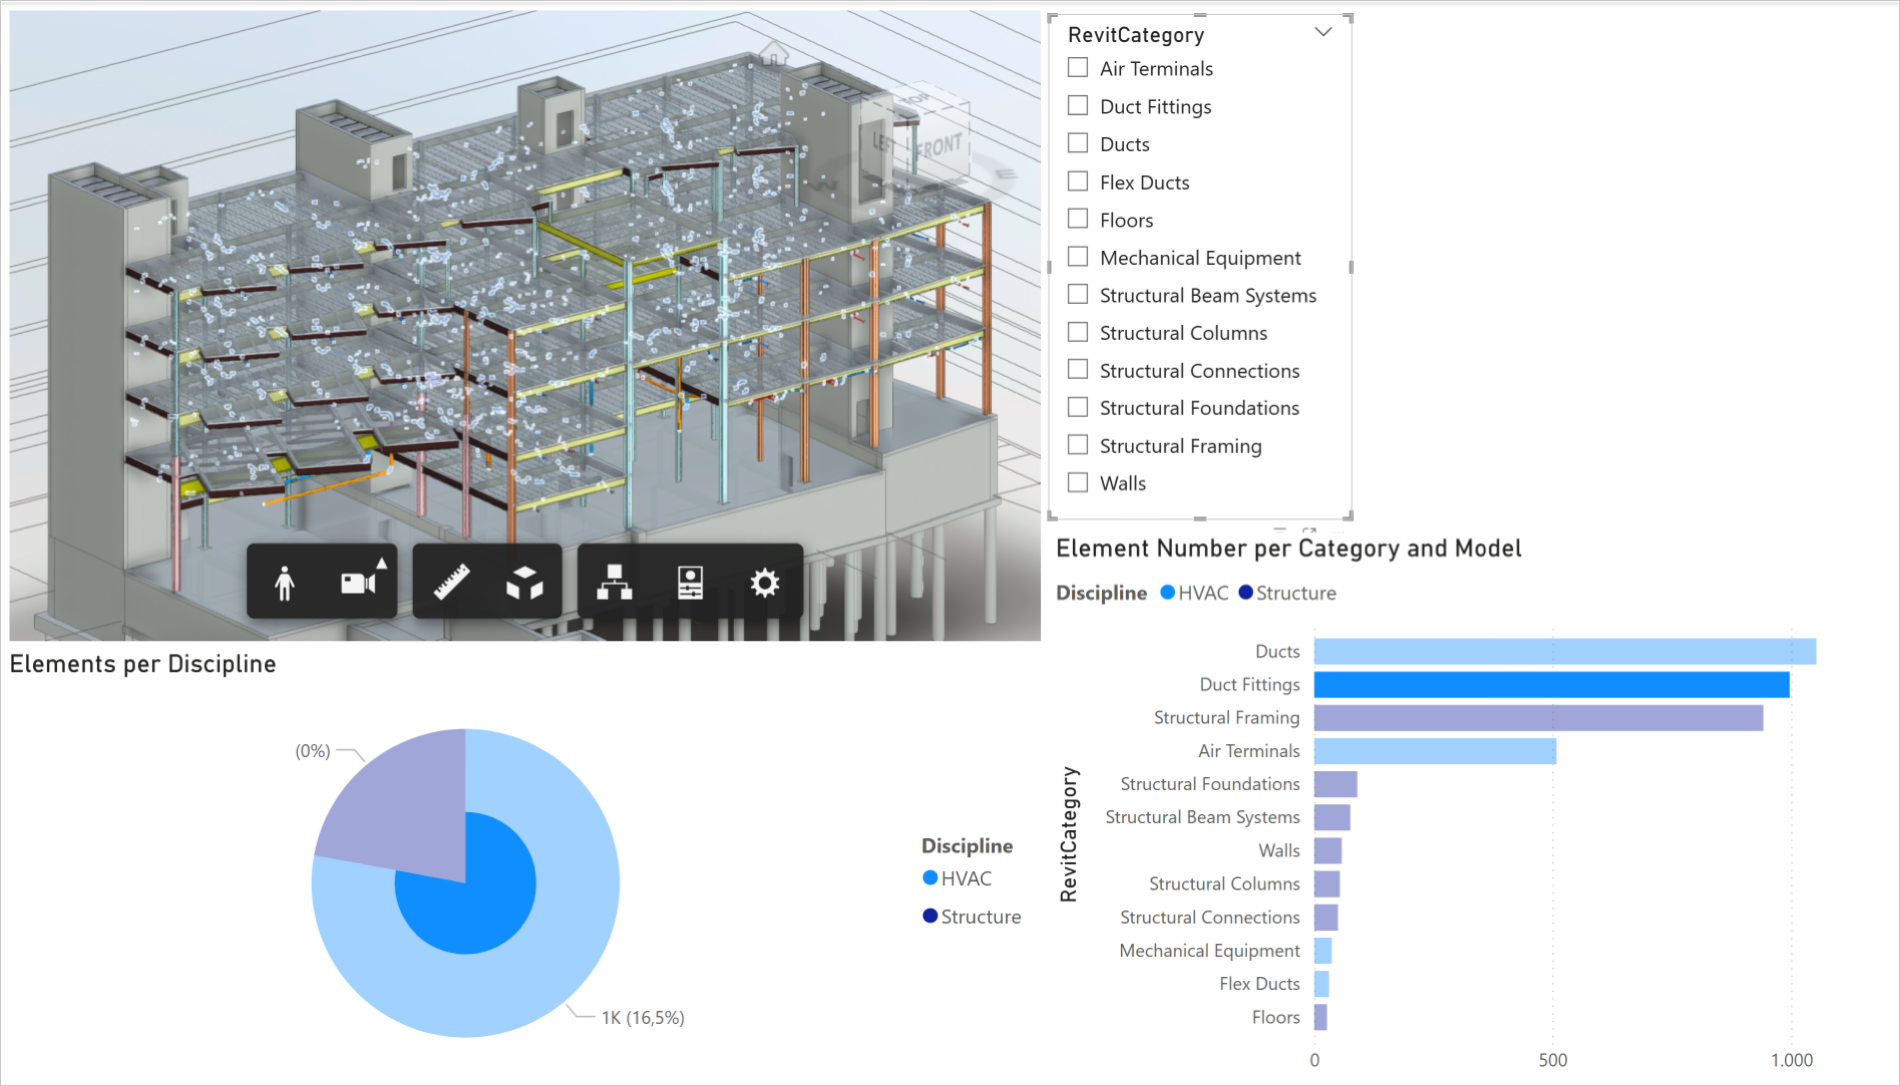
- To integrate the current and immediate previous versions, you need to establish a relationship between both the current and previous version tables of the selected DX that we have loaded into Power BI.
- You need to create a relationship between the Data Exchanges loaded in Power BI using the ExternalElementId column, following similar steps as described above.
