Load Data Exchanges
Use the Connector to efficiently load Data Exchanges into Power BI software. Once loaded, the data can be transformed, analyzed, and visualized to uncover valuable insights that drive informed decision-making. The Connector introduces a Data Filter function which is designed to streamline user experience. This feature empowers you to load only the specific data you need, saving valuable time. By leveraging server-side filtering, the manual process of filtering within the software is eliminated, further enhancing efficiency. The filter UI provides a high degree of flexibility, allowing you to refine your search based on categories, families, and data types. Additionally, you can select the precise properties required for the loaded elements, ensuring you receive the information you require for your analysis.
There are two methods to load the Data Exchange. Both methods are explained in the following sections.
Open the Power BI Desktop software.
Select Get data from the Power BI home page.

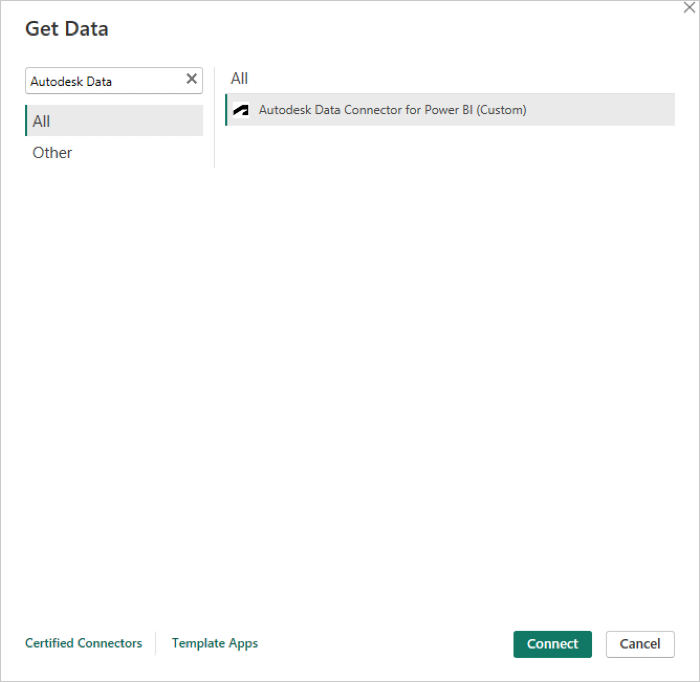
Search and select Autodesk Data Connector for Power BI and click Connect.
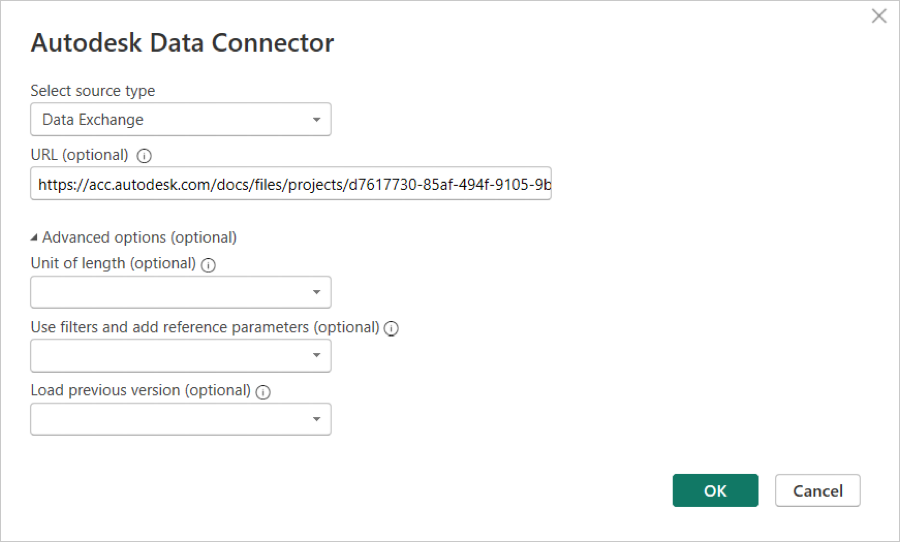
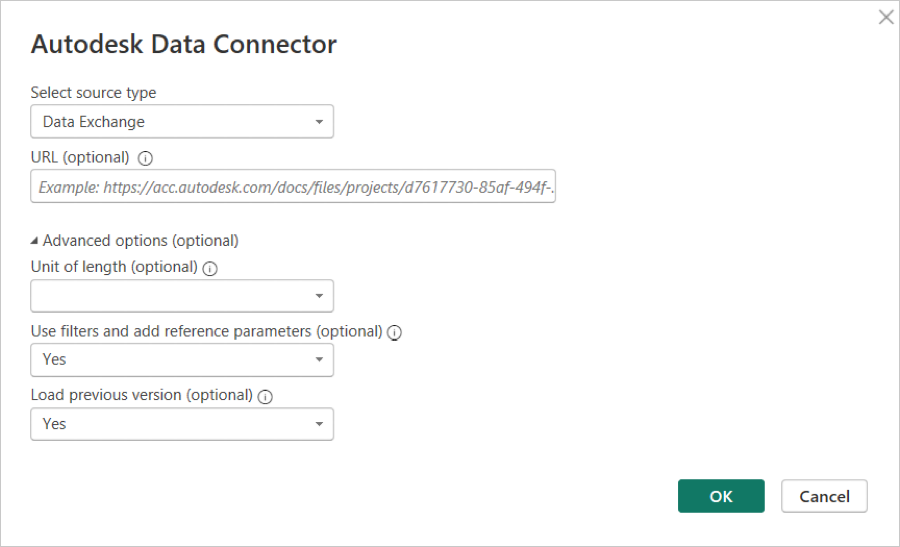
Select Data Exchange as a source type from the drop-down menu.
Select your preferred unit for Length, Area, and Volume from Advanced options and click OK. Note: Unit selection is optional. Meter will be used by default.
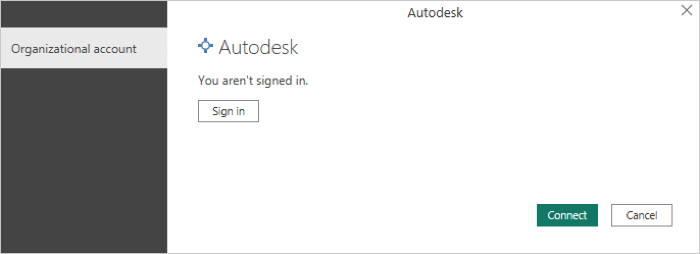
Click Sign in.
After successfully signing in, click Connect to load the navigation data.
Loading Data Exchange without Data Filter
Select Get data from the Power BI home page.
Search and select Autodesk Data Connector for Power BI and click Connect.
Select Data Exchange as a source type from the drop-down menu and click OK.
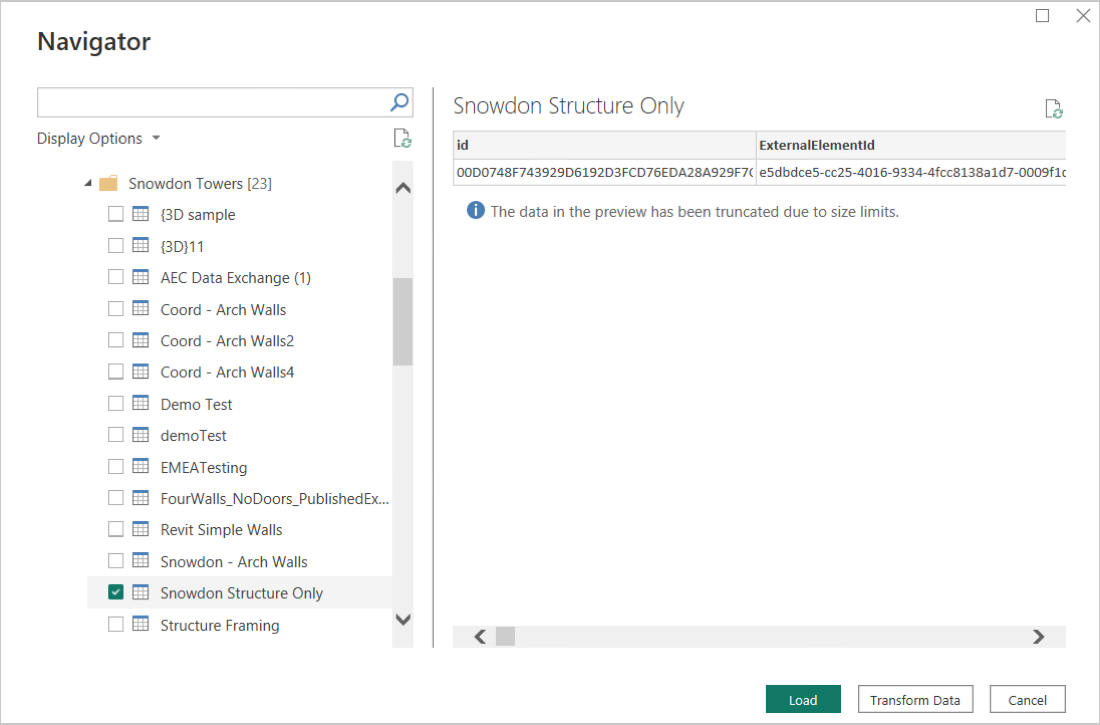
Navigate to desired model folder and expand it to view the file.
Check the box next to the desired Data Exchange to get a preview.
Click Load to load the Data Exchange in the Power BI.
Similarly, you can load the Data Exchange using the link. Put the Data Exchange link in the URL text box and click OK.
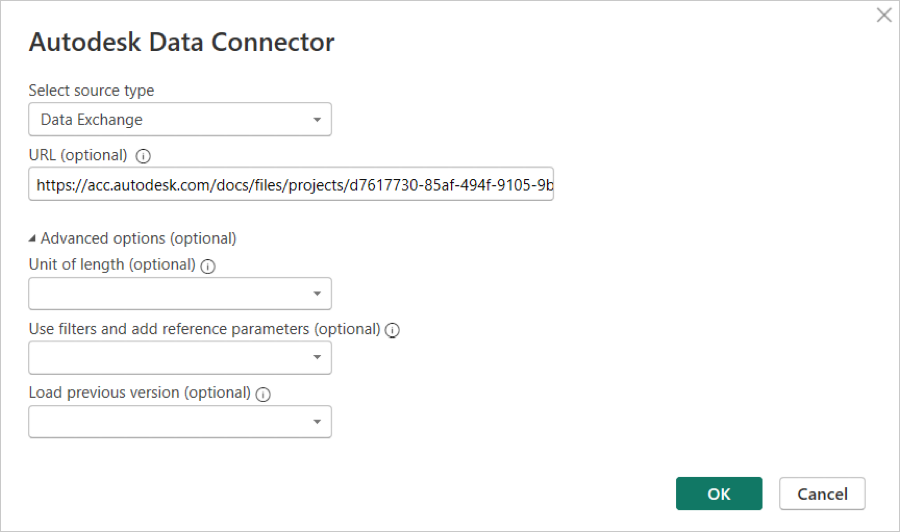
To load multiple Data Exchanges, provide the links separated by semicolon
;, and follow the procedure from step 2 to load the Data Exchange.You can load the changes between the current version and the immediate previous version of the exchange. 'Select Load previous version' as Yes.
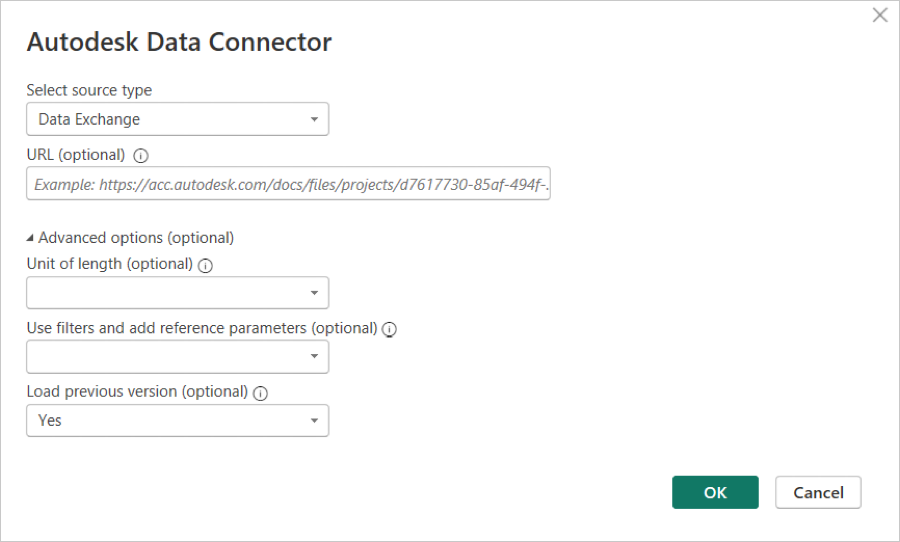
Navigate to desired Data Exchange.
Select the checkbox for the current version and the immediate previous version, if available, of the desired Data Exchange to view a preview.
Click Load to load both versions data set in the Power BI. Viewer column loads only with the current version data table.
Loading Data Exchange with Data Filter
Select Get data from the Power BI home page.
Search and select Autodesk Data Connector for Power BI and click Connect.
Select Data Exchange as a source type from the drop-down menu.
Select your preferred unit for Length, Area, and Volume from Advanced options.
Note: Unit selection is optional. Meter will be used by default.Select Yes for the Use filters and add reference parameters option and click OK.
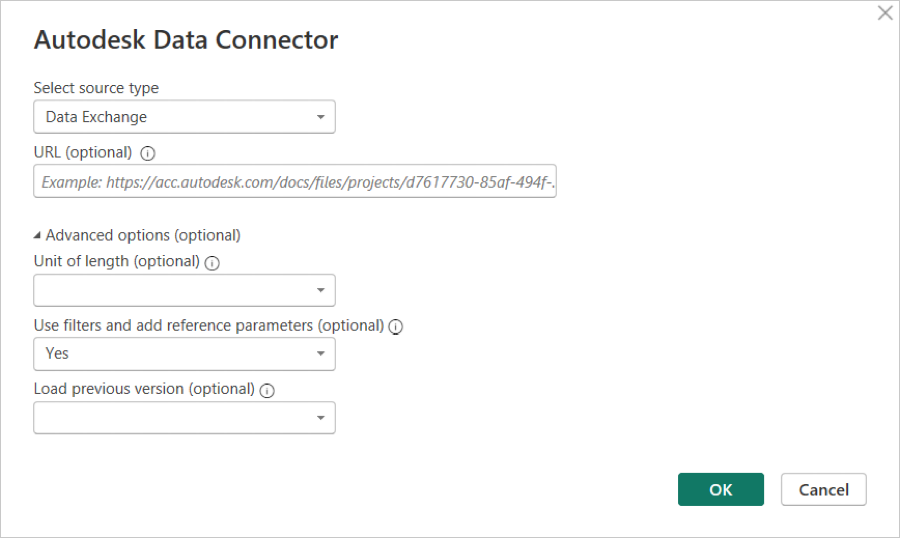
Navigate to desired model folder and expand it to view the file.
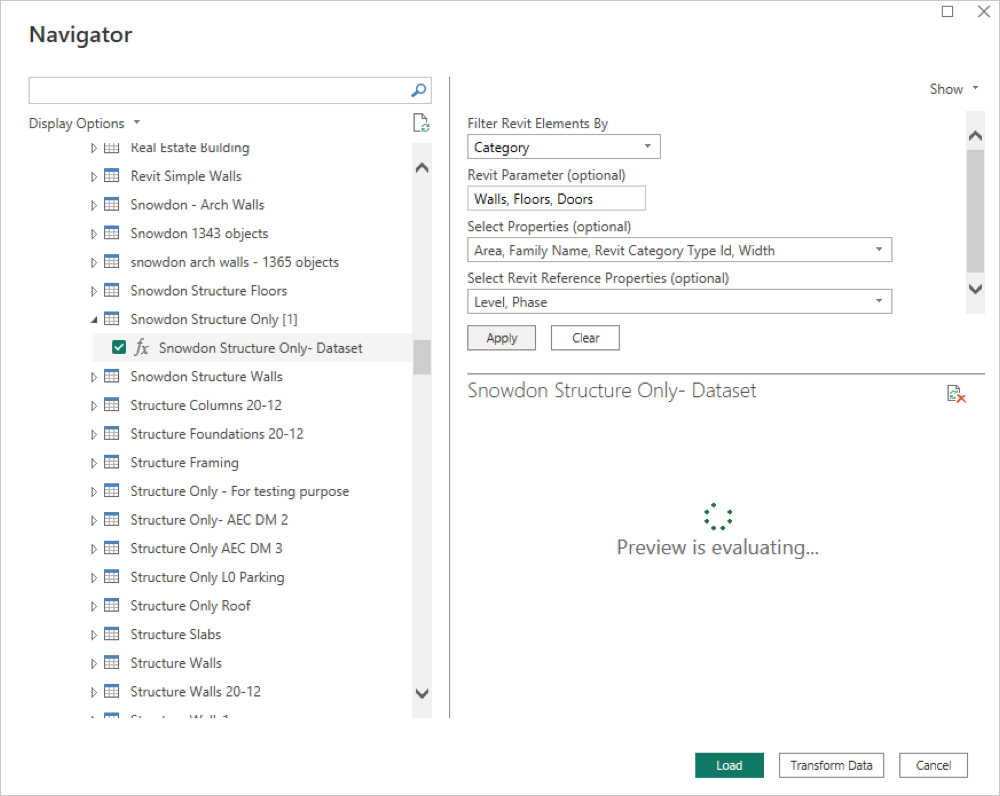
In the Navigator pane, check the file to enable the "Data Filter UI", which can be viewed on the right pane.
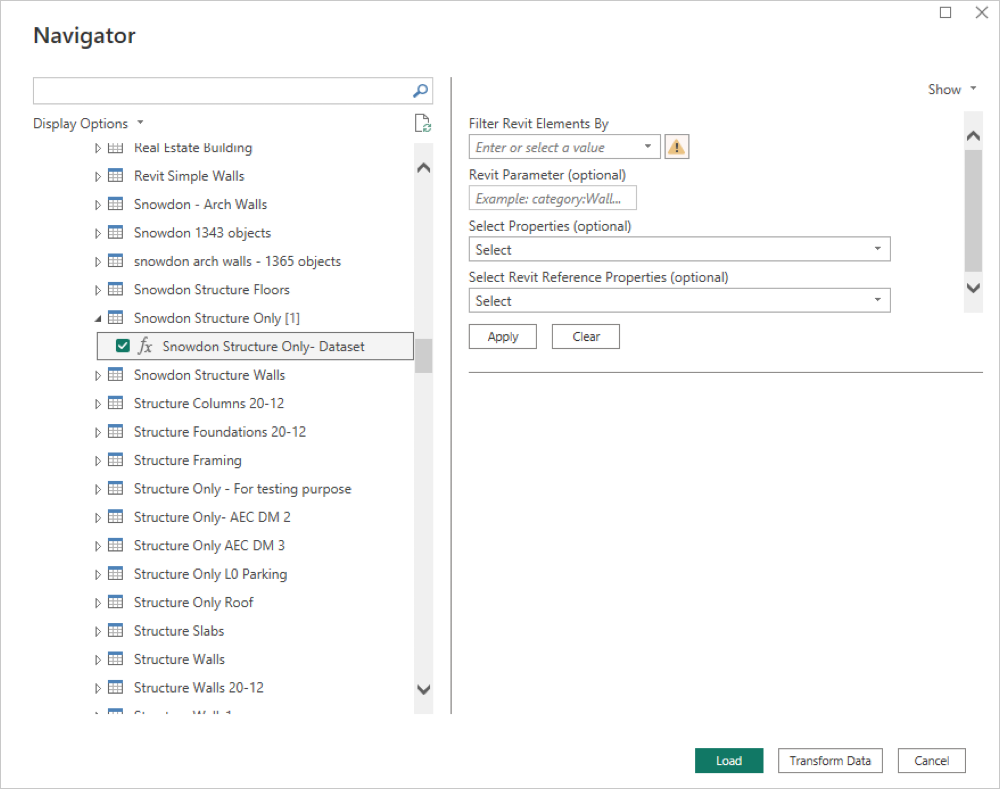
The "Filter Revit Elements By" field has four options, select the required filter from the following options:
- None: to see all elements without a filter.
- category: to see all elements within a specific category.
- family: to see all elements within a specific family.
- type: to see all elements of a specific type.
Note: If "None" is selected, the "Parameter" field can be left empty. For the other options, the "Parameter" field is mandatory.Enter the required Parameter values.
Note: Choose multiple parameters by separating them with commas. Enter specific values for each parameter you select.Select the desired properties from the Select Properties dropdown menu. You can select multiple properties as needed.
Note:- The properties you select will fetch relevant data for both the Instance Element and its Type References. For instance, if you select "Area," the system will retrieve the "Area" property for both instances and Type references. If the Type reference does not have an "Area" property, no column will be created for it in the output.
- Use this option to select of multiple element properties.
- While adding properties using the search function, click the X icon to clear your search before selecting another property; otherwise clicking Apply with an active search will only select the last chosen property.
Choose the desired element properties from the Select Revit Reference Properties dropdown menu.
Notes:
- Use this option when you want to select multiple reference element properties.
- "Select Properties" and "Select Revit Reference Properties" both fields are optional.
- IFC-based data exchanges do not support advanced properties, resulting in an empty drop-down menu.
- Retrieving Revit Reference properties may result in increased latency.
After selecting the fields, click Apply, then Load to initiate the data loading process. You can ignore the preview.
You can click Clear to reset your choices.
 Note: The loading process may take a few minutes, depending on the size of the selected model. You may see a pop-up message stating "Processing Queries." This process indicates that the Power BI is transforming and shaping your data according to the defined queries.
Click Skip to ignore it, as it will disappear automatically after 60 seconds approximately.
Once processing is complete, click Transform Data to view the table.
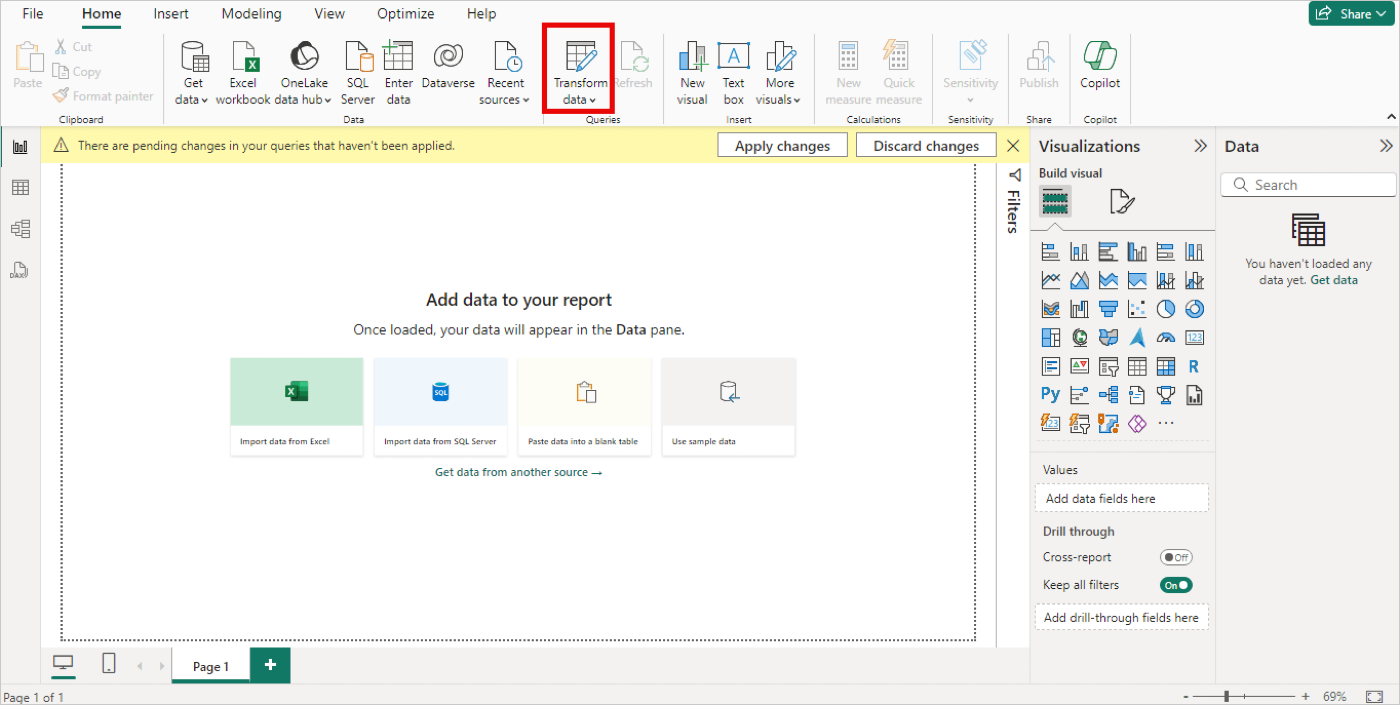
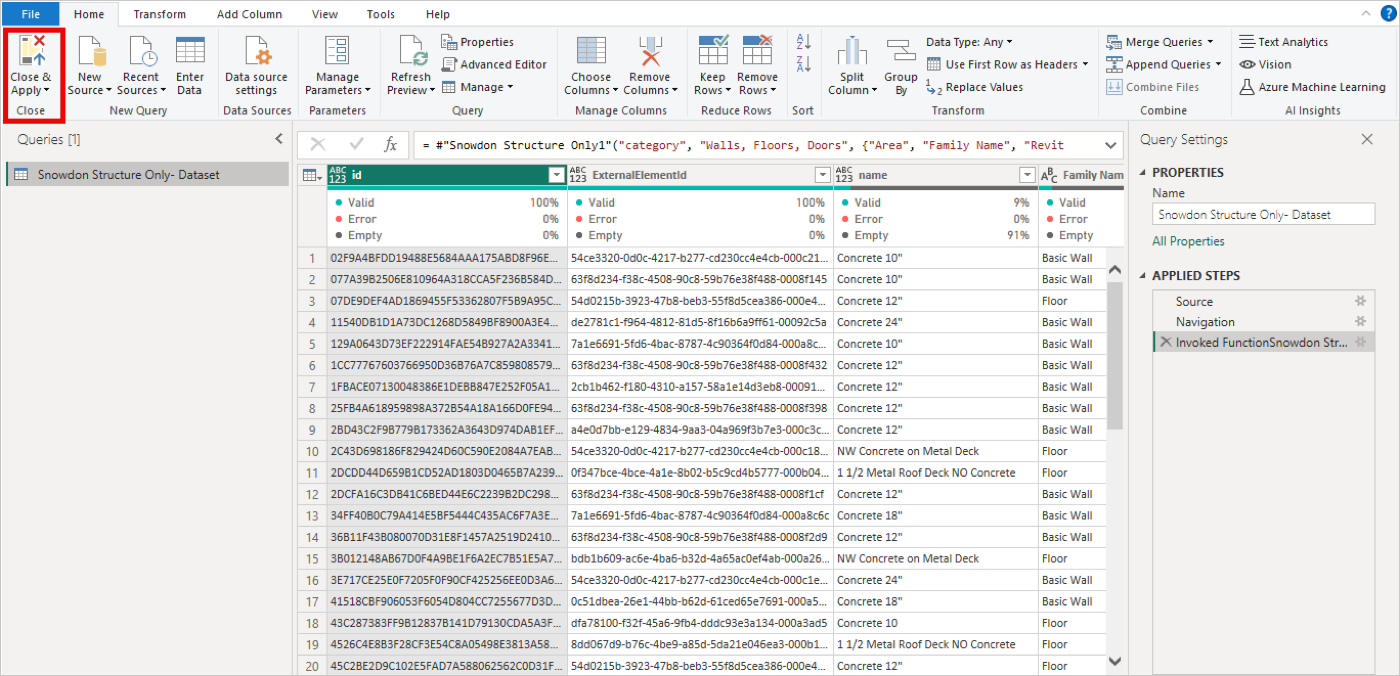
After the table loads, click Close and Apply to load the table in the Data pane. You will see a Load pop-up.
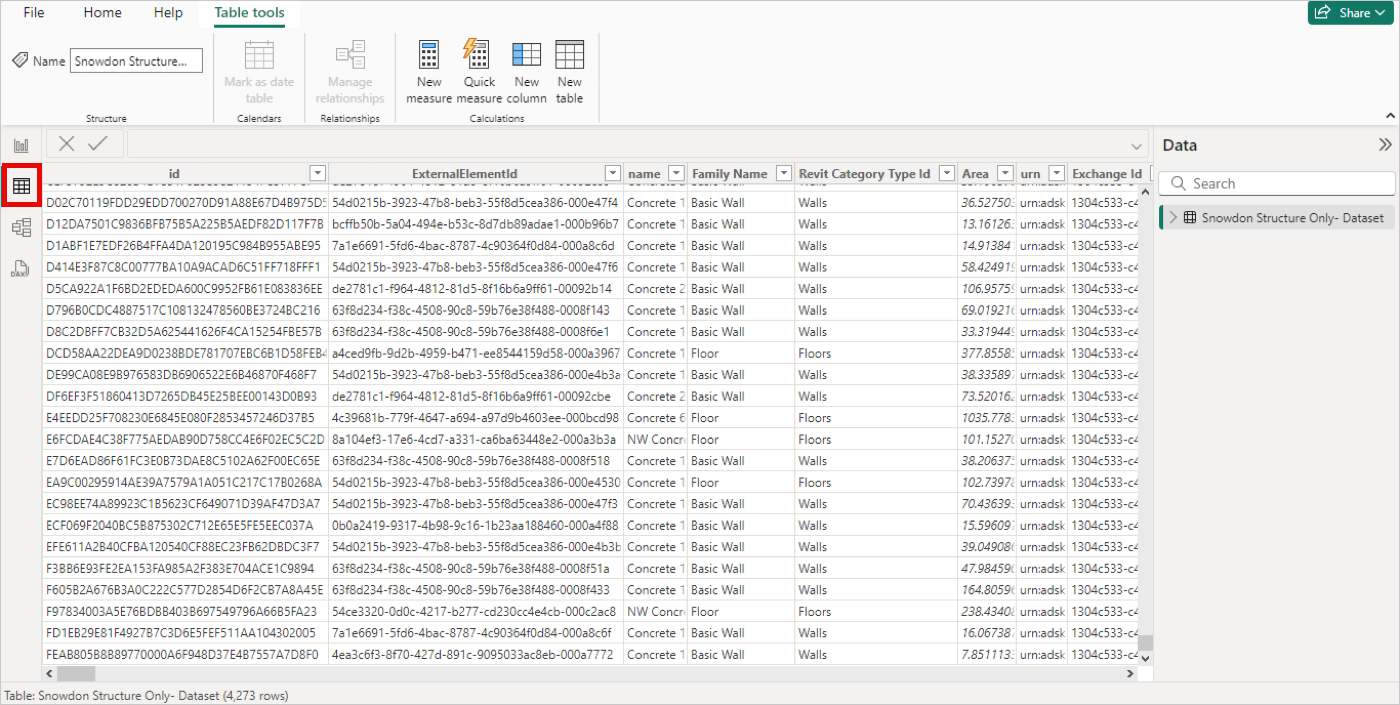
Once processing is complete, click the table icon to view the table.
Similarly, you can load the Data Exchange using the link. Put the Data Exchange link in the URL text box and click OK.
To load multiple Data Exchanges, provide the links separated by semicolon
;, and follow the procedure from step 4 to load the Data Exchange.You can load the changes between the current version and the immediate previous version of the exchange. 'Select Load previous version' as Yes.
Follow the same steps from step 4 to load the dataset for Visualization.
Notes:
- The Viewer column displays data only for the current version table.
- Make sure to select the same parameter values in both the current and immediate previous version Data Exchange filter options.
