A network contains all the information needed to describe the water supply system: the reservoirs, pipes, nodes, valves, pumping stations etc. You can now import some existing data to create your first network. This topic shows you how to import a network of existing data from two sources: GIS files and CSV files. Finally this topic introduces the GeoPlan, a geographical representation of the network, usually displayed over the top of a map.
If you are licensed to use more than one map control, you may want to change the current map control. Please refer to Selecting the map control in the main Help for more details.
The procedure for importing data is as follows:
- Select Options from the Tools menu and click the Metric (Native) button on the Units tab to ensure that user units are set to metric units. Click OK to close the Options dialog.
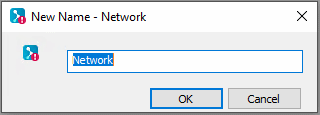
- Right-click the Newtown icon in the Model Group window and select Import | Network using Open Data Import Centre from the context menu. The New Name - Network dialog is displayed.
- Enter a network name, such as 'Newtown Network', and click
OK.
The Open Data Import Centre dialog is displayed. This dialog will be used to import data from GIS files. You can also use the dialog to import data from a variety of other sources.
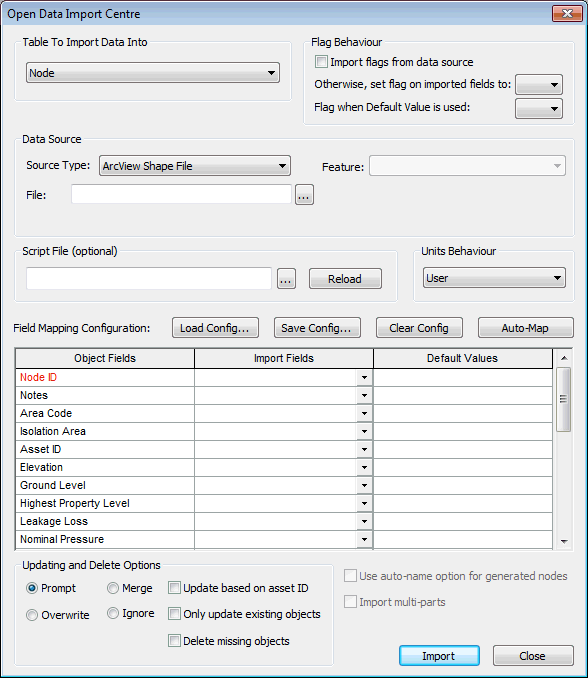
- Check that the
Table is set to 'Node' and the
Source Type is either 'MapInfo TAB File', 'Raw Shape File', 'ArcView Shape File' or 'Geodatabase layer', depending on your GIS.
Note: You can also import some data using the CSV format by selecting CSV in the Source Type drop-down list. Once you have imported the example network from GIS data, as per this topic, please refer to the Importing Data from CSV Files / Updating Network with CSV files topic for an example of network update using CSV files.
IMPORTANT: If you are going to import data in MapInfo Tab File (.tab) format, you must first set the coordinate system.
- Click the
 button in the
Data Source section. From the Example Data Directory, select Tutorial Files/Import Files/GIS Data.
button in the
Data Source section. From the Example Data Directory, select Tutorial Files/Import Files/GIS Data.
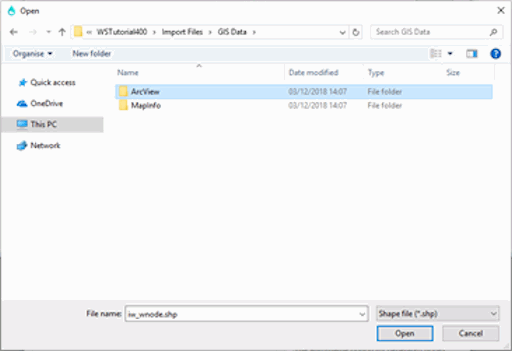
- Open the MapInfo directory, click the iw_wnode file and click Open. This file contains data that defines the nodes in your network.
- Click
Auto-Map.
This button searches the import file for fields that match those that define the nodes in the network.
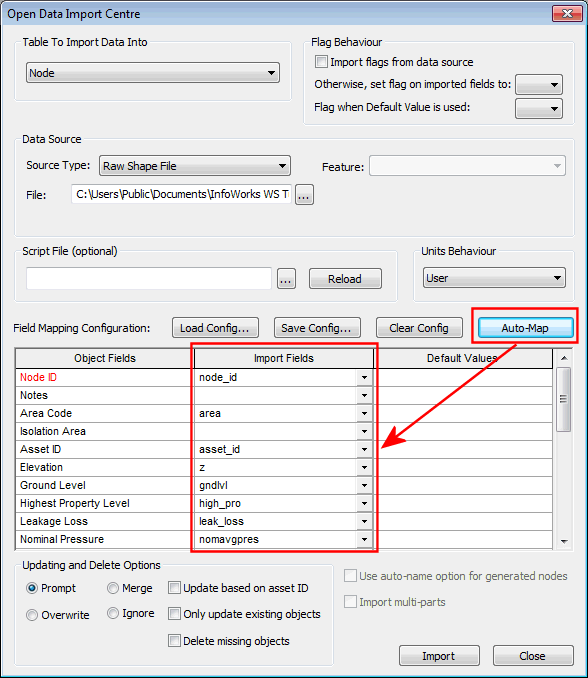
- Click Import. The GIS data is imported.
- When the data has finished importing, click
OK.
- Using the Open Data Import Centre again, import the pipe data:
- Change the Table To Import Data Into to 'Pipe'.
- Change the Data Source to iw_wpipe.
- Click Auto-Map.
- Click
Import.
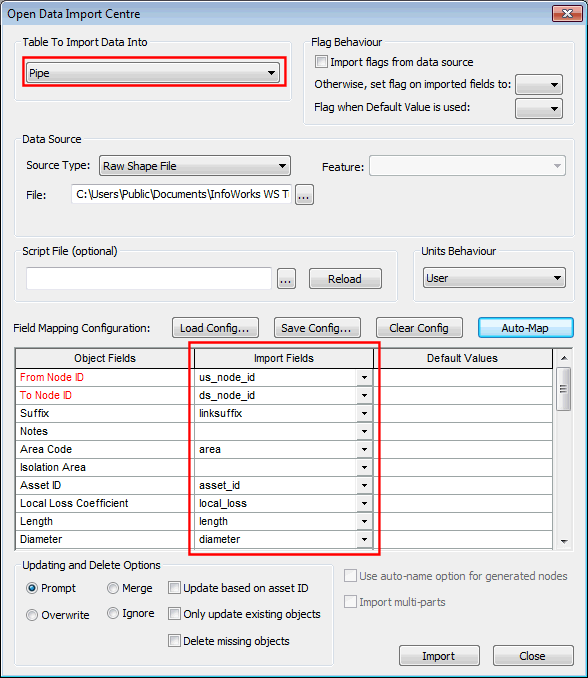
- Click Import.
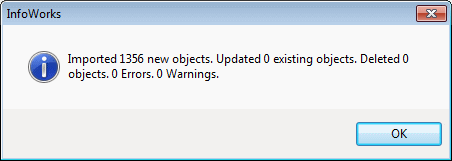
- When the data has finished importing, click OK on the displayed information message.
- Import the other GIS files:
- Repeat the steps above for each of the following
Table types and files:
Customer Point iw_waddr Fixed Head iw_wfixh Float Valve / Inlet iw_wfltv Hydrant iw_whyd Meter iw_wmetr Non Return Valve iw_wnrv Pump Station iw_wpst Reservoir iw_wres Transfer Node iw_wtran Valve iw_wvalv - When all files have been imported, click
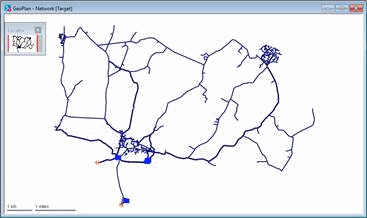
Close. The network is displayed in the GeoPlan window. The network object describes the physical aspects of the system.
Show image
- Repeat the steps above for each of the following
Table types and files:
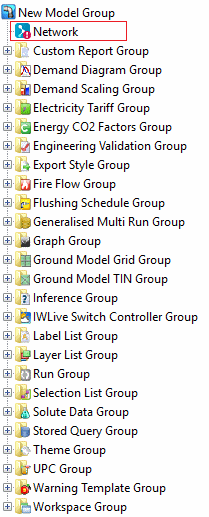
- The new network has been included in the Newtown model group. Drag the edge of the Model Group window to make the window wider if necessary.
- Update the network with the data in the CSV files:
- Right-click the Newtown Network icon (outlined in red) and select
Update | From CSV from the popup menu. The Import/Update From CSV Data dialog is displayed. Check that the Block Headers entry is 'IDs'. All data in the database has a data
flag, which indicates the source or reliability of the data.By default, the Import dialog sets the flag to #V for all imported data. This will allow you to distinguish the CSV data from the existing data.
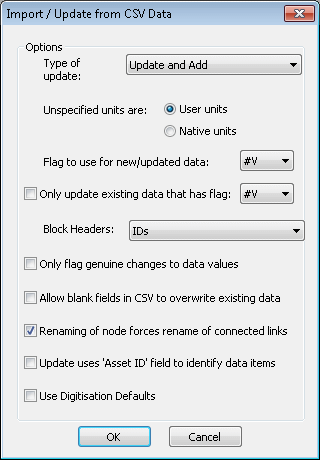
- Click OK.
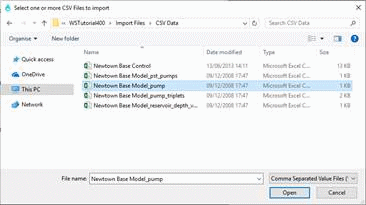
- From the Example Data Directory, select Tutorial Files/Import Files/CSV Data/Newtown Base Model_pump.csv and click
Open.
After the data has been imported, the import directory is redisplayed.
- Select each of the other three Newtown Base Model files in turn (but do not import Newtown Base Control.csv).
- When the last file has been imported, click
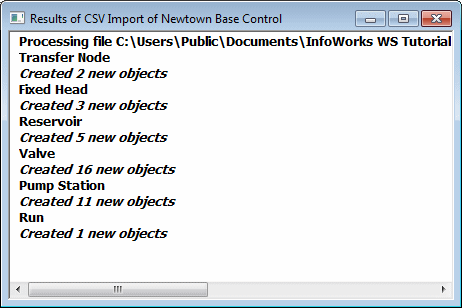
Cancel. A text report is displayed, showing the results of the update.

- Close the window.
- Right-click the Newtown Network icon (outlined in red) and select
Update | From CSV from the popup menu. The Import/Update From CSV Data dialog is displayed. Check that the Block Headers entry is 'IDs'. All data in the database has a data
flag, which indicates the source or reliability of the data.By default, the Import dialog sets the flag to #V for all imported data. This will allow you to distinguish the CSV data from the existing data.
- Import the control data for the network. The control data describes the initial state of the network and the way in which it will be controlled during a simulation.
- Right-click the Newtown Model Group icon at the top of the Model Group window and select Import | Control from CSV files.
- Click OK.
- From the Example Data Directory, select Tutorial Files/Import Files/CSV Data/Newtown Base Control.csv and click Open.
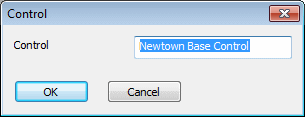
- Click Cancel to close the dialog. In the Control dialog, the control name is shown as 'Newtown Base Control'.
- Click
OK to accept this name. An icon for the control is added to the Newtown model group.
A text report is displayed.
- Close the text window.
- Set the coordinate system to
British National Grid [EPSG 27700].
- To set the coordinate system, first use Tools | Options to set MapXtreme as the map control on the GeoPlan page of the Options dialog, then, having closed the dialog, select Set coordinate system from the GeoPlan menu to choose British National Grid [EPSG 27700] as the projection.
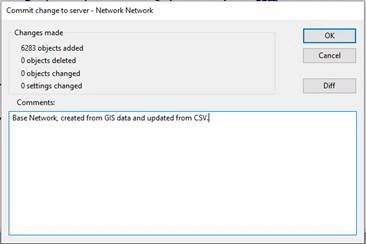
- Commit the new network to the database: This process saves the data as your base network.
- Right-click the Network icon (with the red exclamation mark) and select Commit changes to database.
- You are asked if you want to validate the network. Click No.
- You are shown a summary of the changes and can leave a suitable comment. Type a suitable comment and click
OK.
- Close the GeoPlan view by clicking the
 button in the top right corner of the window.
CSV files format can be used to import data onto a network, either to build a network from scratch or to update it. The Importing data from CSV files / Updating a network with CSV files topic shows you how to update the 'Newtown Network' network.
You can now begin to explore the imported network and investigate the facilities that are available in the GeoPlan view.
 Back to flowchart