
Generate a series of part clones with individual text labels and names in the project tree with data loaded from a CSV file
Jump to:
Creating the CSV file
For this tutorial, an example CSV is created manually. In practice, this could come from a directory listing or any other plaintext source. Over the course of this tutorial, this CSV file is used on two occasions: creating the part duplicates and setting up the support parametrization table.
Use a text editor of your choice and create a new plain text file with the following content.
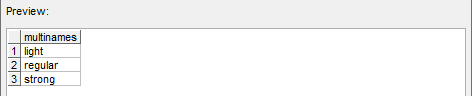
multinames
light
regular
strong
Save the file (ideally with the .csv suffix) and place it in a location where it can be accessed in later steps.
TopSpawn a part on the platform
For this tutorial, a part from Netfabb's part library is used as a stand-in for any actual parts with which to create a series of support variations in practice.
Adding the example part
- Launch Netfabb.
- From the main menu use .
- From the Design category select Bottle opener, click Part configuration and accept the default values with Generate part.
Orienting and arranging
- From the main menu use . Lift the part by 50 mm.
- In the context view switch from the Move to the Rotate tab. Rotate the part by +45° around the Y axis.
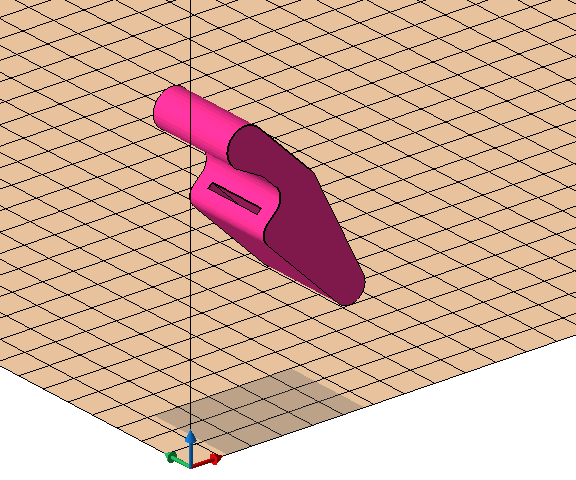
The bottle opener model on the platform after rotating and arranging
Create part duplicates
This step uses the CSV file created earlier.
- Select the part.
- From the main menu use .
- In the context view of list labeling click
 Load CSV file.
- In the
CSV import dialog click the
 button and open your CSV file containing the part names.
- In the Options section enable the checkbox First row contains headers.
- Double-check the import result in the
Preview section and click
OK.
Header text and part names after correct CSV import
- Select any entry in the generated list.
Tip: Select the longest entry to find the right text size even for differing lengths without truncation or overruns.
- Click on the surface of the part and adjust the placement helper.
Tip: Not strictly necessary but practical: Adjust the Depth to 1.00 mm from the default of 5.00 mm.
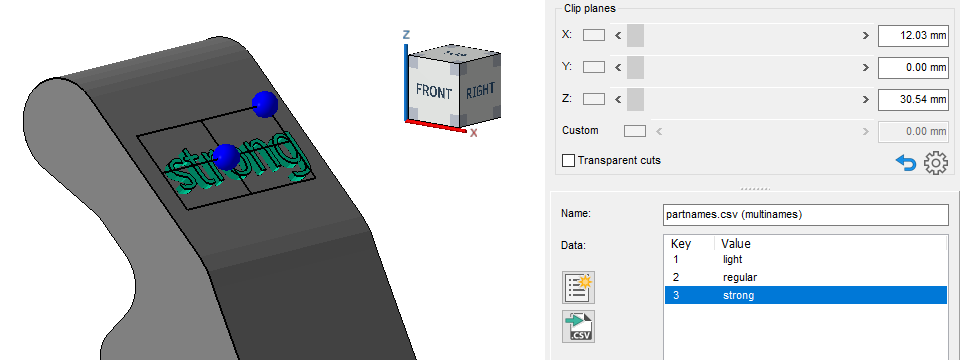
Text placed on the top side
- Click Apply to start the mesh generation and placement of the part copies.
- Confirm deletion of the original part. For this tutorial it is no longer needed.
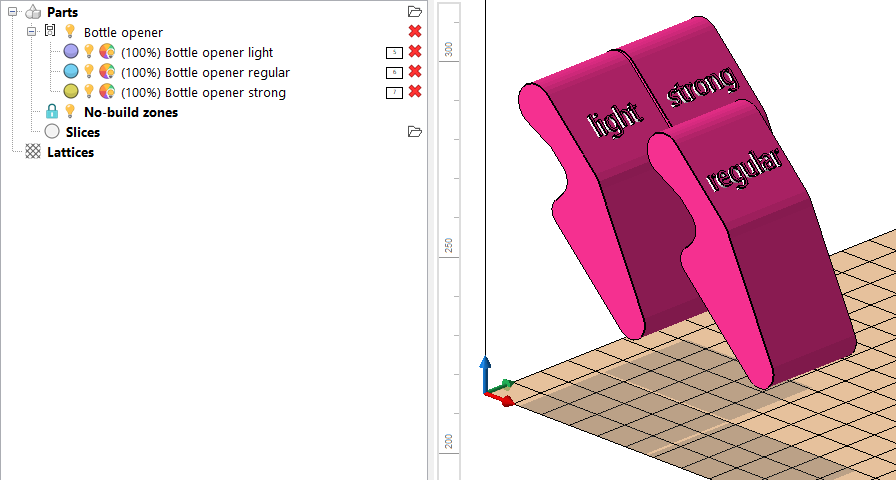
Part clones named and labeled in project tree and in the buildroom