
Transfer Grillage Results to Design Beam
(If not continuing from last section, open "EU Example 10_1 Load_Analysis.sst" via Help | Tutorials | Open Tutorial Model... from the main menu.)
The analysis results can now be directly transferred to the pre-stress concrete beam design load effects tables, and design checks carried out in the project.
In the main menu select Calculate | Transfer Results to open the Transfer Results form.
With the Transfer Type set to "Beam", in the graphics window click on the inner beam just north of the centre of the deck in span 1. It will be highlighted in red. It is now required to match envelopes/compilations produced during the analysis with design load cases in the Design Beam.
Starting with SDL cases, add two lines of data using the + button at the bottom of the table.
In the Design | Load Case column select “Surfacing 1” in both rows.
In the Type column select “Compilation” in both rows and in the Structural Analysis | Load Case column, select "SDL ULS" in the first row and “SDL SLS” in the second. The Factors will be automatically set to 1 in the appropriate column.
Change Transfer Set Name: to “SDL Inner Beam Span 1”.
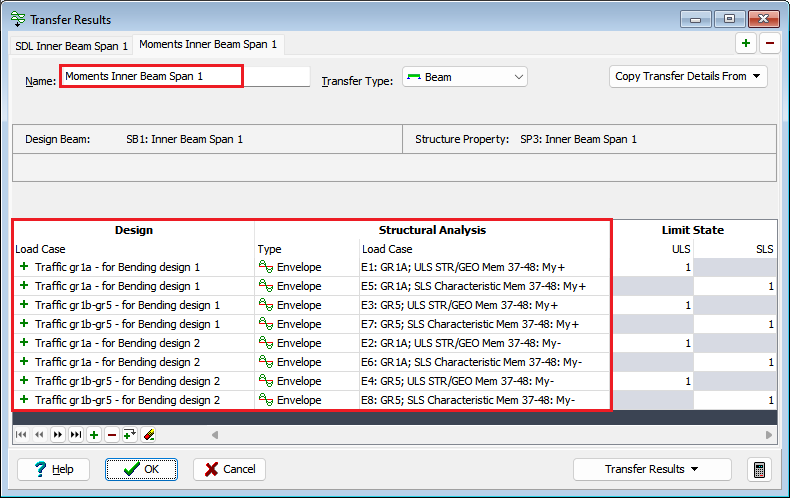
Create an additional transfer set by using the + button at the top right of the form, select the same beam in the graphics and change the Name: to “Moments Inner Beam Span 1”.
Add eight lines of data using the + button in the bottom of the table, as there will be four sagging cases and four hogging cases, and select entries in each field as shown below:
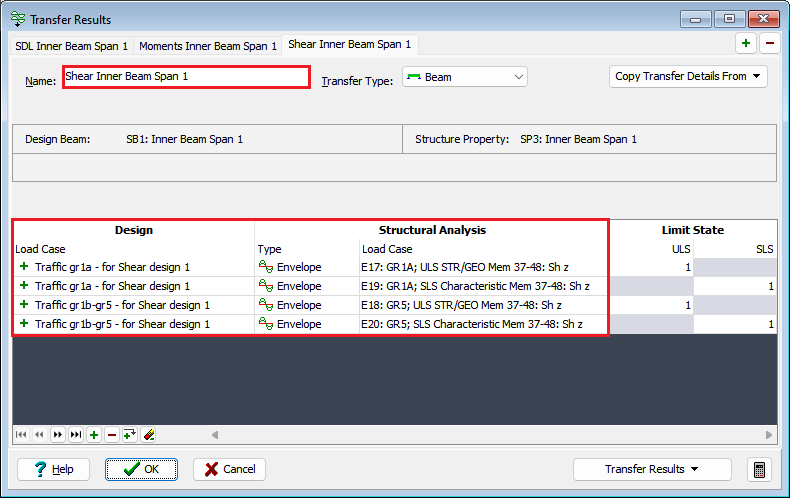
Create an additional transfer set for same beam and change the Name: to “Shear Inner Beam Span 1”.
Add four lines of data using the + button at the bottom of the table as there will be four shear envelopes and select entries in each field as shown below:
Click on the Transfer Results button and select “Transfer All Sets” to transfer the results to the beam design tables.
Close the Transfer Report and use ✓ OK to close the Transfer Results form.
In the Design Beams navigation window it can be observed that all of the Beam Loads tables are now available for inspection and subsequent code checking.
It should be noted that each of the gr1a traffic loading cases has been split into three components, one for the UDL, another for the Tandem system (TS) and the third the footway load. The reason for this is that each component may have different psi factors when combining it with other variable actions when looking at different design checks.
To display the load effects that have just been transferred, in tabular and graphical form, just click on the load table in the navigation window and it will be displayed.

Beam Analysis/Design
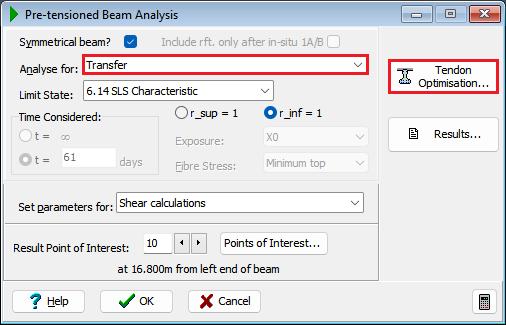
In the Design Beams navigation window toolbar click on the analyse icon to open the Pre-tensioned Beam Analysis form and then set the Analyse for: field to “Transfer”.
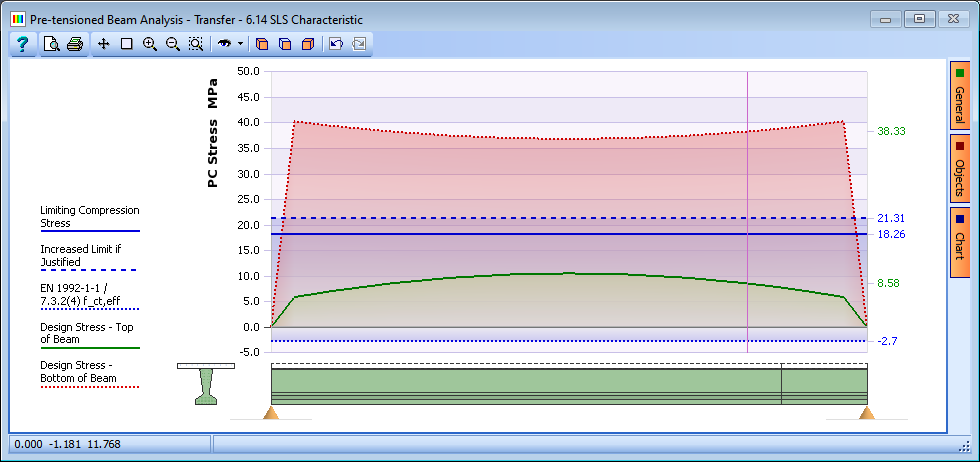
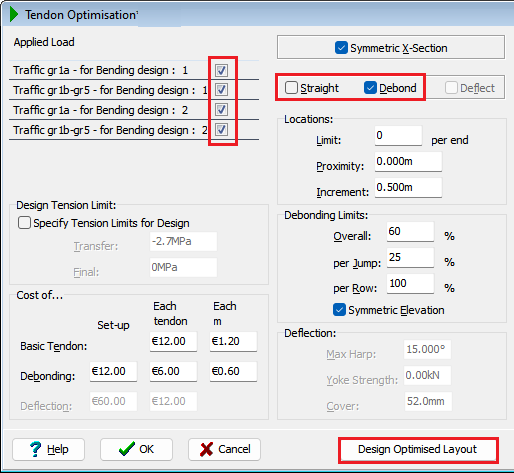
This shows that the design stresses in the bottom of the beam far exceed the limiting compressive stress for this age of concrete. There are a number of design changes that can be utilised to correct this (removing tendons, debonding tendons, changing material properties, etc) but in this example the tendon optimisation can be used to see if there is a good solution by just removing and debonding some tendons.
Click on the Tendon Optimisation button on the analysis form and then dismiss the information message displayed.
Tick the four Applied Load boxes and the Debond option but un-tick the Straight box.
All other default data is acceptable so click on the Design Optimised Layout button.
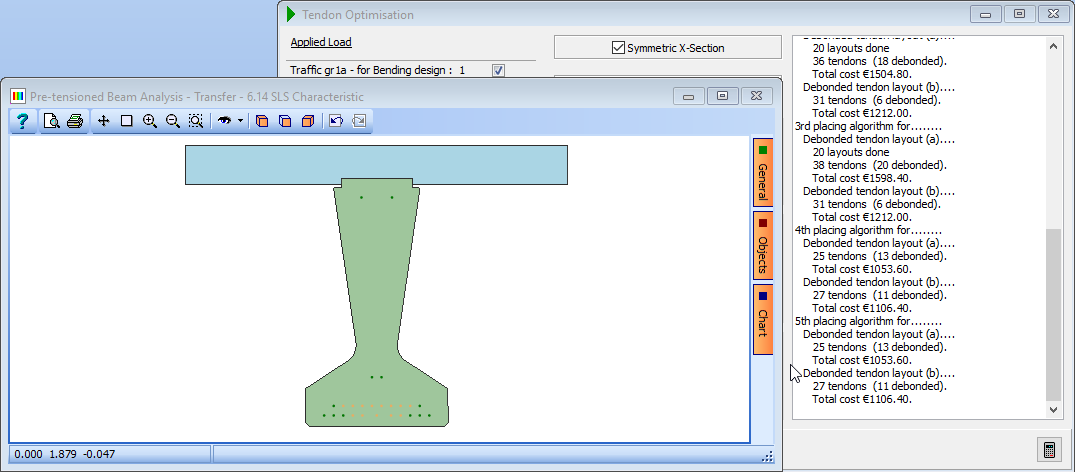
It may take a few minutes to complete the optimisation and a few warning messages may be displayed (which can be accepted).
Close the Tendon Optimisation form with ✓ OK and the affect of the optimised tendon layout is immediately obvious showing that the stresses are now acceptable.
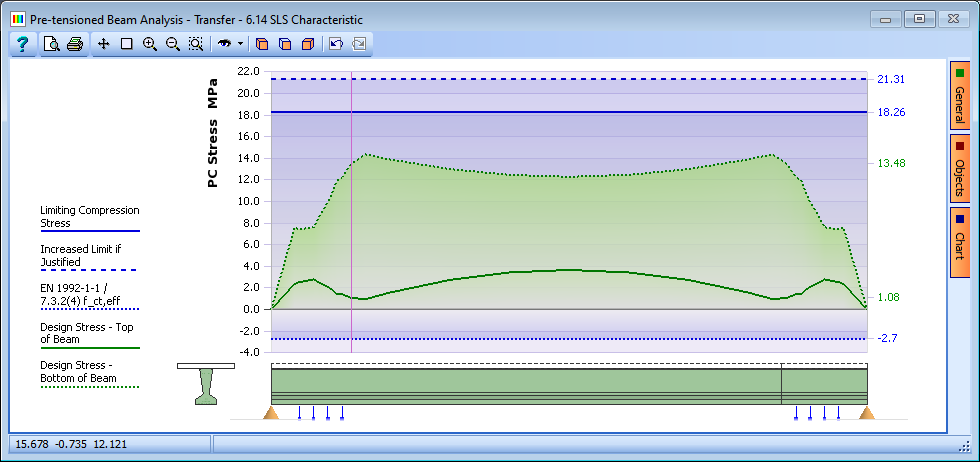
All other design checks can then be carried out to ensure compliance with stress limits etc. by changing the various parameters on the Analysis form.
For instructions on how to carry out these various checks on the design beam, in accordance with Eurocodes, see Example 5.2 Beam Design | Prestressed Beam Design.
Once all the checks (and changes if necessary) have been made, close the Pre-tensioned Beam Analysis form with ✓ OK.
Save the file as “My EU Example 10_1 Complete.sst”.
For Construction on Centring, also refer to Specialist Analysis Example 9.7 Time Dependent Creep Effects in Prestressed Beams.