
Navigating in VRED
Interaction > Navigation
For additional information on navigation, see the following:
- Navigator Preferences
- Autodesk VRED App
Also, check out these videos:
VRED offers various ways to navigate the 3D world in the Interaction > Navigation menu.
- Enabled - Enables and disables mouse navigation.
- Trackball - Enables navigation around all axes. Use this mode when working with a 3-axis trackball mouse.
- TwoAxis - Enables navigation around two axes. This is the standard mode when using a mouse.
- Fly - LMB-click to go forward and RMB-click to go backward. Steer moving the mouse horizontally or vertically.
- Orientation - Sets the position of the virtual camera. Use this to simulate the dirver's point of view inside the vehicle.
- Orbit Mode - Enables orbit navigation mode.
- Auto Center - Rotates navigation around the center of your image. Use double-LMB or double-RMB-click to choose the point to rotate around.
- Animate Camera Change - Animates changes in view; for example, after double-RMB-clicking in the render view to set the rotation pivot.
- Motion Factor - Sets the sensitivity to motion.
To set a default navigation mode, see the Navigator Preferences.
Using the View Cube
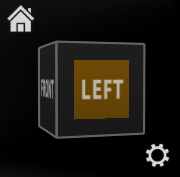
The View Cube only affects the selected object. Click the cube, its edges, or corners to switch to the corresponding position.
Click the Home button to switch back to the ICV.
Changing View Cube Behavior
Show, hide, and change the position, size, and opacity of the View Cube with the preferences found in the General Settings > Interface > View Control section of the preferences.
Select Edit > Preferences > General Settings > Interface.
In the View Control section, select any of these options:
- Show View Cube - Displays the View Cube when enabled. To hide it, disable this option.
- View Cube Position - Sets the location of the View Cube and Navigation Bar. Choose from Top Right, Top Left, Bottom Right, or Bottom Left.
- View Cube Size - Sets the size of the View Cube. Choose from Tiny, Small, Normal, the default, or Large.
- Opacity - Sets how pronounced the View Cube is when your cursor is away from it. At 1.00, the View Cube is always at full opacity, regardless of your cursor's location. At 0, the View Cube in only visible when near it. Use this during demonstrations to reduce visual clutter.
Disabling and Enabling Mouse Navigation
In the menu, select Interaction > Navigation > Enabled to remove the check and disable mouse navigation.
To enable mouse navigation, ensure Interaction > Navigation > Enabled is checked.
Here are the different mouse button shortcuts for navigating in the render view:
- LMB-drag to rotate around the orientation spot
- MMB-drag to pan
- Ctrl + LMB-drag to pan
- RMB-drag forward and back to dolly the camera
Setting a Pivot Point
Double-LMB-click on any object to set it as the pivot point.
Zooming into Geometry
Double-MMB-click to zoom into the geometry.
Rotating and Centering Geometry
Double-RMB-click on any object to set the rotation spot, centering it in the render view.
Rolling and Rotating the Camera
Hold-LMB + RMB-drag to the left and right.