
This topic describes how to configure InfoWorks ICM so that RADAR rainfall can be seen on the GeoPlan during simulation replays.
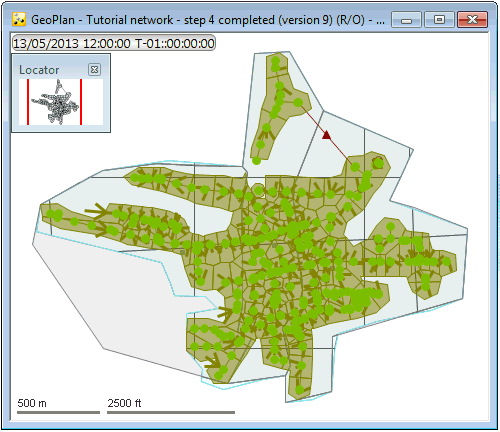
- Open the results of the latest simulation which includes the radar rainfall (test TSDB - with rain gauges, Nowcast and Nimrod RADAR data) in the GeoPlan window.
- To improve the visibility of the RADAR rainfall theme on the GeoPlan, we are going to hide the
Maps GIS layer that was added
here:
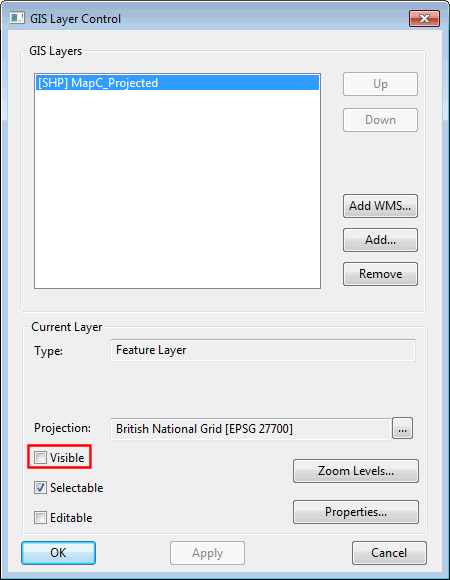
- Right-click on the GeoPlan and select GIS Layer control from the context menu.
- In the GIS Layer Control dialog, disable the Visible option for the MapC_Projected layer.
- Click OK to save the changes and close the dialog.
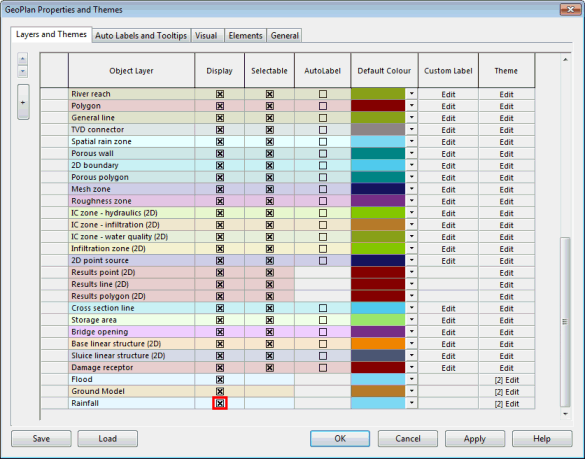
- Right-click the GeoPlan and select Properties & Themes from the context menu. The Layers and Themes page of the GeoPlan Properties dialog is displayed.
- Check the Display box for the Rainfall theme (last in the list).
- We are going to edit the rainfall theme:
- Click the Edit button of the Theme column for the Rainfall Object Layer.
- There is a rainfall intensity theme already set up. This theme will be used to show the radar rainfall in each of the cells.
- Leave the theme as it is and press OK to exit the Layer Theme Editor.
- Back in the Layers and Themes page of the GeoPlan Properties dialog, select Apply, but do not close the dialog.

- Select the
Visual tab of the
GeoPlan Properties dialog.
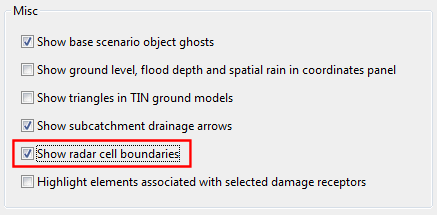
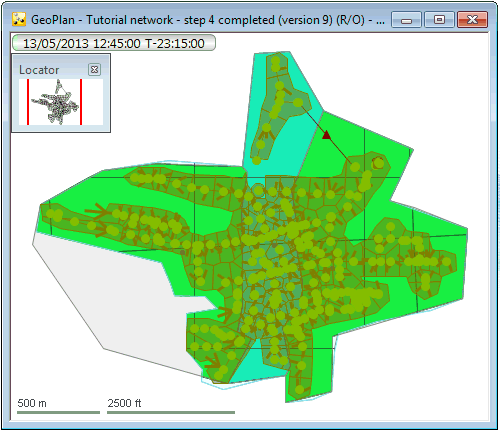
- Ensure that the Show radar cell boundaries option is enabled in the Misc section.
- Select Apply and then OK to close the GeoPlan Properties dialog.
- You should now see two grids within the Spatial Rain Zone polygon. The radar data used in this example has different grid for the observed (1km resolution) and forecast (2km resolution and slightly rotated).
- Replay the simulation and you should see the radar rainfall passing over the network area.
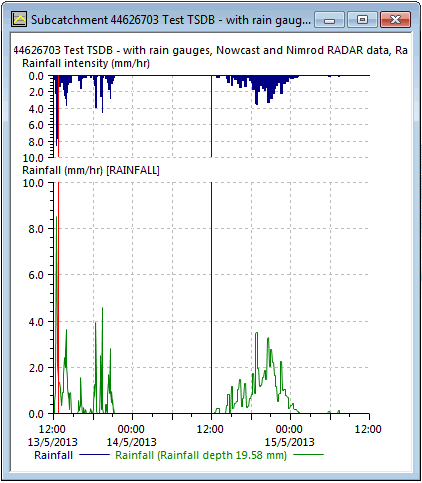
- Plot a graph of the rainfall for one of the subcatchments:
- Select the
Graph tool (
 ) from the
Results toolbar.
) from the
Results toolbar.
- Select a subcatchment on the GeoPlan.
- In the Graph Pick Selection dialog, select Rainfall and click OK.
- The blue vertical line indicates the run origin. The rainfall profile is a combination of gauged rainfall, Nimrod data and Nowcast data:
- Once finished looking at the graph click on the
 button to close the graph.
- Select the
Graph tool (
Tip: If this is the first time that spatial time series data objects are being used, it is recommended to re-load the factory defaults to ensure that any new default theme is made available to the user. For this, click
Load and select
Factory default in the
Load Network Editor Properties Dialog. The GeoPlan Properties dialog will then need to be re-opened.
There is one outfall in this model (ID = 45631203), which currently has no level time series applied to it. It is possible to apply a level time series supplied by telemetry to this location in a similar way to the way the rain gauges have been set up. This is described in the next step. See Step 5 - Adding Time-Varying Data as Model Boundary Conditions for more information.