
Commands in the View category of the main menu
With the view options you control which objects appear in the display and how those objects are visualized.
Some modes such as the support editor have a varying set of commands.
Jump to:
- To adjust the level of detail
- To highlight backfaces
- To highlight mesh edges
- To show the buildroom boundaries
- To toggle the machine-specific platform model
- To toggle the gizmo
- To show part names
- To show the triangle mesh
- To toggle between display color and actual part color and texture
- To toggle the part bounding box shadow
- To toggle visibility of no-build zones
- To hide and show parts
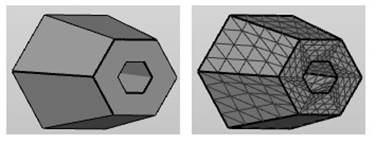
To adjust the level of detail
A reduced level of detail may be necessary for projects containing many parts or complex parts. Netfabb operations run faster when parts are displayed with lower levels of detail.
- Select a part.
- Click
 View >
  Level of detail and choose the appropriate level of detail.
Note: If no parts are selected, the level of detail is applied to all parts. Also, when parts are created as duplicates, they share the same level of detail. This connection can only be resolved by overwriting the duplicate, such as by applying repair to it.
Level of detail and choose the appropriate level of detail.
Note: If no parts are selected, the level of detail is applied to all parts. Also, when parts are created as duplicates, they share the same level of detail. This connection can only be resolved by overwriting the duplicate, such as by applying repair to it.
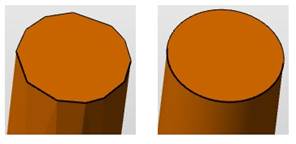
Left: Part with low level of detail. Right: Part with high level of detail.
Despite the coarse appearance of low-detail parts, the part attributes remain unchanged. The project tree reports the current level of detail for each part.
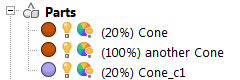
Part levels of detail in the project tree
To highlight backfaces
- Click
View > Highlight backfaces.
When enabled, the interior side (negative normal) of triangles is always colored red, even when the part is selected. It helps to detect inverted triangles, holes, and cuts.
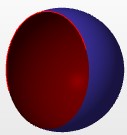
Backfaces are marked as red triangles
Backfaces showing to the outside not always, but usually, require repair.
TopTo highlight mesh edges
- Click
View > Highlight edges.
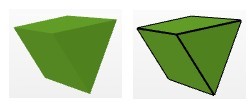
When enabled, sharp edges (<135° between normals of adjacent triangles) on objects are highlighted with black lines.
To show the buildroom boundaries
- Click
View > Show platform.
-
Tip: Hold the P key to display a local platform with the selected parts at the origin.

To toggle the gizmo
- Click
View > Show gizmo, or use the default shortcut Shift+Ctrl+G.
The gizmo is not always available. It is disabled where it would interfere with other operations. When this is the case, a message notifies you about this.
TopTo show part names
If you have loaded several parts, Netfabb can show part name labels in the display.
- Click
View > Show part names.
-
Tip: The default keyboard shortcut for this function is Ctrl + L.
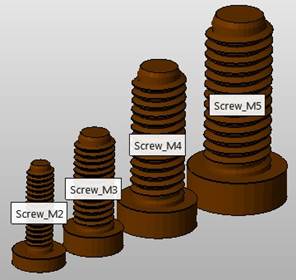
In addition, a selected part also shows its dimensions along X, Y, and Z on its bounding box.
TopTo show the triangle mesh
- Click
View > Highlight triangles.
-
Tip: Alternatively, right-click a part and choose Highlight triangles to show the triangles for just that one part.
To toggle between display color and actual part color and texture
- Click
View > Show texture and color, or use the default shortcut Ctrl+M.
To toggle visibility of no-build zones
- Click
View > Toggle no-build zone visibility.
Alternatively, click the
 lightbulb icon for the No-build zones group, or even for individual no-build zones, in the project tree.
To hide and show parts
When you need a clear view of certain parts, it can be useful to hide other parts from view.
There are multiple ways to hide a part:
- Click
View >
 Hide all parts.
- Click
View >
 Hide unselected parts.
- Select one or more parts and click
View >
 Hide selected parts.
- Click the
yellow lightbulb icon next to the part name.
To make hidden parts visible:
- Click
View >
 Show all parts.
- Select one or more parts and click
View >
 Show selected parts .
-
Tip: To temporarily preview a part that is obstructed by parts in the foreground, select the part and press and hold Shift+H.
To flip the visibility of all parts:
- Click
View >
 Invert part visibility. This command makes the hidden parts visible, and the visible parts hidden.
lightbulb icon in the project tree provides a third option between visible and invisible:
 transparent. You can set the strength of transparency in the
 Settings.