
Approve or Decline content on PIX for macOS
Approve or Decline an item
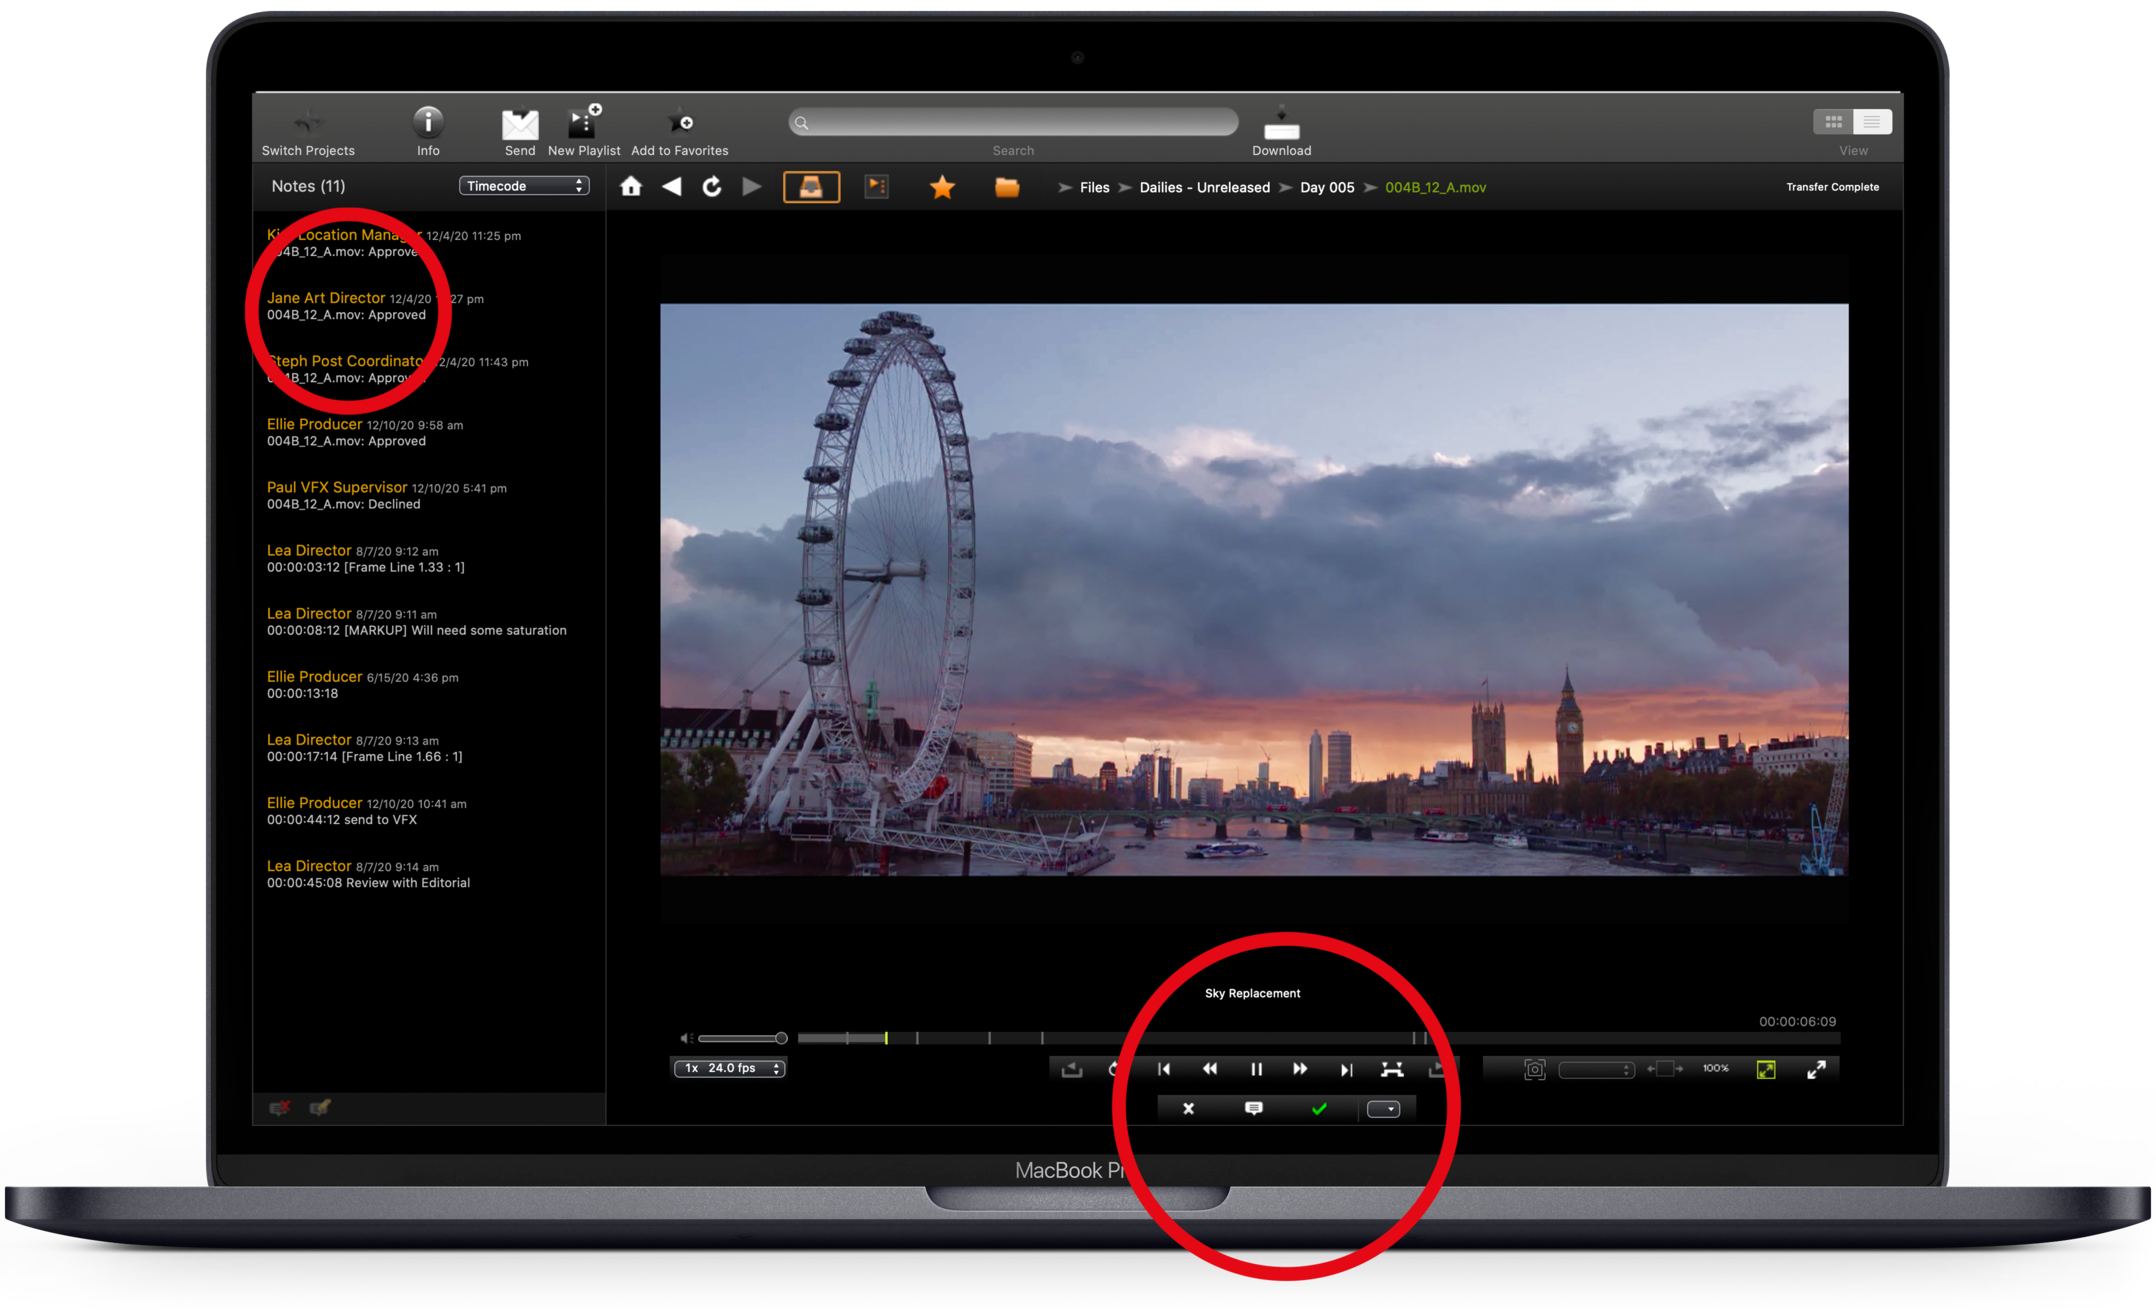
Depending on your permissions within the project, you may be able to click the checkmark ✓ and an X at the bottom of the viewer on either side of the Add Notes icon.
Click the checkmark to quickly mark a file as ✓ Approved or the X to mark it as X Declined. Click again to remove the approval or decline.
Or Use the following keyboard shortcuts:
Approve: Shift-Command-A
Decline: Shift-Command-D
Items you have approved will show a green check ✓ , items you have declined will show a red X . Click the check or X again to remove the approval/decline.The approval/decline will be visible in the Notes panel, just like any other note, but will not necessarily be visible to other users on the project.
Review what others have approved or declined

PIX must set up other users on the project to be able to see approvals and declines made by other users. If this is something you are interested in setting up, please contact PIX Support.
When reviewing approvals and declines from list view, the approvals/declines made by others will display as a number next to your own approval to the left of the file name.
If you approve an item and someone else declines it, you will see a green check ✓ (for your approval) and a red “1” to indicate that one other person has declined the item, or a green "1" to indicate another user has approved that item.
Similarly, if you and another person approve an item and a third person declines it, you will see a check ✓(for your approval) and an orange “2” to indicate that 2 people have left conflicting votes on the item.
If you see a sticky note icon next to the file name, this signifies that there are notes that have been made on that file.
Set up Notifications for Approvals and Declines
With Gatekeeper approval, you can have PIX set up email notifications that will alert you when items have been approved or declined within your project.
Making notes on PIX for macOS