Manage PLM workspace access
Fusion Manage requires a separate license and can be used with Fusion or independently. Learn more.
Control which hub members access specific PLM workspaces by creating groups and assigning roles. Groups let you restrict data access based on job responsibilities and project requirements.
To access PLM workspace management:
Open your Fusion Manage site.
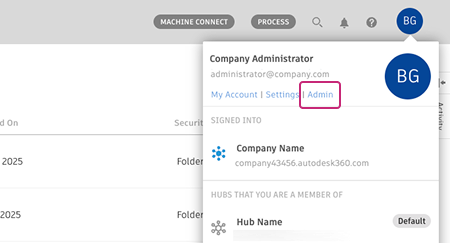
In the upper-right corner, click your profile image, then select Admin > Groups.
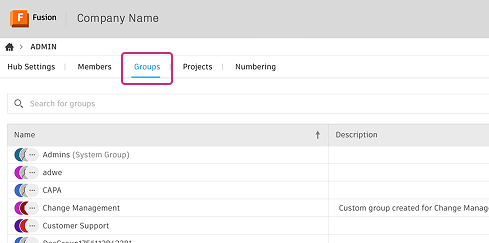
Click a group to open its side panel.
In the Add PLM workspace access section of the side panel, you can grant workspace access to the group.
Create a group and assign workspace access
On the Groups page, click Create group.

Enter a group name and optional description.
In the Add PLM workspace access field, type the workspace name and select it from the list, then press Enter.
Workspaces in your hub appear as you type. To remove a workspace before creating the group, click More
 at the end of the row, then select Remove access.
Under PLM Role, click the drop-down menu and select one or more roles for the workspace.

Each workspace must have at least one assigned role. Without workspace roles, group members won't have access to those workspaces when the group is created.
In the Add or invite group members field, add members:
- Type a member's name and select from the list. Hub members appear as you type.
- To add people outside the hub, enter their email addresses separated by commas. They'll receive an invitation to join the hub.
Click Create group.
The group is created with the specified workspace access. Group members automatically receive the assigned permissions.
Assign workspace access to an existing group
On the Groups page, click on the group you want to update.
A side panel with the group's details opens.
In the Add PLM workspace access section, type the workspace name into the field, select it from the list, and press Enter.
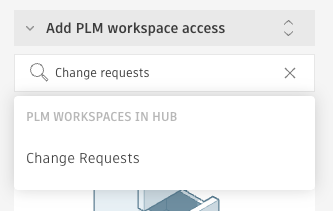
Click the drop-down menu
 next to the workspace name.
Select one or more roles for the workspace.
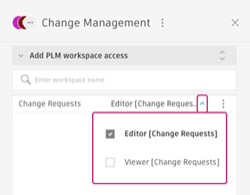
Workspace access is granted to the group, and all group members receive the assigned permissions.
Change a group's workspace access
On the Groups page, click on the group you want to update.
A side panel with the group's details opens.
In the Add PLM workspace access section, locate the workspace you want to modify.
Click the drop-down menu
 next to the workspace name.
Select a different role or add additional roles as needed.
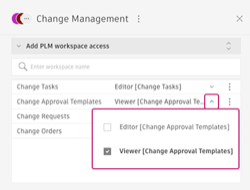
Permission changes take effect immediately for all group members.
For more information about PLM roles, see Manage roles.
Remove a group's workspace access
On the Groups page, click on the group you want to update.
A side panel with the group's details opens.
In the Add PLM workspace access section, locate the workspace you want to remove.
Click More
 next to the workspace name.
Select Remove access.
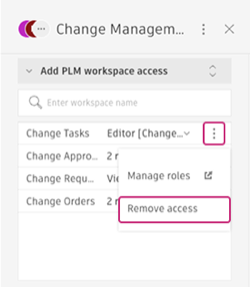
The workspace access is immediately removed from the group, and all group members lose their permissions to that workspace.
