By default, PartMaker orders the processes in the Process Table according to the sequence in which you programmed the part. It starts by creating processes for all the part features in the first Face window you created, before moving onto the next Face window you created and so on.
If the default order of processes does not reflect the sequence in which you want to machine the part, you can drag-and-drop processes to a new position in the Process Table.
When using Swiss-type lathes, you can also use Synchronization Modes to machine some processes simultaneously on different tool posts (such as, gang, backworking or turret) and/or on different spindles (that is, main or sub-spindles), which reduces machining time.
To synchronize processes in the Process Table:
- Select a process in the Process Table and click the
Set Mode (
 ) button to display the
Set Modes dialog.
- Select the Synchronization Mode for the process, then click
OK to return to the Process Table.
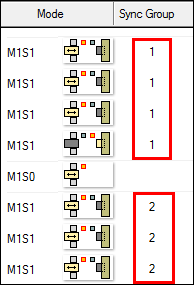
The icon on the Set Mode button changes to reflect the selected Synchronization Mode. For example, when the main spindle and the sub-spindle are each machining with one tool the icon changes to:

- Repeat Steps 1and 2 for each process that you want to synchronize.
- When you have selected the Synchronization Mode for all processes, click the
Sync Group button.
PartMaker groups two or more consecutive processes with the same Synchronization Mode together into a Synchronization Group, and assigns a number to each group.

As PartMaker groups processes into Synchronization Groups, it also verifies the Synchronization Mode settings and displays details of any errors.
- To view a graphical representation (known as a Time Chart) showing the results of the synchronization, click the
Show Time Chart button on the Process Table.
