
PartMaker provides two ways of creating profile groups, containing letters or numbers, for engraving:
Using the Engrave icon together with a .gpf file
- Click the Engrave icon, to display the Engrave Data dialog, where you can enter details of the text or numbers you want to add to the profile group.
- By default, PartMaker uses the font from the font.gpf file in the PartMaker data folder (for example, C:\PartMaker\PM-Swiss\). You can see which font file is loaded in the Font File area of the Engrave Data dialog. Click Browse to load a different file.
- If you want to create your own font file, you must place each character, namely:
[A...Z, a-z, 0-9,. ,- ,/] in a separate group named after this character.
- The size of a character must be based off the height of '0'.
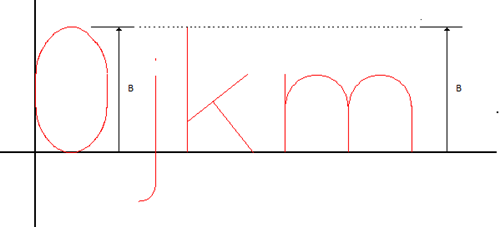
- A character's vertical origin must be along the horizontal axis.
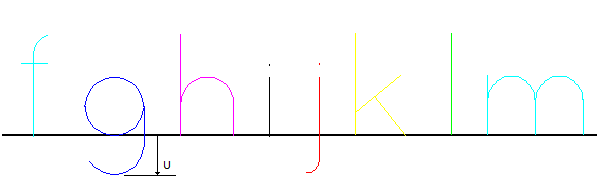
- A character's horizontal origin can be arbitrary.
- The size of a character must be based off the height of '0'.
Tip: The
Edit > Convert Notes to Profiles option enables you to create profile groups for engraving and use user-defined fonts, without needing to use .gpf files.
Converting a note into a profile
- When creating notes in CAD mode, you can use the default font or select a user-defined font from a Font dialog.
- When you have created the note, or notes, that contain the letters and numbers you want to be engraved, select the Edit > Convert Notes to Profiles option.