
To add a component road assembly to the library
Add any component road assembly you've created to the library so you can use it again.
Select a component road.
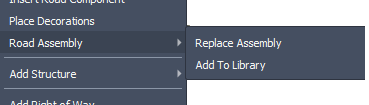
Right-click, then expand the Road Assembly menu.
Click Add to Library.
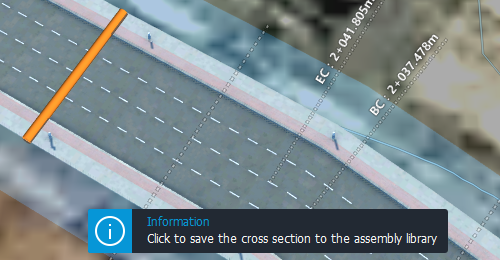
You cursor will become an orange placement guide on the roadway. Follow the on-screen instructions to select the cross-section of the roadway containing the assembly you want to add to the library. (Hit Esc. to cancel and return your cursor to normal)
Specify a name for the assembly.
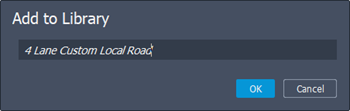
Click OK to finish adding the assembly to the library. A success message will display when the assembly has been added to the library.

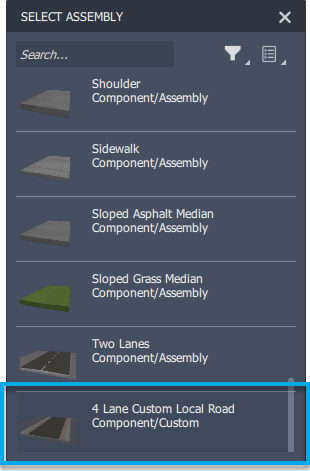
The assembly you just added to the library can now be found in the Select Assembly catalog.
To sketch your new component assembly, click Create
 Transportation
  (Component Road)(Keyboard Shortcut: Ctrl + R), then click the name of the current assembly in the Stack.
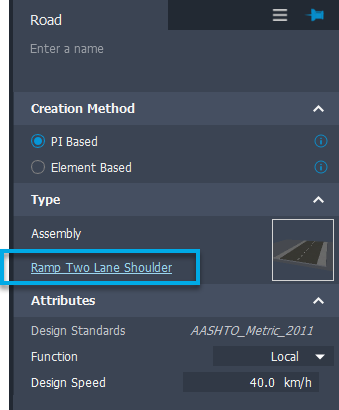
Click the name of your custom assembly style from the Select Assembly catalog. You can also choose your custom assemblies using in-canvas component road editing commands, such as the Replace Assembly tool in the right-click context menu.
You can now sketch your custom component road assembly as you would any other type of component road. See To add a component road for more information.