
Use the Single Blade Curve tab to:
- specify the start, end, and intermediate curves bounding the area you want to machine.
- add machining properties to the curves you specify.
To display the
Single Blade Curve tab, click
Select curves
 on the
Single blade finishing strategy page. This tab contains the following:
on the
Single blade finishing strategy page. This tab contains the following:
Definition panel
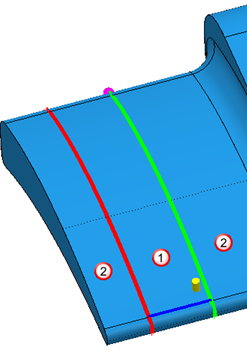
- Start curve — Select a closed curve where you want the machining to start.
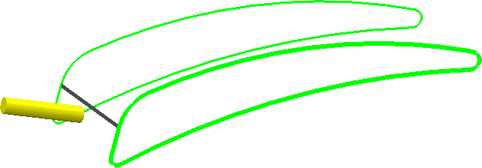
- End curve — Select a closed curve where you want the machining to end.
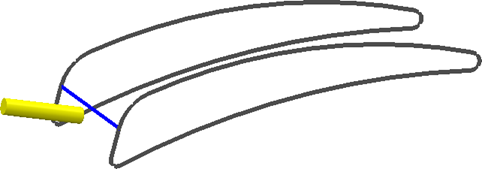
- Seam curve — Select an open curve that joins the start and end curves. This curve defines the start point of each toolpath segment and must connect to the start and end curves.
 Tip: To minimise the likelihood of leaving a dwell mark on the machined component, the seam curve should be located by the leading or trailing edge of the blade.
 - Start point — If there is no seam curve to select, click
Start point
to define the starting point of the curve.
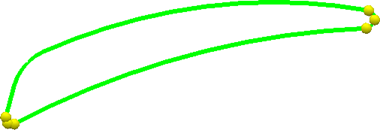 Note: To select a starting point, you must have a valid tool for the strategy, with a diameter greater than zero.
Modify panel
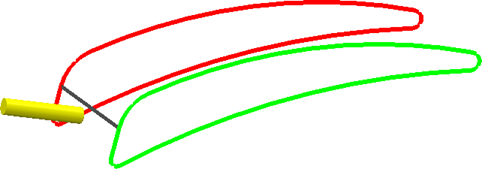
- Swap drive curves —Swaps the start and end drive curves.
- Change Cut Direction —Changes the cut direction from conventional to climb milling or from climb to conventional milling.
- Reverse Machining Side
—Toggles the side of the curve that is machined. For example, click to toggle the creation of toolpaths from the area between the two curves, to the area outside the two curves. A tool is displayed to indicate which side of the curves is machined.

 Area in which toolpaths are generated.
 Area in which toolpaths are not generated.
The tool is displayed in the machining area.
Status panel
- Curve Definition — Hover to display curve definition information.
Finish panel
- Accept — Click to accept and keep the changes.
- Cancel — Click to delete the change