Spaces
Spaces in Autodesk Tandem are intertwined throughout the product. When utilized correctly, it can lead to being more informed about a facility.
Space Navigation
Improving room visualizations enables better contextualization to the work that you're doing without overwhelming the viewer with extra data. When navigating your model in the viewer:
- Clicking the floor label, the viewer automatically filters to the level(s) selected.
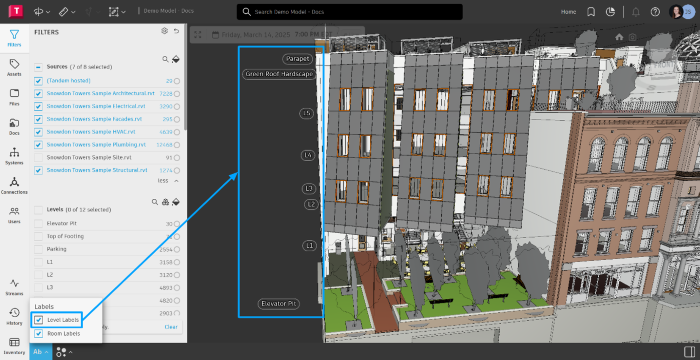
- Room and level labels are permanently displayed, regardless of what angle users at in the viewer.
- Building and floors are outlined when a Level is selected.
- Double-click the level icon to get top-down or perspective view (Autoview).
- Click and hold the shift key to select multiple floors.
- Highlighting by room displays semi-transparent walls and an opaque grid that allows you to estimate distance (1 line = 1 foot).
- When searching for a room in the search bar, the viewer will automatically contextualize the room and level.
- If your model has Zones, and you select one in the viewer, it will be highlighted in orange.
Spaces (aka Rooms)
Viewing a list of Spaces
The workflow to view a list and work with the Spaces in Tandem is nearly identical to the workflows described above for Levels. Users can view the Spaces for a facility a few different ways:
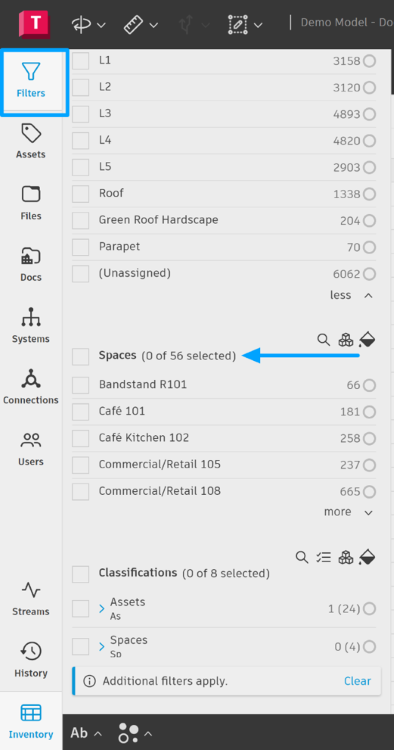
- In the Filter Panel, there is a Spaces properties list. If that is not visible, Edit the Filters to add this property.
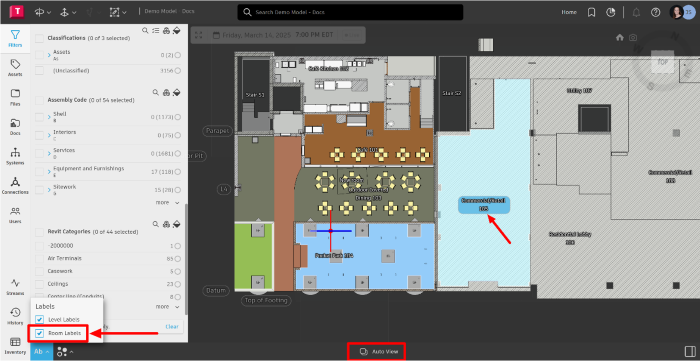
- Directly in the viewer by turning on the Rooms labels from the footer navigation. Spaces are best viewed when filtered down to a Level and orienting the viewer to the Plan view (click on Auto-Views in the footer navigation).
- Under Revit Categories in the Filter Panel, select the Room filter and then open the Inventory panel to view a complete list.
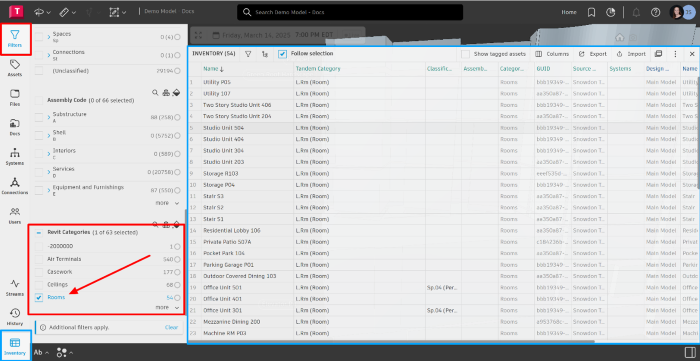
NOTE: In Tandem, Rooms are called Spaces, and in Revit, they are called Rooms; hence, the Rooms filter property is under the Revit Categories.
Just like with Levels, users can filter the list of Spaces in the Inventory Panel to focus on what is essential.
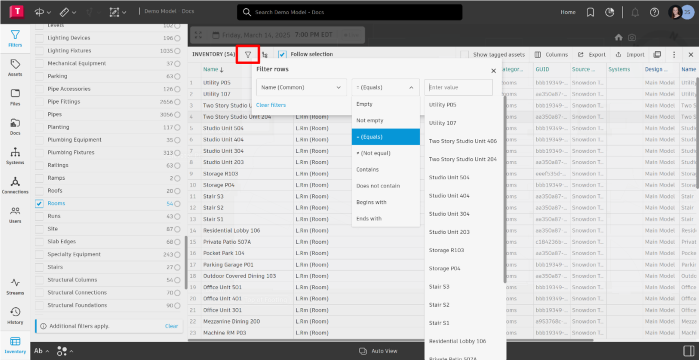
Additionally, users can Group Rows in the Inventory panel, which can then be viewed in the Inventory panel in a tree structure.

Along with filtering and grouping, users have the option to export to .xlsx or .csv from the Inventory panel to view their level and room information that way.
The Inventory Panel provides the most robust options for viewing details about Levels and Spaces in a digital twin.
Levels
Viewing the List of Levels
Users can view the Levels for a facility in a few different ways:
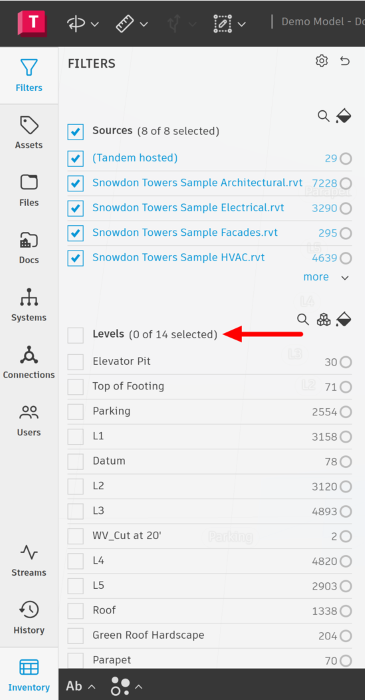
- Open the Filter panel, and there should be a Levels section. If it is not visible, Edit the Filter panel and add that property.
- Directly in the viewer by turning on the Levels Label from the footer navigation.
- To view the list of Levels in the Inventory Panel, users must select the Levels filter option under Revit Categories and then open the Inventory Panel.
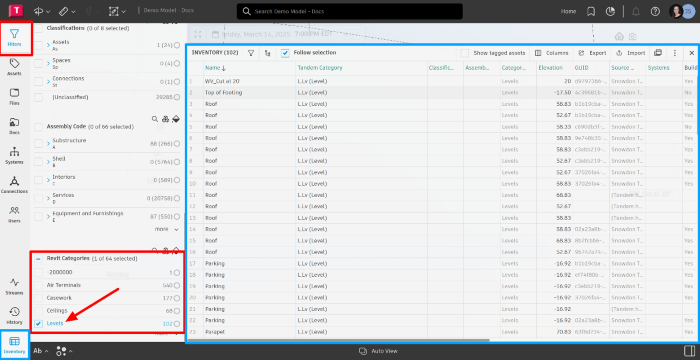
The Inventory panel offers filter options independent of the traditional filtering in Tandem. Open the inventory filters to select and focus on what matters.
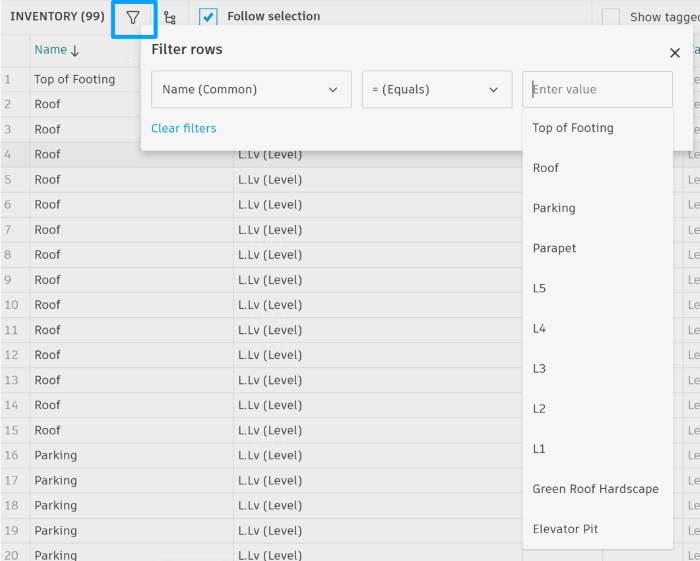
Merging Levels
With a variety of disciplines working on a model, you may find that many have different naming conventions for rooms and spaces. When this happens, merging Levels is a great way to clean up the model, filter panel, or viewer.
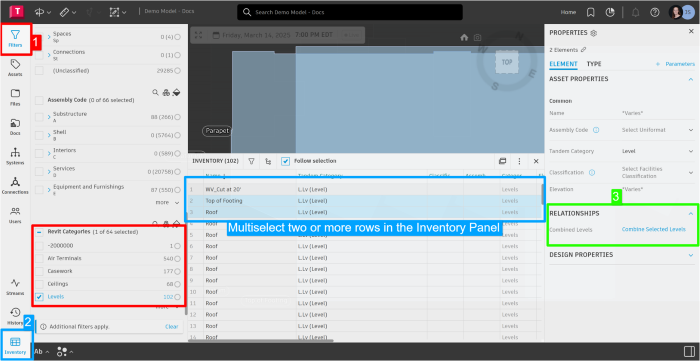
With Levels selected in the Inventory panel as mentioned in option three above, select two or more rows, by holding down the ctrl key and clicking the rows to merge. When selected, the rows will appear light blue.
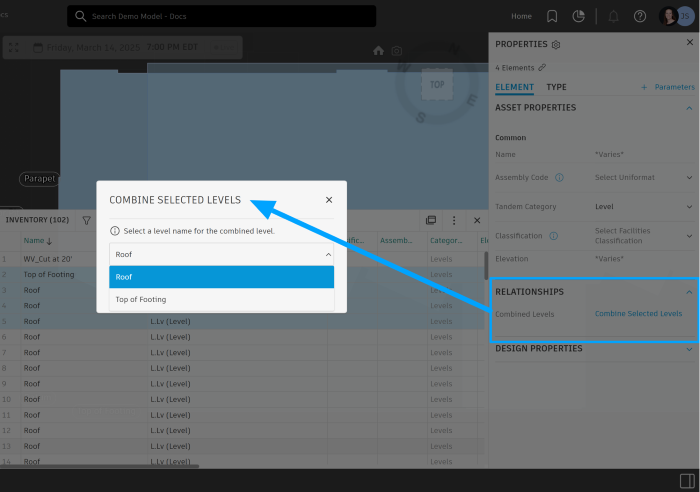
Once selected, click Combine Selected Levels in the Properties Panel.
From there, users must select from the dropdown which Level all of them should be merged into. Then click Combine.
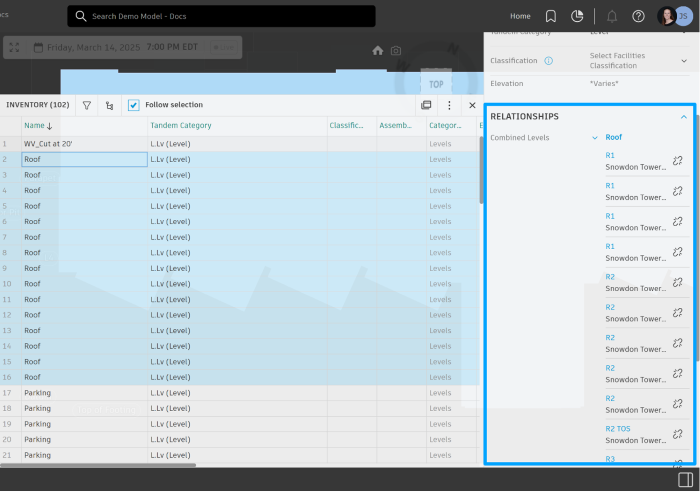
Once combined with the Level selected in the Inventory, the levels will appear under the RELATIONSHIPS section in the Properties Panel. Clicking the level name in the relationships section, in the picture below, that would be “Roof.” It will select all the levels that were combined and highlight them blue in the inventory.
An alternative workflow for merging levels is the Import/Export feature in the Inventory Panel, which allows users to utilize Microsoft Excel.
To begin this workflow:
- Open the Inventory Panel & Filter panel.
- Within the Filter Panel, under Revit Categories, select Levels. This will populate the Inventory with all the levels that were imported with the authoring model.
- Click Export in the top-right corner of the Inventory panel.
In the example pictured, the levels are grouped by name.
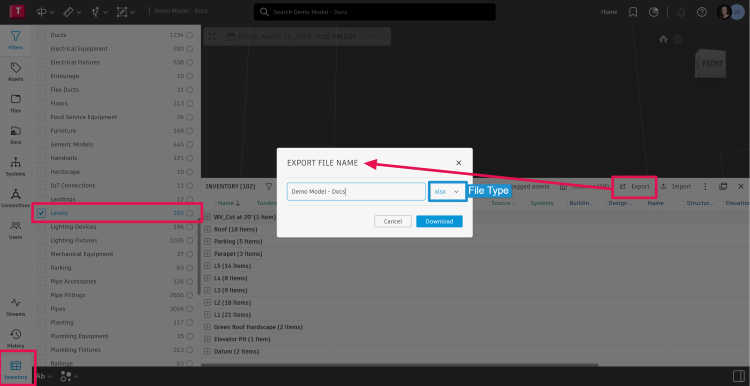
- In the EXPORT FILE NAME dialogue, update the name of the file download if applicable, and select either .XLSX or .CSV for the file type.
- Once downloaded, open the Excel file.
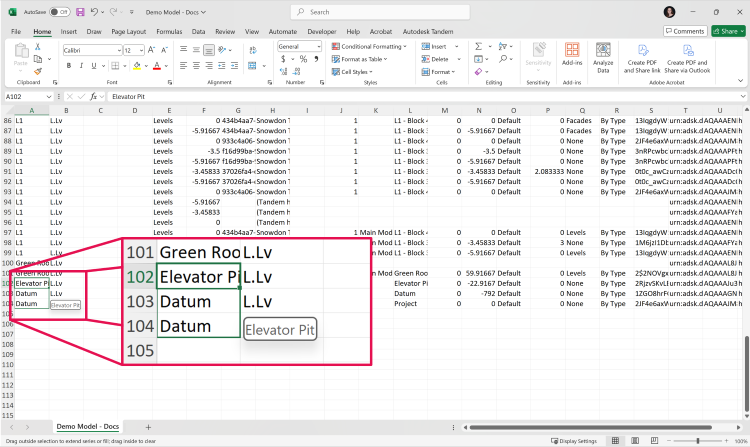
- In the above, we want to merge the level Elevator Pit with Datum levels. To do so, update the names by copy/pasting, in this Example, Elevator Pit into the cells where the level name is Datum. Now, save the file.
Pro-tip: By copy/pasting, this guarantees that there are no miss spellings or further duplication or adding of more Levels.
- Navigate back to Tandem, and in the Inventory panel, click Import and select the Excel file that changes were just made to.
- Once imported, the level names will update and be merged.
Before: Elevator Pit had one item, and Datum had two.
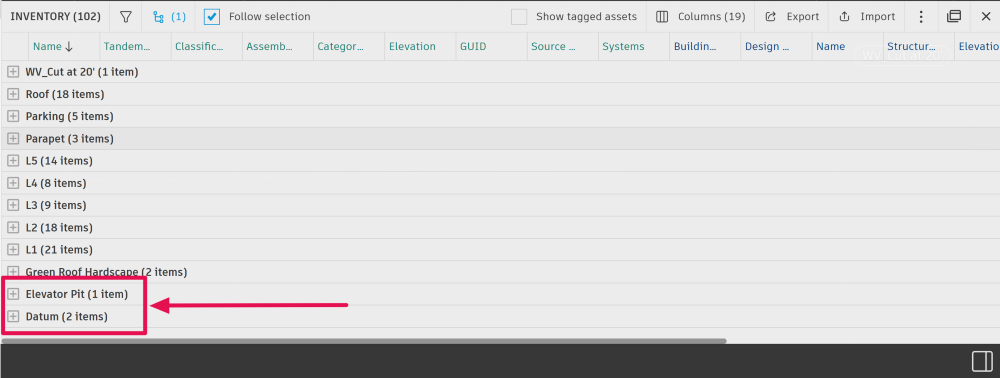
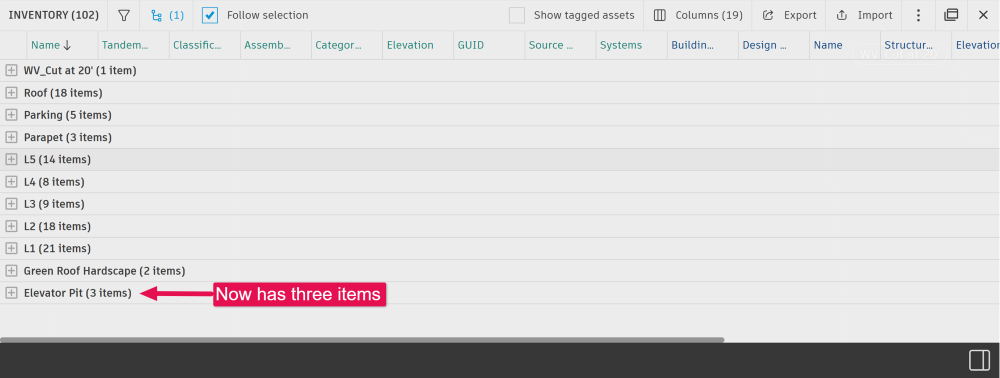
After: Elevator Pit has three items, and Datum has nothing.
