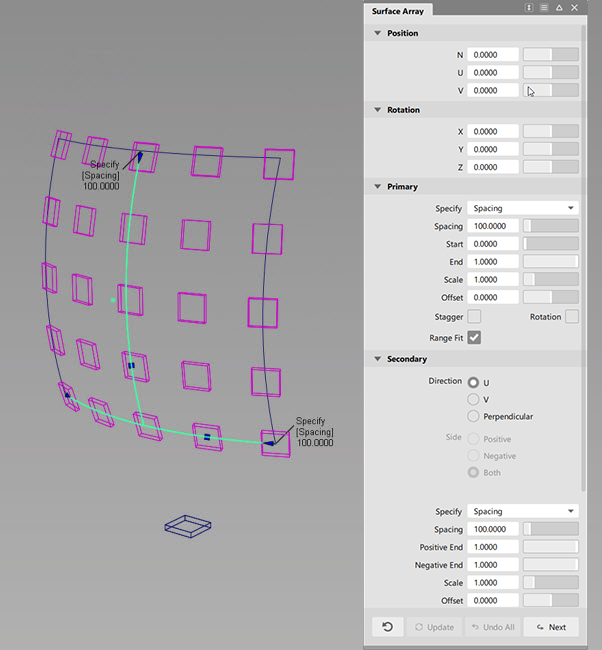
 Surface Array
Duplicates one or more objects and places the copies in arrays on surfaces.
Access this tool from the Transform tool palette:

Surface Array options
Position
Offset in the N, U, and V directions along the duplicates local axes.
Rotation
Rotation around the local, X, Y, and Z axes of the duplicates.
Primary
Specify
Choose to duplicate by Spacing or Number.
Spacing
Choose distance between duplicates.
Number
Choose number of duplicates.
Start / End
Specifies where the duplicates Start and End in the primary direction of the surface. These can be adjusted in the control window or with in-canvas range manipulators.
Scale
This is a relative scale factor applied to the original object to produce the last duplicate in each row . The size of the intermediate duplicates is interpolated.
Offset
Offsets each row in the array by this distance from the previous row.
Stagger
Offsets each row half of the spacing value, creating a "stagger" effect.
Rotation
When checked, displays fields to change the Incremental Rotation of the duplicates in the X, Y and Z.
Range Fit
Expands the array to fit within the start and end range.
Secondary
Direction
If U is selected, the objects will be laid out along U isoparms. If V is selected, they will be laid out along V isoparms. If the target is a U or V isoparm, the U or V direction will be selected by default and is dependent on the primary direction.
Perpendicular creates the secondary direction perpendicular to the primary direction.
Perpendicular
Select UV or 3D coordinates when a Perpendicular direction is selected. Selecting UV can give non-perpendicular results in world space coordinates depending on the shape of the surface (the angular difference increases with the ratio of the extents of the surface in U and V directions). Selecting 3D gives perpendicular results in world space.
Side
Creates the secondary direction of the array on the Positive, Negative or Both sides of the primary input.
Specify
Choose distance between duplicates.
Spacing
Choose distance between duplicates.
Number+ Spacing
specify both the number and the spacing of the duplicates.
Number
Choose number of duplicates.
Positive End / Negative End
Specifies the start and end of the secondary direction duplicates on the positive and negative side of the primary input.
Scale
This is a relative scale factor applied to the original object to produce the last duplicate in each row . The size of the intermediate duplicates is interpolated.
Offset
Offsets each row in the array by this distance from the previous row.
Stagger
Offsets each row half of the spacing value, creating a "stagger" effect.
Rotation
When checked, displays fields to change the Incremental Rotation of the duplicates in the X, Y and Z
Range Fit
Expands the array to fit within the positive and negative end range.
Control Options
Auto Update
When this box is checked, duplicates update automatically when values in the control window are changed.
Chain Select
When checked, selecting a surface also selects all other curves that are tangent continuous with it.
Create History
When checked, the duplicates have construction history. Modifying the stitch objects or target curves causes the duplicates to update accordingly.
Orientation
- None – No change in orientation.
- Tangent – The first copy of the object takes the original orientation and all subsequent copies are rotated based on the tangent of the input curve at the point where the object is being placed. This allows the arrayed objects to follow the flow of the input curve.
- Normal – Aligns the local X axis of each duplicate with the tangent of the target curve at the position of the duplicate. If the target curve is a curve-on-surface, each duplicate is oriented so that its local Z axis matches the normal direction of the surface where the curve-on-surface lies. If the target curve is a free curve, the Z axis of each duplicate is oriented along the direction of the curvature vector of the curve (like plot combs).
Surface Array workflow
Shift-select the Surface Array tool
 icon.
icon.Select the object to duplicate. Click Accept
Select surface edge or curve on surface for the primary direction. The surface array is built.
Note: If Number is 1 for the primary and secondary direction, you will only see the original objectAdjust the options in the control window. If Auto Update is checked, the surface array updates automatically. Otherwise click the Update button.

