
Methods to specify which triangles to affect by a semi-automatic repair action
There are several commands available in the repair module to select triangles.
Jump to:
- To use the basic selection commands
- To use the selection primitive
- To expand or shrink the selection
- To select triangles around a hole
To use the basic selection commands
- Click one of the basic selection commands from the toolbar. Available options include:
 Select Triangles: Selects individual triangles.
 Select Surfaces: Selects consecutive triangles until they are angled further than a configurable threshold away from the previous one.
 Brush Selection: Selects individual triangles by painting over them with a brush.
 Select Shells: Selects entire shells.
Tip: Hold Ctrl and click on a triangle, surface, or shell to add to or subtract from the selection based on the current selection state of the clicked triangle.
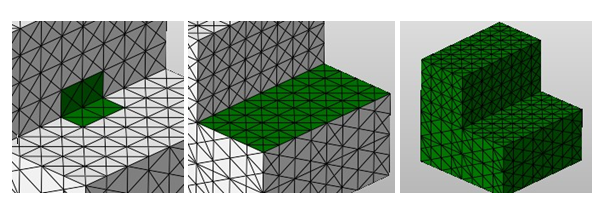
Left: Selected triangles. Center: A selected surface. Right: A selected shell.
In addition to these basic selection commands, you can quickly select all triangles, clear the selection, or toggle the selection.
- Click
 Select all Triangles to select every triangle in the mesh.
- Click
 Clear Selection to deselect all triangles.
- Click
 Toggle Selection to flip the selected and unselected triangles.
To use the selection primitive
- Click one of the selection options from the toolbar listed under
 Selection Primitive. Available options include:
- Select All Triangles: Selects all triangles that lie within the selection primitive, regardless whether they are on the backside of the part or whether they are covered by other triangles.
- Select Front-Facing Triangles Only: Selects triangles facing the front of the display, even when they are covered by other triangles.
- Select Uncovered Triangles Only: Selects triangles which face either the front or back towards the camera, but are not covered by other triangles.
- Select Front-Facing and Uncovered Triangles Only: Selects only the triangles partly or fully visible from the current viewing perspective.
- Choose a selection type. Available options are Triangles or Shells.
- Choose a primitive selection shape. Available options are Rectangle or Circle.
- In the display, click and drag with the mouse to create the primitive shape.

Left: Drag a primitive shape. Right: The resulting selection.
To expand or shrink the selection
If you have already selected triangles or surfaces, you can quickly expand or shrink the selection.
- Select one or more triangles or surfaces.
- Right-click the selection and choose
 Expand Selection to include the adjacent triangles or surfaces in the selection.
- Right-click the selection and choose
 Shrink Selection to remove the adjacent triangles or surfaces in the selection.
To select triangles around a hole
If you have a part that contains a hole, some actions benefit from, or even require, selecting one or more of the triangles directly touching the hole.
- Right-click an edge of the hole.
- Choose
 Select all Surrounding Triangles to select every triangle touching the hole.
- Choose
 Select Attached Triangle only to select the triangle adjacent to the edge.
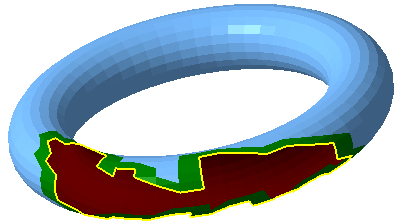
In preparation for freeform-hole closing, the triangles surrounding the hole have been selected.