

- Some Motion Trail settings are available only in the Attribute Editor. See Attribute Editor specific Motion Trail settings at the end of this topic.
- If you modify values in the Motion Trail Editor when there is nothing selected, the default values for any new Motion Trails are changed. However if a Motion Trail is selected and showing the values for a Motion Trail, changing the values modifies the selected Motion Trail only. It does not change the future default values in the Motion Trail Editor.
Motion Trail menu bar
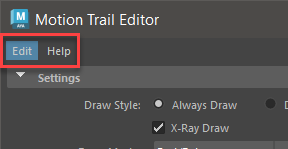
The Motion Trail menu bar
- Edit
- There are two Edit menu options:
- Reset Settings: Restores all Motion Trail Editor defaults.
- Save Settings as Default: Saves the current Motion Trail Editor as the default for later use. (This option is active only when a Motion Trail is selected.)
- Help
- Opens this topic for quick access to a description of the settings in the editor.
Note: You can set where Maya accesses help by adding a custom location, for example, a network, using the Custom settings in the Help preferences.
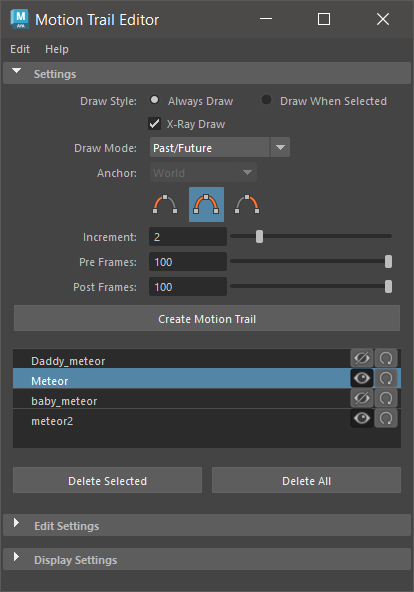
Settings
These properties represent the Motion Trail appearance.
- Draw Style
- Choose when you want to view the Motion Trail:
-
- Always Draw
-
Choose Always Draw to show the Motion Trail even when the object is not selected.
- Draw When Selected
- Choose Draw When Selected to show the Motion Trail only when you click the object.
-
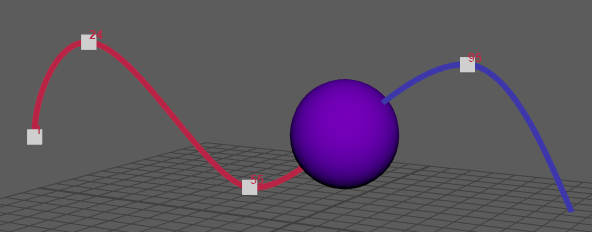
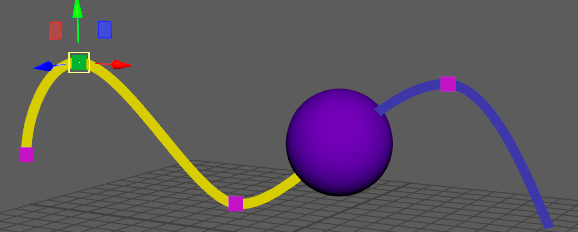
- X-Ray Draw
- Choose X-Ray Draw to show the Motion Trail inside the object.
-
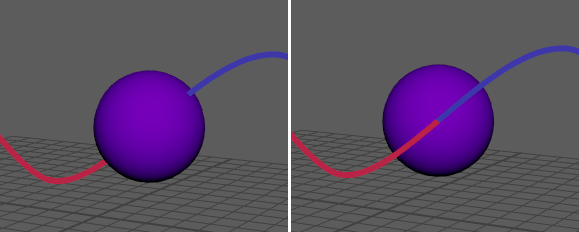
Left: the sphere passes over the Motion Trail (default) Right: Motion Trail X-Ray Draw
- Draw Mode
-
Select what you want the Motion Trail to display:
-
- Past/Future
- Lets you see the animation occurs before and after the current frame, by differentiating them by colors defined by the Trail Color and Alternate Trail color settings. (See Motion Trail Display settings.)
-
- Constant
-
Always show the Motion Trail the same color.
-

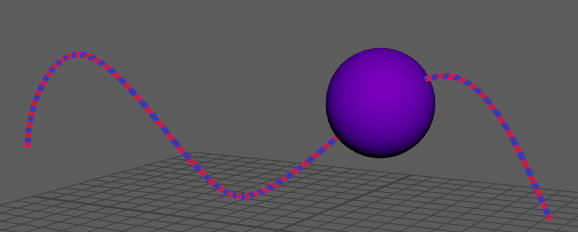
- Alternating Frames
-
Displays each frame in an alternating color, defined in the Trail Color and Alternate Trail Color settings. (See Display Settings, further down in this topic.) Using Alternating Frames lets you see the speed of your animation along the Motion Trail: the smaller the frame segment, the slower the animation, and the longer the frame segment, the faster.
-
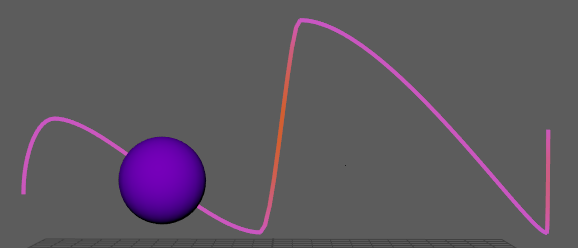
- Velocity
- Uses colors to create a "heat map" to show the acceleration of the animated object. In areas where the animation is slow, the Motion Trail shows one color and where it travels faster, the color changes. The gradient of color the path lets you distinguish between varying speeds.
- See the Velocity Fast and Velocity slow colors in the set in the Display Settings area of the Motion Trail Editor.
-
- Anchor
- Creates a Motion Trail relative to cameras or other objects in the scene, and isolates the movement relative to the rest of the animation. Choose between World, Object, and any cameras that are in the scene. Apply Anchor to camera animation to visualize the motion of objects within a moving camera shot. See Analyze animation in Camera Space.
- Choose World to display the Motion Trail of the object relative to the world coordinate system. This way, if your move the object, the trail does not change.
- Use
Object to display the object trail relative to the last selected object so the trail changes when you transform the object.
If you have an object that is rotated 45 degrees, and create a Motion Trail in World mode, the path looks like the object has moved diagonally. However, if you create a Motion Trail in Object mode, the path appears like the object has moved up and down, because the Motion Trail is relative to the object's coordinate system.
- Motion Trail Direction Icons
-

-
-
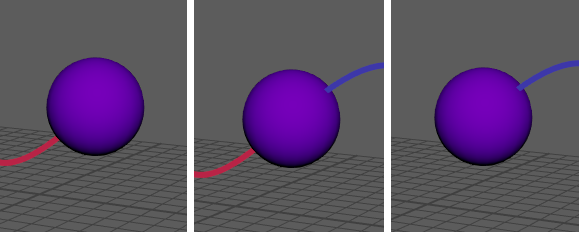
Choose how you want the Motion Trail to show: Before
 , Before and After
 , or After
 .
.
- Increment
-
Sets the frequency at which the Motion Trail is sampled and drawn, essentially specifying the resolution of the Motion Trail line. The default is 1, so the Motion Trail is sampled at every frame. Setting the Increment to 5, for example, samples and draws a motion trail point every five frames. If a Motion Trail key falls on a sample point, it is drawn on the trail.
Setting Increment to a larger value can increase performance, as fewer keys are drawn on the Motion Trail. Sometimes Motion Trail keys that do not fall on sample points may be drawn offset from the trail.
-
Comparison: Motion Trail Increment set to 0 and 10
- Pre Frames
- Specify the number of frames before the current time to draw the Motion Trail. A value of 0 (default) draws the motion trail from the current frame back to the start frame.
-

Pre and Post Frames set to 10 frames, shortening the Motion Trail.
- Post Frames
- Specify the number of frames after the current time to draw the Motion Trail. A value of 0 (default) draws the Motion Trail from the current frame to the last frame.
- Create Motion Trail
- Creates a Motion Trail for the selected object. Once a Motion Trail exists, it appears in the Motion Trail List.
- Motion Trail List
- Shows all Motion Trails in the scene.
- Click the Eye
 icon next to a
Motion Trail to show or hide it. Double-click the
Motion Trail to rename it.
icon next to a
Motion Trail to show or hide it. Double-click the
Motion Trail to rename it.
- Click the Update
 icon to refresh the
Motion Trail so that it matches the Time Range shown on the Time Slider.
icon to refresh the
Motion Trail so that it matches the Time Range shown on the Time Slider.
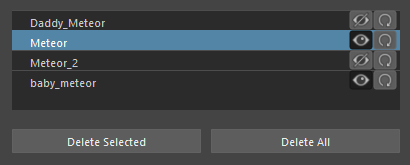
Motion Trail List area
Note: You can have multiple Motion Trails on the same object. The name is incremented numerically, for example objectname_motionTrail1, Objectname_motionTrail2, and so on. - Delete Selected/All
-
Removes either the Motion Trail currently selected in the Motion Trail List, or removes every Motion Trail from the scene.
Edit Settings
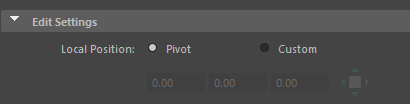
Motion Trail Edit Settings area
- Local Position
- The Local Position settings let you adjust the position of the Motion Trail relative to the source object:
-
- Pivot
- Draws the Motion Trail at the rotation pivot of the object. For example, like the motion of a swinging sword, the motion at the center differs from the tip.
- When you drag the object, the
Motion Trail adapts to the new position.
- Custom
- Lets you set a custom object-space position for the
Motion Trail. Click the
Custom option to enter a specific position coordinate field, or click the
Move icon
 to manually reposition the
Motion Trail.
Note: Select the Motion Trail before activating the Custom option.
to manually reposition the
Motion Trail.
Note: Select the Motion Trail before activating the Custom option.
- You can have multiple
Motion Trails on the same object and use the
Custom option to position them, for example adding a
Motion Trail to each wing tip of an airplane.
Two Motion Trails on the same object, but positioned differently
Display Settings
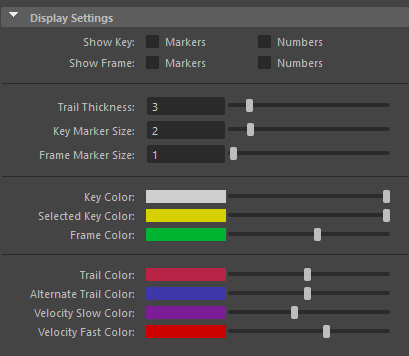
- Show Key
- Activate this option to depict the keyframes set for your object. Choose between Markers and Numbers. Key markers show a square at the point in the animation where each frame occurs and Key numbers instead show frame numbers.
-
Key Markers and Numbers both active
- Show Frame
- Activate this option to depict the frame numbers that correspond to the animation for your object. Choose between Markers, which are small plus signs (+) appearing at location of every frame or Numbers showing the corresponding frame number.
-
Frame Markers and then Frame Numbers
- Trail Thickness
- Lets you specify the size of the Motion Trail. The default setting is 2.
-
- Key Marker Size
- Lets you specify how large the key markers appear.
-
- Frame Marker Size
- Lets you specify how large the Frame markers appear.
- Color Settings
- Use the slider or double-click the color swatch beside the value to choose a custom color for
Motion Trail elements in the Viewport.
Custom colors for Motion Trails
- You can set the color of Keys, Selected Keys, Frames, and Velocity. You can also set theTrail Color and Alternate Trail Color, when the Draw Mode is set to something other than Constant.
-
Tip: To set your Motion Trail color to match your animated object, click the Trail Color color tile in the Motion Trail Editor Display Settings to open a Color window. Use the eyedropper tool to select the color on the object.
Attribute Editor specific Motion Trail settings
The following Motion Trail settings only appear in the Attribute Editor as they are used in only specific cases.
- Draw Trail
- This setting is the same as the Motion Trail Direction icons in the Motion Trail Editor, letting you set how you want the Motion Trail to show: Before current frame, All frames, or After current frame.
- Fade Frames
- Creates a fade effect that lasts for the specified number of frames.
-
- Scale/Rotate Key Markers
- Shows the key markers set for scaling and rotation in the color set in the Scale/Rotate Key Color setting.
-

- Scale/Rotate Key Color
- Lets you pick a color to define key markers set for scaling and rotation. The Scale/Rotate Key Markers setting must be active.
- Edit In/Out Tangent
- Shows the In/Out tangents. You can access this action as Show Tangents in the Motion Trail Marking Menu when you right-click a key on the Motion Trail
- Edit In/Out Beads
-
Note: Timing beads can only display for curves with weighted tangents. You can set tangents to weighted in the Graph Editor. See Change tangent weight.
- Display and adjust timing beads on a Motion Trail to control the ease-in and ease-out of your animations at each keyframe. Each bead represents one frame in time. When you adjust the timing bead spacing on either side of a key, you slow down or speed up the movement of the object. Stretching out the timing beads slows the movement of the object into or out of the key, while compressing the beads speeds up the movement.
- You can also access this action in the Motion Trail Marking menu when you right-click a key on the Motion Trail. See Display and Edit Timing Beads in the Modify keys on a Motion Trail topic.
- Add/Remove Keys
- Lets you insert, move, or delete keys on a Motion Trail. See Modify keys on a Motion Trail.
- You can also access this action in the Motion Trail Marking menu when you right-click a key on the Motion Trail.
- Edit Marker Color
- Lets you pick a color for Markers.