
Edit a change notice before submission to a workflow
The Items tab is where the items you have sent to the change notice (CN) are displayed and where you configure additional information about the items to be sent for procurement.
Edit a change notice
After a CN has been created, you may edit it while it is still in a Draft state.
To edit a CN, click the Edit button in the top right corner.
You may now Edit the CN. When you are finished, click Save to save your changes or Cancel to cancel your changes.
Change the type
- Click the CN type drop-down list.
- Select either Regular requisition or Adjustment requisition.
- Click Save.
Change the workflow
- Click the workflow drop-down list.
- Select the workflow you want to use.
- Click Save.
Select items for procurement
- Select individual items or click the action menu next to a parent item and then select Select all released.
- Click Save.
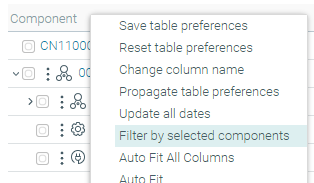
Once you have items selected, you can filter the BOM tree to show you only the items that have been selected. This makes it easier to review the items that have been submitted to the CN if your BOMs are large.
Change R quantities
Ensure the item has been selected.
Click the field in the R quantity column beside the item whose quantity is to be edited.
Type in a number:
- If this is for an order, type in a positive number (less than the P quantity).
- If this is for a return, type in a negative number (less than the H quantity).
Click Save.
Edit the required date
The default date shown here is six weeks from the current date. If you would like to change this:
Ensure the item has been selected.
Click the date field in the Date Required column whose date is to be edited.
Type in a new date in the format
MM/DD/YYYY. Alternatively, click the calendar icon ( ) next to the date field and navigate to your chosen date.
Click Save.
Alternatively, you can bulk update the date for all selected items. To do this:
- Ensure the item has been selected.
- Click the down arrow beside the Date Req’d column heading.
- Select Update all dates.
- Type in a new date in the format
MM/DD/YYYY. Alternatively, click the calendar icon () next to the date field and navigate to your chosen date. - Click Update.
Add notes
- Click the field in the Notes column beside the item whose note is to be edited.
- Type in your note. The limit is 255 characters.
- Click Save.
Return orphaned items and redistribute items
Click here for more information on how to manage orphans.
Attach documents
Click here for more information on attaching documents to the CN.