Menu Bar
The options in many of the menus can also be found in the context menu and QuickActions Bar.
File
Contains options for loading and saving materials, loading animation to the Materials Editor, rendering preview images, and viewing statistics.
 Load Materials - Enables the reuse of materials within other VRED projects, by importing saved materials into the library. Load all formats, such as AXF or HDR, using File > Load Materials. You can filter for HDR environment, Substance, X-Rite, and OCS materials. Materials are created using the original filename.
To create these materials, assign a texture file, like an AXF or HDR file. If you select multiple files containing any supported texture format, the Material Editor will create corresponding materials and assign textures to them automatically.
 Save Materials(s) - Save is available when materials have been previously selected; the dialog asks for a folder within the file system for storing the selected materials in OSB file format.
 Load Animation to Materials - Applies a saved material animation to the selected material nodes.
 Statistics - Shows some important statistics about the materials used within the scene, such as the number of materials and textures and amount of memory used by the materials.
Edit
Contains options for copying, pasting, merging, referencing, optimizing, removing, and locking/unlocking.
 Rename (Ctrl + R) - Renames the selected material.
 Copy (Ctrl + C) - Copies the selected material to the system clipboard.
 Paste (Ctrl + V) - Pastes a material saved on the clipboard into the Material Group.
 Duplicate (Ctrl + D) - Creates an independent copy of the selected material.
 Delete (Del) - Removes the selected material from the library when it's not in use.
 Paste Attributes - Pastes all material settings from clipboard to the selected material.
 Paste Texture Size - Pastes the copied texture size onto the selected material to resize it.
 Lock/
Lock/ Unlock - Avoids any change to the material when locked. Attributes from locked materials are not accessible until the material has been unlocked. A lock icon is added to the top left of the material's icon, when the material is locked.
 Create Light Source - Only available when Environment materials are selected. Opens the Create Light Sources from HDR module to add lights to your environment. Once the module opens, click the Create New Light Source button.
 Boost Light - Only available when Environment materials are selected. In some outdoor HDRs, the sun is too dark compared to the sky. This leads to incorrect lighting that's bluish look, with shadows that aren't contrasted enough, etc.
Use the Boost Light dialog to repair an HDR. All values in the HDR above a threshold (e.g., 95% of maximum value) are scaled up by a user-defined boost. Use this to make the sun brighter, compared to the rest of the HDR.
Important:If you choose to apply your boost settings to the environment, this action is not undoable, as the pixel values in the HDR are actually modified (overwritten).
 Inline Image Sequence - Inlines the image sequence into the .vpb file. When selected, loaded image sequences are packaged within the .vpb file. If the .vpb is moved to another computer, the image sequence does not need to be moved separately.
 Merge Duplicate Materials - Merges materials, based on the option selected in the Merge Duplicate Materials dialog that appears. Select one or more options, then click Merge. It can merge duplicate materials that are in switch materials. It allows sub-materials from switch materials or multipass materials to be merged. Locked materials are replaced during the merge by matching duplicates but their entries in the Material Editor will be not deleted.
With Same Names - Merges only materials that share the same name.
Ignore Names - Merges all materials, regardless of different naming. This might replace child materials of switches with duplicates that have a different name.
Warning:This can potentially break material variants and variant sets.
Include Switch Materials - When checked, switch materials are merged, if they are duplicated. This has no effect on the merge of children within switches.
Include X-Rite Materials - When checked, X-Rite materials are merged, if they are duplicated.
 Remove Unused Materials (Ctrl + U) - Removes all unassigned materials from the Material Group.
 Reference Unused Materials - Creates a reference to any unused materials, so that they are not erased by commands such as Remove Unused Materials.
 Optimize Textures - Optimizes textures to improve memory performance.
 Remove All Groups - Removes all material group nodes and places the materials in the top level of the Material Group.
Create
Contains options for creating materials, groups, switches, and environments.
Create Material - Creates a Truelight Material or Volume Scatter. Select materials from its list. See the Materials section for a full listing of available materials and options within VRED.
Create Environment - Creates an environment map material. Select an environment from its list: Sphere Environment, Skylight, Substance Panorama, and Environment Switch.
 Create Group (Ctrl + G) - Creates a new empty material group node.
Convert
There are different classes of materials supported within VRED. Truelight materials provide a photorealistic representation; this type of material is required for ambient occlusion calculation. Geometry that has been newly imported to VRED contains a standard OpenGL Phong material that doesn't support ambient occlusion calculation. Then there are Volume Scatter materials, which are used to create volumetric effects such as fog, smoke, or atmospheric scattering, where you control how light interacts with a volume, affecting its appearance and visibility. Convert helps to convert all three of these into either another material of the same or different type. It also helps to convert standard OpenGL Phong materials into Truelight Phong materials.
For an environment, if a skylight is selected, you can convert it to a sphere environment and vice versa.
Selection
Contains options for dealing with selecting things within a scene.
 Select Nodes (Ctrl + N) - Selects the geometry nodes assigned to the currently selected materials.
 Select Material - Selects the original material used in the grouped hierarchy (a switch, multi pass, or layered material). Select a child material within a switch, multi pass, or layered material, then right-click and choose Select Material to select the original material.
 Select all Occurances - Selects all occurances of the selected underlined material, expanding group hierarchies and highlighting the parent text blue, to show where a material is used. Now, with one or more materials selected, use Select all Occurrences to select all examples of its or their use.
 Select by Environment - Selects all materials with the same environment as the selected material in the Material Group or preview. Use it when there different environments used for different materials and you want to select all materials assigned to a specific environment.
When one or more environments or environment switches is selected with this option, all materials in the Material Editor with this environment assignment are also selected.
Note:If no materials have that environment assignment, nothing is selected.
With a material selected, right-click and choose Select by Environment or from the menu bar, choose Selection > Select by Environment.
 Scroll to Selection (Ctrl + Shift + F) - Scrolls to the selected material. This is useful when working with large lists of materials.
 Add Nodes to Selection (Ctrl + Shift + N) - Extends the selection in the Scenegraph to include nodes with the currently selected material.
 Group Selection - Creates a group from the selected materials, switches, or environments.
 Create Switch from Selection - Creates a switch material node and applies selected materials to it.
 Apply to Selected Nodes (Ctrl + M) - Applies the currently selected material to the selected geometry nodes in the Scenegraph.
 Apply Environment to Selected Nodes - Applies the selected environment to the selected nodes.
- Apply Environment to All Materials - Applies the selected environment to all materials.
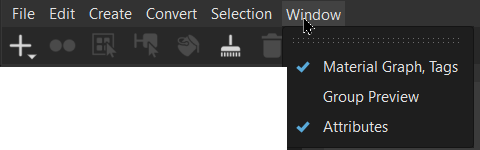
Window
Contains options for displaying one or more of these Material Editor components: Material Graph/Tags, Group Preview, and Attributes. When an option is checked, that component is displayed in the editor. When unchecked, it is removed.