
Group Preview
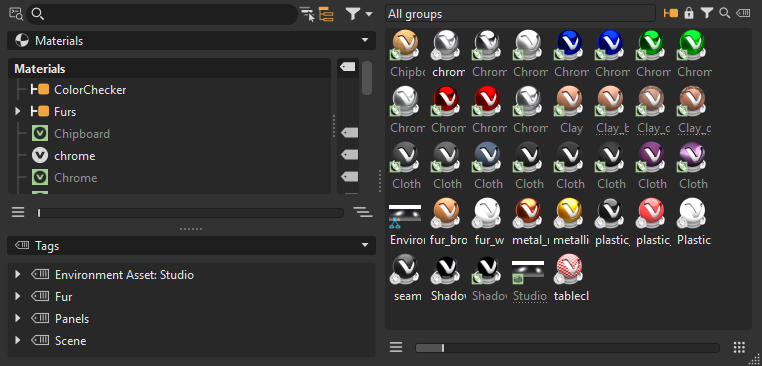
The preview shows a visual listing of materials, based on any search, filter, or selection in the Material Graph or Tag Lister. Use the slider at the bottom to increase or decrease the size of the previews.
If this pane is not displayed, in the Window menu, select Group Preview.
When a material group is selected, only a listing of the group materials is displayed, unless other operations have been performed, such as a search or filter.

If the group materials are not displaying, look at the toggles. If any toggles other than ![]() are activated and not required, click to deactivate them.
are activated and not required, click to deactivate them.
When no material groups or tags are selected, the entire listing of the scene materials is shown, unless a search or filter is still active.
If all materials are not displayed, look at the toggles. If any, other than ![]() , are activated, click to deactivate them.
, are activated, click to deactivate them.
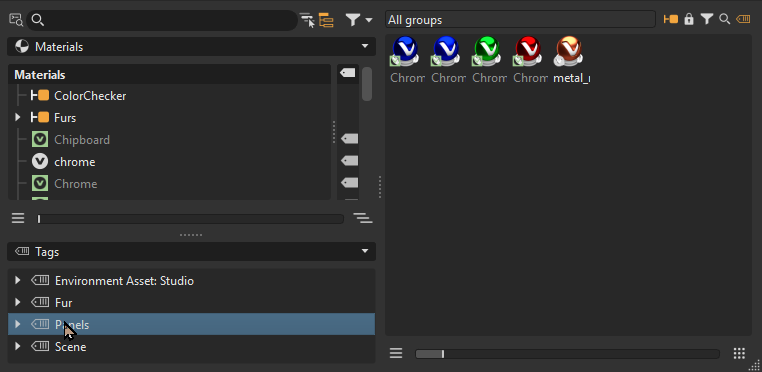
If a tag is selected, only the materials in that tag are shown, unless a search or filter is still active.
If the tag materials are not displaying, look at the toggles. If any toggles other than ![]() are activated and not required, click to deactivate them.
are activated and not required, click to deactivate them.
Filter Toggles
These filter toggles are automatically activated and deactivated, based on any search, filter, or selection in the Material Graph or Tag Lister. The only exception to this is ![]() , which is on by default, but can be manually toggled off.
, which is on by default, but can be manually toggled off.

Changes in the Tag Lister have a direct and automatic affect on the Group Preview. For example, selecting a tag in the Tag Lister will activate ![]() and display the tag materials. Clicking empty space in the Tag Lister automatically deactivates
and display the tag materials. Clicking empty space in the Tag Lister automatically deactivates ![]() and resets the display to show all materials. The filters, search, groups, and tags can be used in combination or individually.
and resets the display to show all materials. The filters, search, groups, and tags can be used in combination or individually.
![]() Toggle Group Lock - Activate to lock the group filtered material list, so no changes can be made.
Toggle Group Lock - Activate to lock the group filtered material list, so no changes can be made.
![]() Toggle Group Filter - Activated by default. Use it to display only materials from a selected group. Once deactivated, it must be clicked to reactivate it.
Toggle Group Filter - Activated by default. Use it to display only materials from a selected group. Once deactivated, it must be clicked to reactivate it.
![]() Toggle Type Filter - Activated once a filter is performed. The materials displayed are the result of this filter. It is automatically deactivated when the Select none filtering option is selected.
Toggle Type Filter - Activated once a filter is performed. The materials displayed are the result of this filter. It is automatically deactivated when the Select none filtering option is selected.
![]() Toggle Search Name - Activated once a search is performed. The materials displayed are the result of the search. It is automatically deactivated when the search criteria is removed from the Search field.
Toggle Search Name - Activated once a search is performed. The materials displayed are the result of the search. It is automatically deactivated when the search criteria is removed from the Search field.
![]() Toggle Tag Filter - Activated once a tag is selected in the Tag Lister. The tag materials are displayed. It is automatically deactivated when you click the empty space in the Tag Lister.
Toggle Tag Filter - Activated once a tag is selected in the Tag Lister. The tag materials are displayed. It is automatically deactivated when you click the empty space in the Tag Lister.
Material Preview Icons
Every scene-related material is represented by a small icon in the lower left corner of the material preview to identify what it is.
Interactions
The way you click within the Group Preview determines the action.
- Clicking a material selects and loads its attributes into the Attributes to the right.
- Right-clicking opens the context menu.
- Clicking a material, then its name, enables renaming. To rename an asset material, see Modifying and Saving an Asset.
Multi Material Selection
When multiple materials are selected, you can change values for the complete selection at once in Attributes. This means you can set an override for multiple materials.
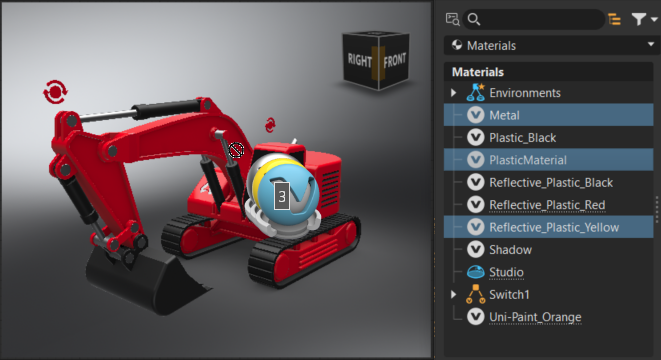
Material Assignment Preview
When dragging materials from the Material Graph or Group Preview, a preview appears next to the drag cursor. When you drag the material over an object, it provides a preview of the material assignment. This helps you avoid mis-assignment. If the material is correct, drop it; otherwise, return to the Material Editor and select a different material.

Dragging to Assign Materials
Assign materials by dragging them onto objects in the render view. The mouse button used determines the action.
LMB - Replaces the material on a single object.
MMB - Replaces the current material with the dragged one for all objects sharing the original material assignment.
RMB - Creates a material switch or multi pass material, based on your selection in the pop-up menu, for all objects sharing the original material assignment. Both materials (previously assigned and dragged) are present within the newly created switch or multi pass material.
If a switch or multi pass maerial is already assigned to the geometry, the material is added.
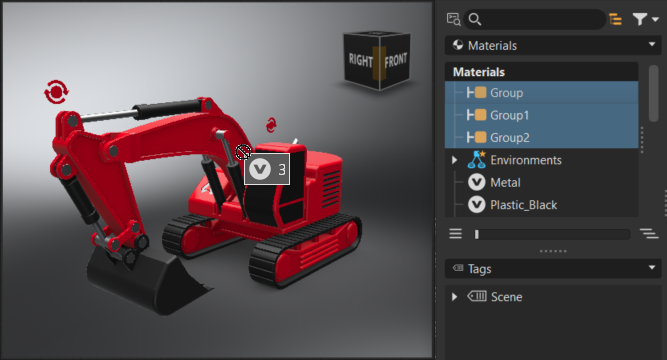
Dragging Multiple Materials or Material Groups
If multiple materials or material groups are selected and dragged, using RMB, the material preview next to the cursor displays the number of selected materials or material groups. The order of the selection is preserved and the materials will be stacked as expected.
Once the RMB is released, one of the following occurs:
A dialog appears with the option to create a switch or multi pass material and add them to it.
If a switch or multi pass material is already assigned to the geometry, the materials are added.
Where Materials Can Be Dropped
Here is a list of all the places where materials can be dragged and dropped.
Assets Manager - Drop groups of materials, material multi-selection, or single materials.
Media Editor - Drop the material onto the Material field.
Node Attribute Editor - Drop a material here to see the details of the material.
Render Layer - Drop a material onto the Empty field in the OverrideMaterial column.
Render Window - A material can be dropped the following ways:
- Drop a material onto geometry (LMB) to apply the material to this node.
- Drop a material onto geometry (MMB) to apply the material to all nodes with this material.
- Drop a material onto geometry (RMB) to add the material as either a switch or decal.
Scenegraph Scene Tree - A material can be dropped the following ways and places:
- Drop a material onto geometry (LMB) to apply the material to this node.
- Drop a material onto geometry (MMB) to apply the material to all nodes with this material.
- Drop a material onto a group to apply to all nodes in this group.
Scenegraph Scene Tree Tags - Drop a material on a tag or node in the list. The material is applied to all nodes with the tag.
Variants - A material can be dropped the following ways:
- Drop switch into the Name pane to create a variant for the material.
- Drop a non-switch into the Name pane to create a switch material containing the dropped material.
- Drop a material into the Base pane to add it to a switch.
Variants Set - Drop a material into the Material tab. A Variant Set must exist.