Export JSON from DWG Migration and Integrity for Docs Tool
Once you've downloaded and installed the DWG Migration and Integrity for Docs tool and Desktop Connector, you can now select local AutoCAD or Civil 3D folders to create a JSON file to upload to the Bulk Upload Tool.
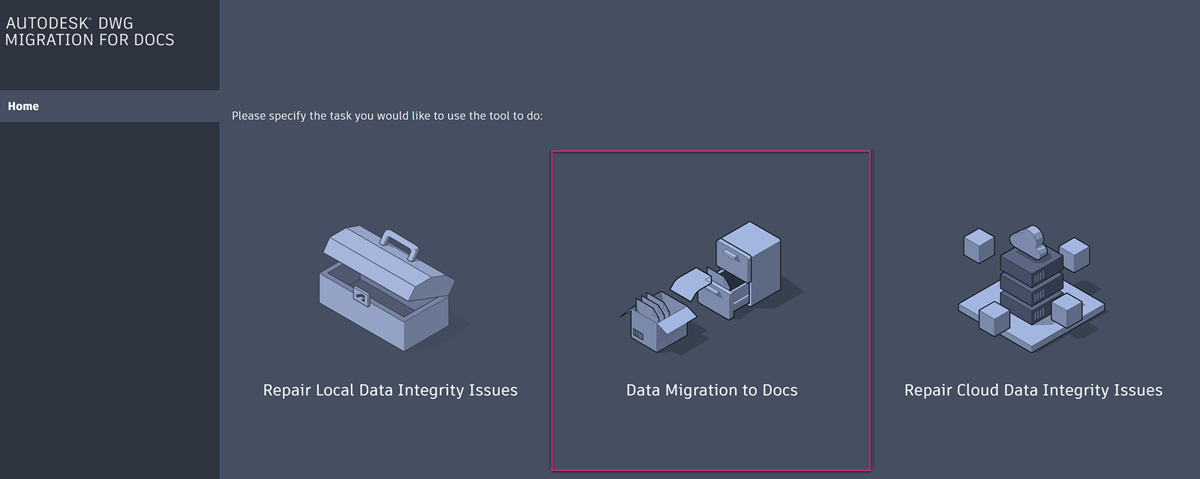
Open the DWG Migration and Integrity for Docs tool.
Click Data Migration to Docs.

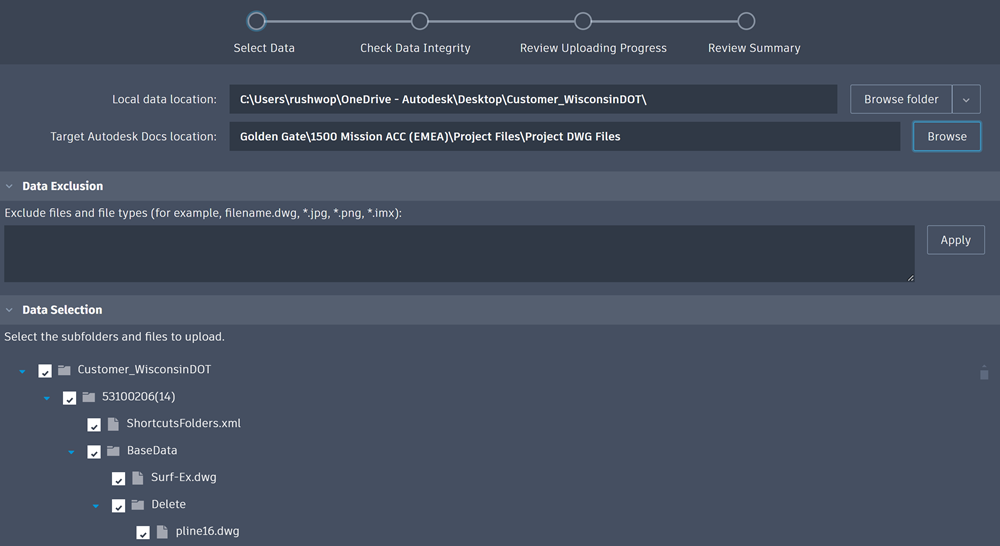
Click Browse folder to the right of the Local data location field.

Select your local AutoCAD or Civil 3D folder which contains the folders and files you want to upload to Docs with the same structure.
Click Upload in the dialog.
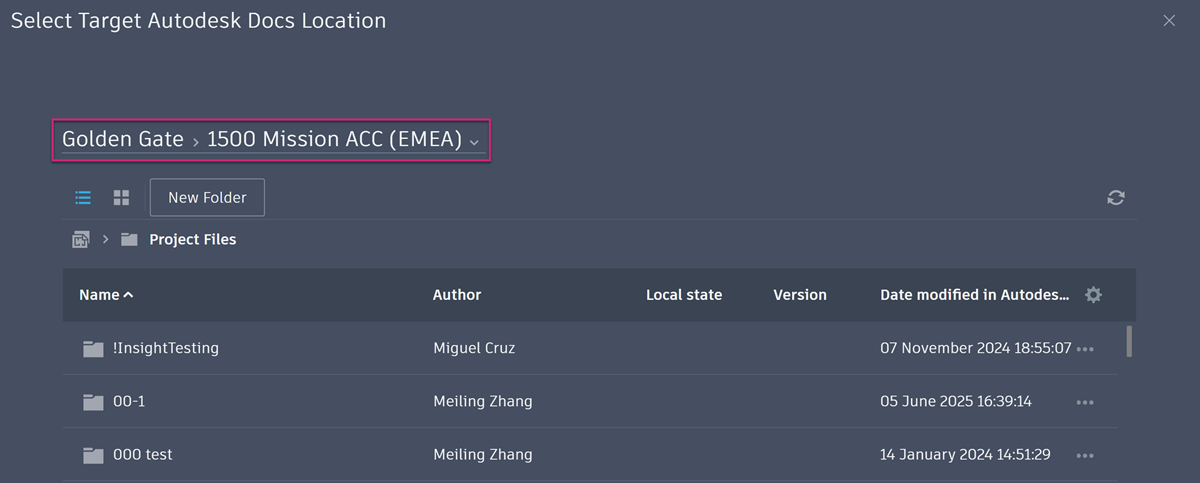
Click Browse to the right of the Target Autodesk Docs location field.
Note: If you get the error message You are not currently a member of a document management account, this means that you haven't added any projects to Desktop Connector. See Docs - Manage Projects in the Desktop Connector help for details on how to add projects.Select the relevant project in Docs where you want your folders and files to upload. Click the project drop-down to view and select a different project you've added to Desktop Connector if necessary.
Click the relevant project upload folder. You can click New Folder to create a folder if necessary.
 Note: You can't upload to a folder with a naming standard applied.
Click Select.
You can now exclude any files and folders you don't want to include in the JSON files. This is useful as you can exclude file types which aren't supported by Docs as you won't be able to upload these to project folders.

Data Exclusion
Enter the filename and extension to exclude a specific file. For example, filename.dwg
Enter an asterisk and a file type to exclude all files with that type. For example, *.jpg
Separate multiple entries with commas.
When you have entered any specific files and file types to exclude, click Apply.
Data Selection
You can deselect any folders and subfolders to exclude them from the JSON file.
Click Next.
The system will take a few minutes to check the data integrity of the files. This includes checking for circulate and missing references, long path issues, and duplicated file names.
Any issues are detailed when the check is complete and icons are displayed in the Status column.
If you want to resolve the issues, hover the information icon in the help column and follow the instructions.

Click Next.
Click Export Reference Relationship JSON. Do not click Start Uploading as this will not create the JSON file required to upload files with references in the Bulk Upload Tool.
Select a local folder to save the exported JSON file and name the file.
Click Save in the dialog.
Exporting the JSON file may take a while. Wait until the export is complete before starting a new job, as doing so may interrupt the export process. Once the export is finished, a dialog box will say File successfully exported to JSON.
Important: If you export a Reference Relationship JSON for use in the Bulk Upload workflow, make sure to use it shortly after export , otherwise the following issues may occur:- Outdated JSON: Changes to your local project may cause the exported JSON to become invalid.
- Missing Reference Files: Windows may automatically remove temporary files used for reference fixing, which can result in an invalid JSON or incorrect upload results.
