
Create an engineering project
For users with Fusion connected sites, references to the 'Items' workspace should be the 'Components' workspace.
Navigate to Workspaces > Engineering Project Management > Engineering Projects.
Click Create
 .
.In the Header section, fill in all fields as necessary. Required fields are marked with a red asterisk.
(Optional) In the Number field, enter an alphanumeric value to identify the project. If you leave this field blank, Fusion Manage fills this in with the default numbering scheme for items in this workspace upon creation of the project.
In the Title field, enter a name for the project.
(Optional) In the Description field, enter additional information about the project.
In the Schedule From field, select whether to schedule all activities from the kickoff date or from the completion of milestone 5 (the final milestone).
- If you choose Kickoff, you must enter a project start date in the Kickoff Date field.#
- If you choose Milestone 5, you must enter a project completion date in Project Schedule > Planned Completion > Milestone 5 field.
In the Template field, click to select the project template to use. The template chosen is used to automatically fill in many fields within the project from the values in the template. This means a template saves you from having to fill in a lot of this information manually for each new project.
Click Save.
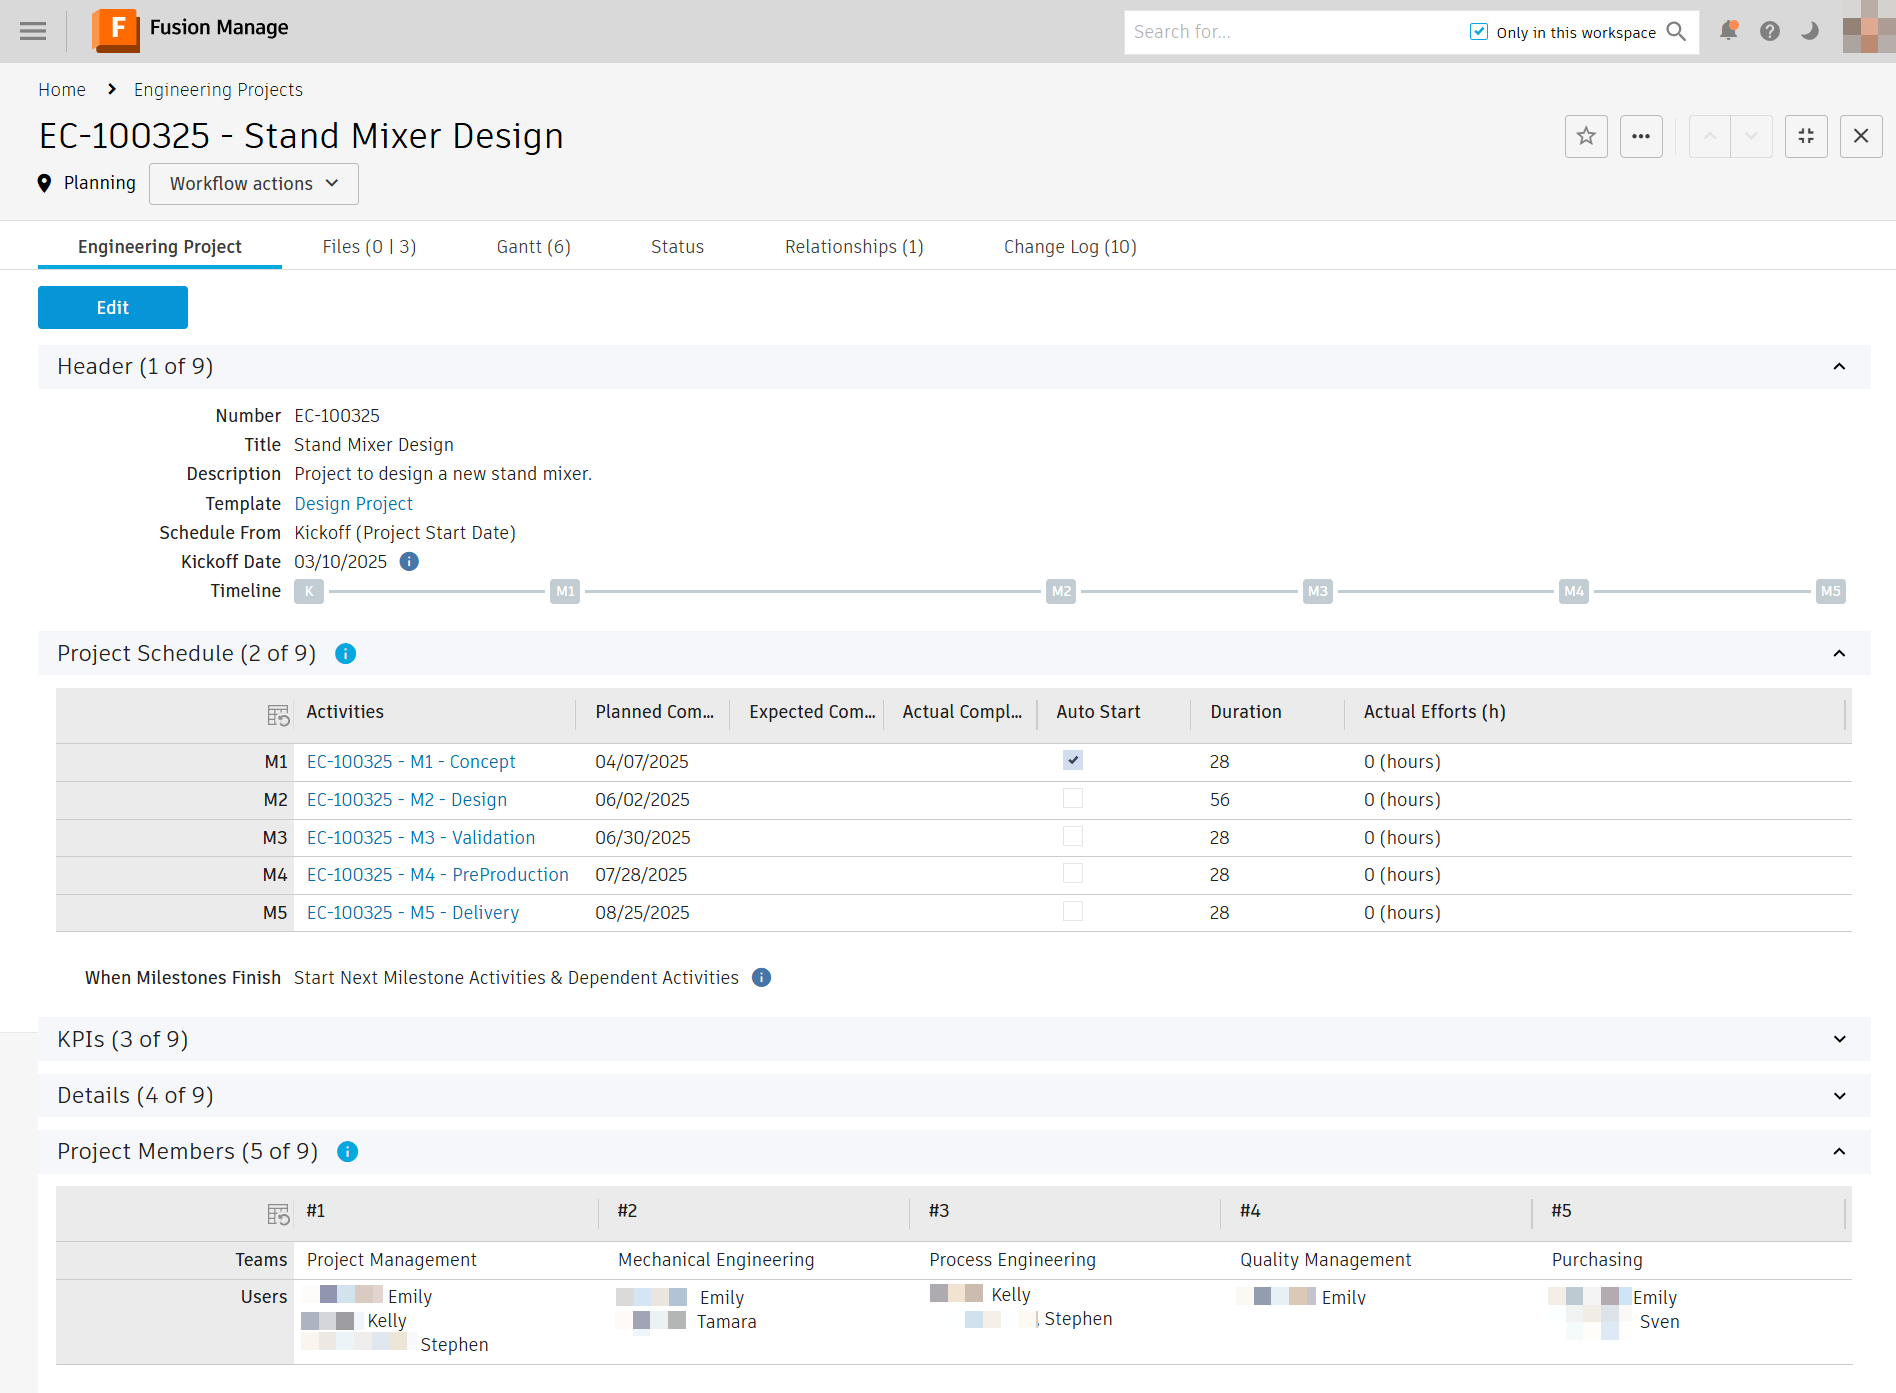
The project is created and assigned an item number based on what you’ve typed in the Number field, or the rules set for items in this workspace if you left it blank.
The Project Schedule section is filled in based on the specified kick-off date and the duration of activities set in the chosen project template.
The Project Members section is filled in based on the chosen Schedule From option, the corresponding date chosen, and the duration of activities set in the chosen project template. For each team, you specify all team members that belong to that team. This creates a mapping between the team name and the people on the team. Then, when activities are assigned to teams, every member in the team is notified and can decide to work on the activity. This means you can have different people in each team for every project, which provides flexibility in people management.
The Files tab may show something like ( 0 | 3 ) beside the tab name. The first number indicates how many attachments have been uploaded directly to the project. The second number indicates how many attachments were brought into this project from the project template. They appear in the Related Attachments section.
The Gantt tab is populated with project activities based on the kick-off date or project end date chosen and the duration of tasks set in the project template. Each activity is assigned a number which is a combination of the project number and activity ID specified in the template. Each milestone is named according to the names given to the milestones in the chosen template. They are also created as an activity and all activities are nested underneath their corresponding milestone as specified in the project template. All activities are added to the Engineering Project Activities workspace. If you specified dependencies between activities in the template, then they are shown in the order they must be completed.
The Relationships tab shows the template that was used to create this project.
Edit a project
Many sections are filled in automatically or as the project progresses. You may now tweak what needs to be updated for this specific project if it differs from the template.
Click Edit.
In the Details section, fill in all fields as necessary. Required fields are marked with a red asterisk.
Scope – Enter the scope of the project. This might include information on what tasks should and should not be included in this project.
Business Unit – Enter the specific business unit this project is for or might be completed by.
Industry – Enter the general industry this project falls under.
Customer – Enter a customer the project relates to.
Product – Select a product this project relates to.
Note: Your site administrator may configure these fields to be drop-down lists with pre-determined values or values from other workspaces.
The Project Members section will already be filled in based on the values brought in from the chosen project template. Adjust the fields as necessary for the current project. Required fields are marked with a red asterisk.
- Teams – Select up to five teams that will be involved with this project.
- Users – Select the users that belong in each team.
In the Key Deliverables section, fill in all fields as necessary. Required fields are marked with a red asterisk.
Note: Your site administrator may configure these fields to be drop-down lists with pre-determined values or values from other workspaces.Click Save.