
Initiate approval process
For users with Fusion connected sites, references to the 'Items' workspace should be the 'Components' workspace.
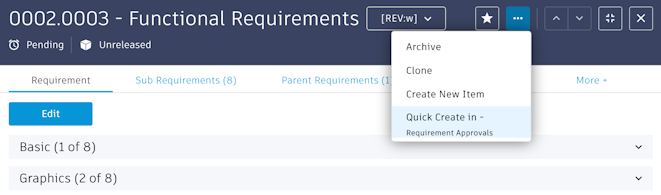
Approval processes can be initiated from any requirement by using the Quick create action menu from a requirement. Autodesk recommends creating this approval processes from a parent requirement as this enables to easily approve a group of requirements and not just one.
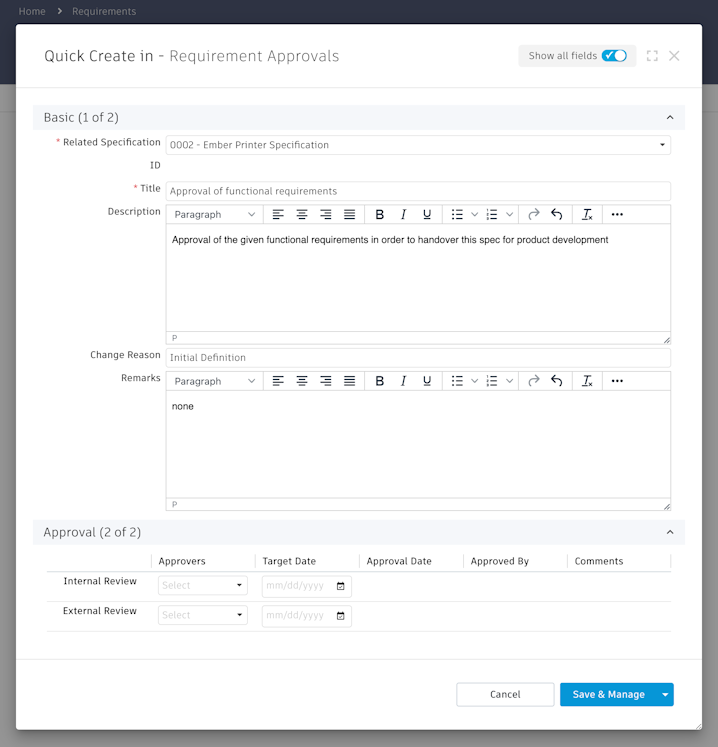
Provide these details when creating a new Requirement Approval process. Use Show all fields to focus on required inputs only.
Field |
Description |
|---|---|
Related Specification |
Select the specification that your requirement to be approved belongs to. |
Title |
Name your approval process to indicate the context and purpose of the process |
Description |
Provide more details about the purpose of this process if needed |
Change Reason |
Explain why this approval is required. This can become key if there are late changes to requirements that were approved before already. |
Remarks |
Any further comments and instructions that might be of relevance for this process. |
Internal Review Approvers |
Select users that should perform the internal approval. If given approvers are defined on the selected specification already, these users will be added to the list anyway right after the approval process creation. |
Internal Review Target Date |
This optional date can be set to have a milestone created for the internal review, enabling to set the right focus for this process |
External Review Approvers |
Select users that should take care of the external approval and document its outcome. If given approvers are defined on the selected specification already, these users will be added to the list anyway right after the approval process creation. If this field is left empty, the workflow step External Review will be skipped. If it is not empty, this workflow step will be enforced. |
External Review Target Date |
This optional date can be set to have a milestone created for the external review, enabling to set the right focus for this process |
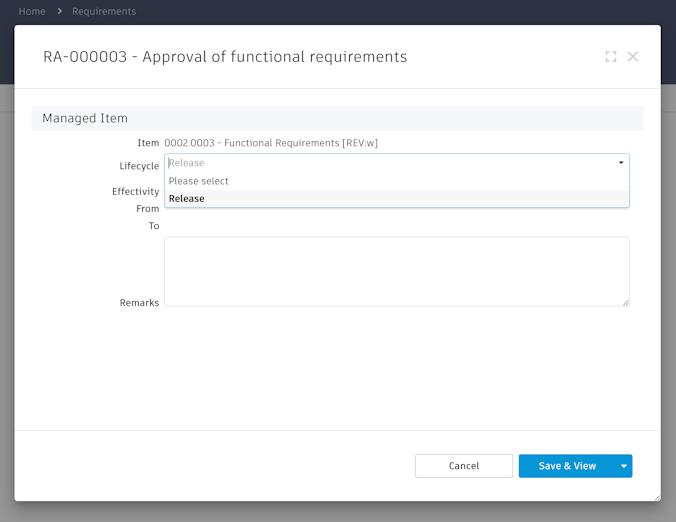
After clicking Save, you are prompted to define the managed item lifecycle action. If this approval process is dealing with a single requirement only, Autodesk recommends selecting the Release operation before clicking Save & View. This information also can be provided and adjusted at any time later in the screen that follows.
A new approval process now has been created and a number will be shown on top as reference. The view Affected Requirements enables to add further requirements that should also be approved with this process if needed. Use the Add button to search for the given requirements by name.
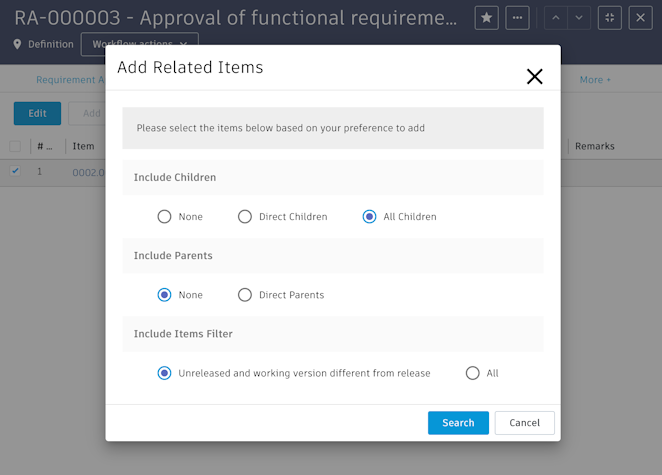
In this scenario, the currently listed requirement is a parent requirement, and its sub requirements should be released as well. The command Add Related Items enables to add the related sub requirements to this list easily:
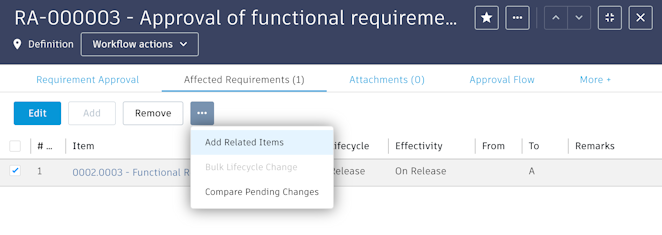
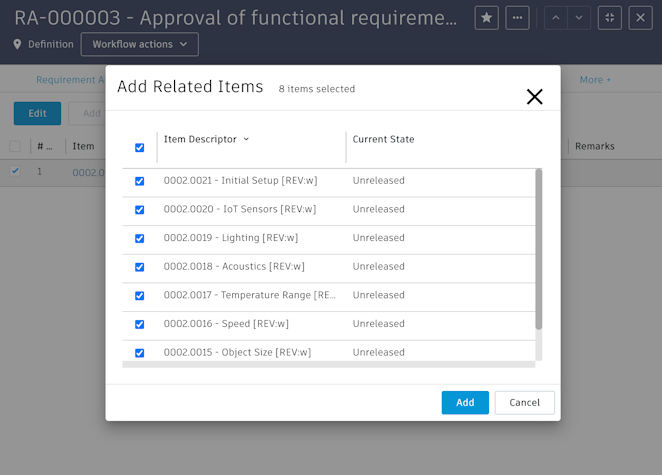
Use the Add Related Items dialog to find sub requirements on all levels that have not been released, or modified since their release, then click Add.
| Add Related Items: Settings | Add Related Items: Results |
|---|---|
 |
 |
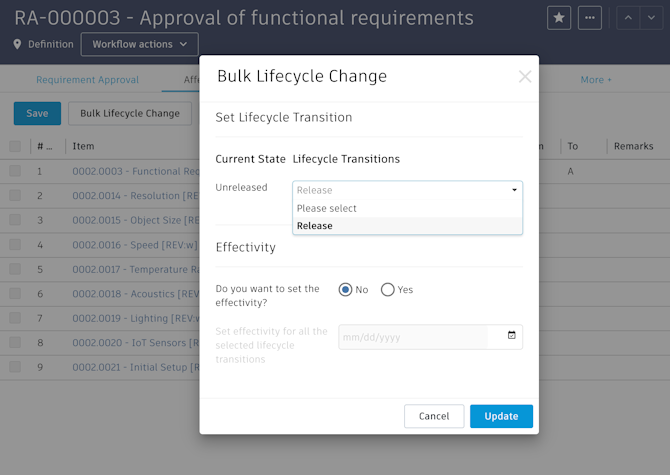
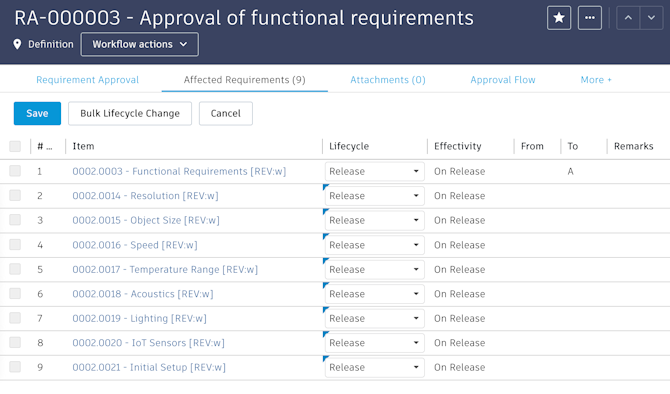
Now that all (sub) requirements are included in this list, click on Edit and Bulk Lifecycle Change to select the lifecycle action Release for all the given requirements. Confirm by clicking on Update.
Do not forget to save your changes by clicking Save in the top left corner.
Finally, to notify given stakeholders and to request approval, submit this process with the list of requirements for review. Use the action Submit for review in the Workflow actions menu to do so or click the given transition in the Approval Flow tab:
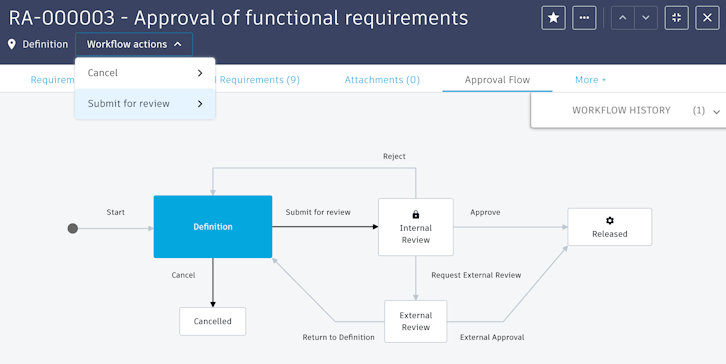
Once the approval process is submitted to status Internal Review, it will be locked as shown in its header, preventing changes to its details and the list of affected requirements. All internal reviewers now will be notified about the approval request by mail and find the given process in their My Outstanding Work list in their landing page.
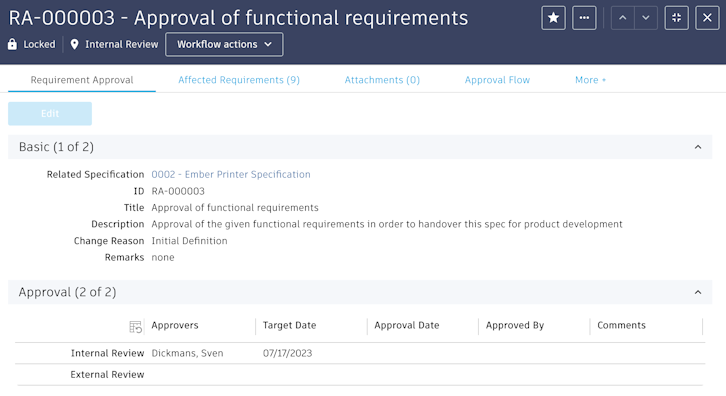
As a Target Date was defined for this process, a milestone was created which will be shown to the list of approvers as well.
