
 Reverse Mesh Orientation
Reverses the direction of the normals on mesh components, or on the whole mesh. Use this tool when you need to have all mesh normals pointing in the same direction.
Some tools, such as Mesh Offset require that all components of a mesh have their normals pointing in the same direction.
Access this tool from the Mesh tool palette:

Reverse Mesh Orientation workflows
Show mismatched normal directions
Click the Multi Color icon.
Click the small arrowhead to open the options section.
Turn on the new Show Orientation option.
If mesh components facing in the same direction (either toward or away from the camera) are shaded in both blue and yellow, your model exhibits mismatched normal directions.
Reverse the direction of normals on a component
Select the Reverse Mesh Orientation tool.
.All meshes are shaded in blue and/or yellow. Blue indicates components that have a normal pointing toward the camera, and yellow, away from the camera.
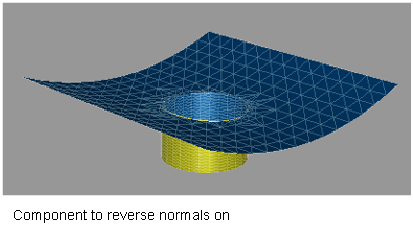
Select the component that you wish to reverse.
Click the Reverse Component button.
The direction of the normals is reversed on the component. The shading color changes.
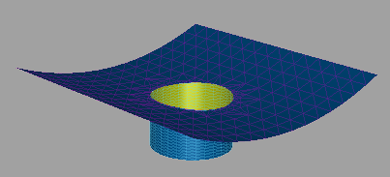
Click Reverse Component again to undo the operation, or select another component to reverse normals on.
To reverse the normal direction on the whole mesh, click the Reverse Mesh button.