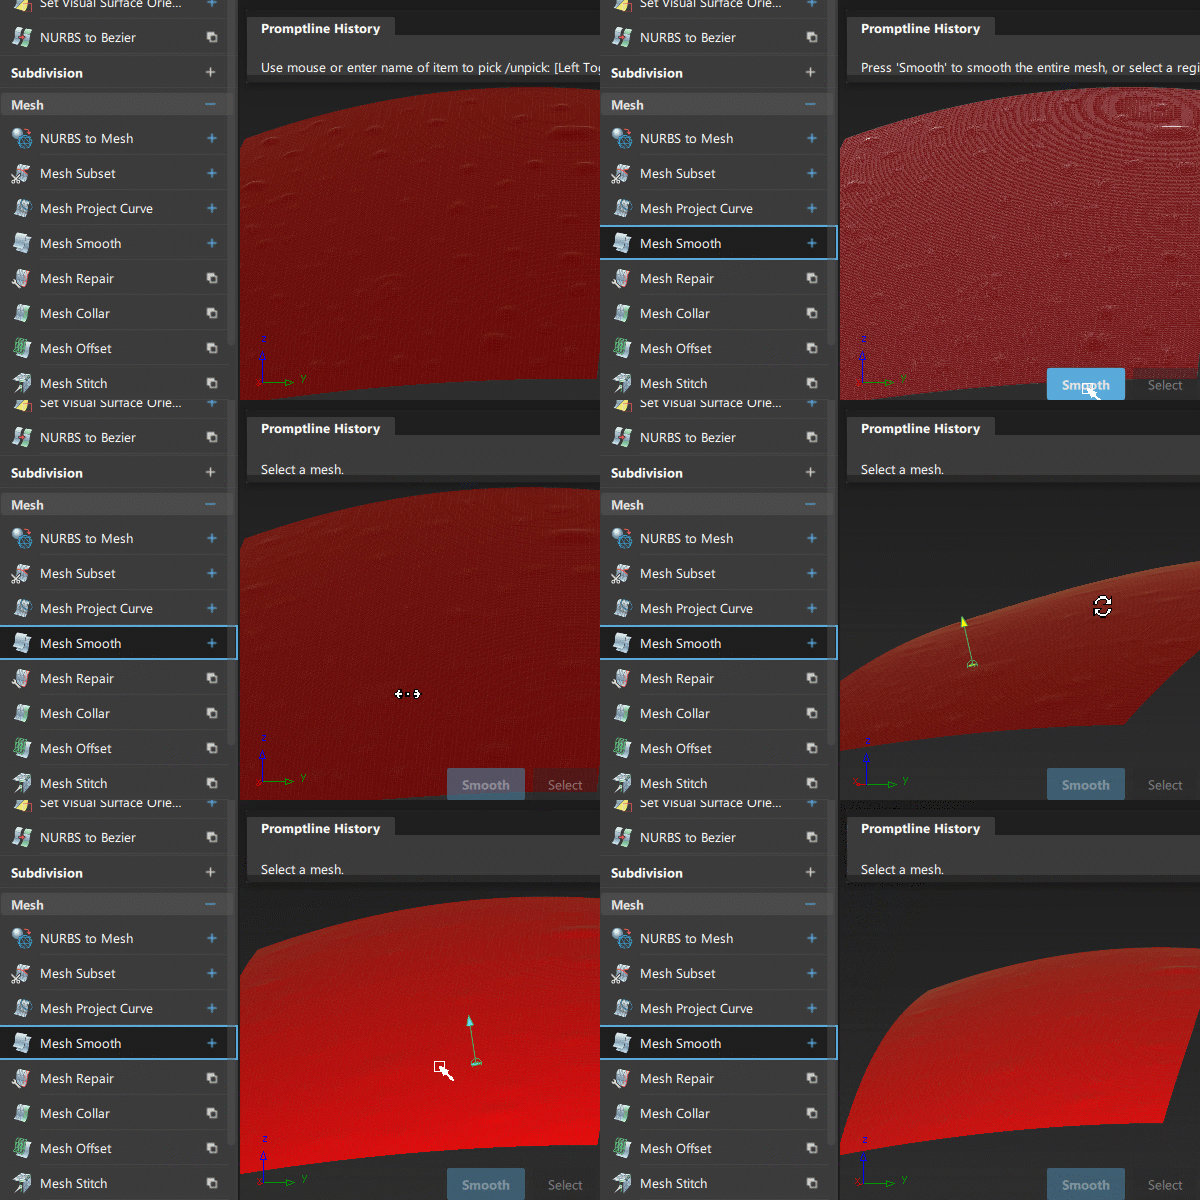
 Mesh Smooth
Smooths regions of a mesh. To better see the smoothing effect, first shade your mesh by using Visualization > Diagnostic Shading or Visualization > Hardware Shade.
Increasing the mesh Transparency in the Control Panel also helps.

Access this tool from the Mesh tool palette:

Mesh Smooth Control settings
Preserve Features
When this option is checked (default), the tool attempts to smooth the mesh while preserving the local features within the selected region. If the box is unchecked, the smoothing effect tends toward an overall “flattening” of the region.
Radius
Defines a radius value around each vertex. All vertices located within that radius and connected to the center vertex affect the movement of the center vertex.
We recommend that you use a small radius for better results. If the results are not satisfactory, you can use Edit > Undo and change the radius later.
Fix Boundaries
If this option is checked, the edges of the mesh remain fixed while the mesh is smoothed.
This option is turned on by default.
Number of Iterations
This slider has a range of 1 to 10 and specifies how many smoothing iterations occur every time you click the Smooth button. The default is 4.
Show Deviation Map
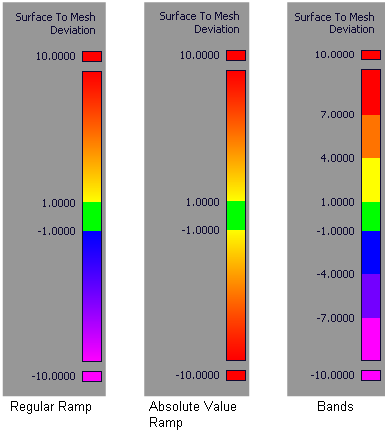
If this option is checked, a color deviation map displays the deviation between the original mesh (prior to entering the tool) and the smoothed mesh. A deviation scale (ramp) also appears. This shows you what areas of the mesh have been affected, and by how much.
Deviation Map Settings
These options only appear if Show Deviation Map is checked on.
Auto Ramp
If this option is checked (default), the color scale updates automatically based on a range between zero and the maximum deviation from the last operation.
Ramp Distance
Maximum distance between original and modified mesh shown on the color ramp. Areas on the mesh where the deviation is larger than this value are displayed in a solid color (red or purple). The default is 10.0 mm.
Acceptable Distance
Upper limit for the acceptable deviation between original and modified mesh. Regions of the mesh where the deviation is smaller than this value are colored in green. The default is 1.0 mm.
Where the value of the deviation is between the Acceptable Distance and the Ramp Distance, the mesh displays intermediate colors as shown on the ramp.
Absolute Value Ramp
Turn on this option if you are not concerned with the direction of the deviation and simply want to view absolute deviation values.
Use Bands
Turn on this option if you want the ramp to display solid bands of color instead of slowly varying colors.

Vertex Movement
Greatest
Non-editable field displaying the maximum vertex deviation.
Restrict
If this option is checked, the smoothing process stops when the maximum vertex deviation between the original mesh and the smoothed mesh reaches the value of Maximum Permitted.
Maximum Permitted
Maximum vertex deviation allowed between the original and smoothed mesh.
This option only appears when Restrict is turned on.
Selection Options
Selection Mode
Defines how you select triangles on the mesh:
Normal Angle – Click on an area of the mesh to select a connected range of triangles where the angle between a selected triangle's normal and the normal of the triangle you clicked is less than the set Max Angle to normal. Right-click to deselect. Continue clicking to add to or subtract from the selection.
Brush – Drag on the mesh with the left mouse button to select triangles within the Pick Radius.
Lasso – Click points on the mesh to define a selection area and then click Select.
Mesh Smooth workflow
To better see the smoothing effect, first shade your mesh by using Visualization > Diagnostic Shading or Visualization > Hardware Shade. Increasing the mesh Transparency in the Control Panel also helps.
Select the Mesh Smooth tool
 .
.Select the mesh to smooth.
To smooth the entire mesh, go to step 5.
Select the triangles to smooth using the selection mode set under Selection Options in the Mesh Smooth Control window.
The selected triangles are highlighted in blue.
Click the Smooth button repeatedly until the desired amount of smoothness is achieved.
The mesh updates after each iteration.
Note: To keep the vertices from moving by more than a certain amount, turn Restrict on, and use the Maximum Permitted option.To see a color deviation map showing the deviation between the original and smoothed mesh, turn on Show Deviation Map and adjust the Deviation Map Settings if necessary.
The color map display updates each time you click the Smooth button.
Use Edit > Undo to undo successive smoothing iterations.
The color map display updates for each smoothing step that you undo.
