
Data contained in Scalar and Spatial time series data objects can be edited by the user in the Time Series Data grid .
Which data is user editable depends on the dimensionality (scalar/spatial) and the type (observed/forecast) of the stream. Any fields that can be used in a user edit as described below, and only those fields, can be applied to the real data.
Observed data
The fields of a time series point which can potentially be edited are value, flag, and whether the data point is to be excluded or protected.
In addition new time series data points can be added with a new timestamp, using the
 button, depending on the stream type and dimensionality:
- For scalar observed data, all of these fields can be used in a user edit. New time series data points can be inserted.
- For spatial observed data, all fields except for value can be used in a user edit. New time series data points cannot be inserted.
Forecast data
Only the forecast origins are editable ( check box and
Flag field can be modified), the forecast data itself cannot be edited.
check box and
Flag field can be modified), the forecast data itself cannot be edited.
This means used edits on forecasts are restricted to the following: flag, whether the forecast origin is to be excluded or protected.
If exclude is set on a time series data point for a forecast origin this means all of the forecast data for that origin would be ignored.
Working with user edits
To create a new user edit
- Ensure that the data time zone is correct.
-
Click New in the User Edit section.
The New User Edit dialog is displayed.
- Type in a name for the edit and click OK.
- The user edit becomes current (the User Edit combo box is populated with its name) in the Time Series Data grid.
- Make the desired edits. See the sections below for details.
- Click Save to save the changes to the user edit.
- Click Apply Edits to commit the changes so that they are available to all users.
To save a user edit
- Select the user edit in the User Edit combo box of the Time Series Data grid.
- Make the desired edits.
- Click Save to save the changes to the user edit.
To edit an existing user edit
- Select the user edit in the User Edit combo box.
- Make the desired edits. Usually, values (User Value column) and flags (User Flag column) can be edited, and data can be excluded from runs.
To change a user value, you can either select the cell and type in the new value or you can right-click on one or more selected cell(s) and choose one of the following options from the context menu:
- Set new value(s) for cell(s), which displays the New Cell Value dialog. Type a new value for the selected cells and click OK.
- Adjust current value(s) for cell(s), which displays the Adjust Cell(s) Value dialog. Enter the values by which the selected cells are to be amended and click OK.
- Insert timestep, which inserts a new timestep after the cell from which you selected this option.
- Insert multiple timesteps, which displays the Add Multiple Timesteps (after) dialog. Use the arrow keys to specify the number of new timsteps you want to add, and then click OK. The specified number of timesteps will be added after the cell from which you selected this option.
- Click Save to save the changes to the user edit.
To delete a user edit:
-
Select the user edit in the User Edit combo box and click Delete.
The user edit is deleted.
Excluding data points / forecast origins
To exclude data points:
- Ensure that the data time zone is correct.
- Tick on the
column for the desired rows (spatial time series data only) or delete the user values of interest in the User Value column (scalar time series data only).
- Save the edit.
- Click Apply Edits.
The following message is displayed:
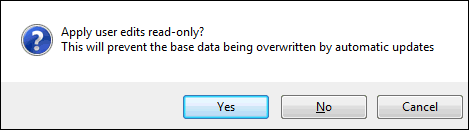
- Click No to apply the edits in normal mode (such edits may be overridden by subsequent updates from external sources).
A strike-through is used to indicate that the rows will not be used.
Protecting edits
Edits can be protected so they will never been overwritten by external source updates.
For this, follow the steps presented in the sections above for editing time series data.
When you click Apply Edits, select Yes on the Apply user edits read-only? message instead of No.
A padlock ( ) appears to the left of the row(s), indicating that the data is protected.
Time series data may also be manually (on demand update) or automatically (scheduled or triggered update) updated from data sources. See Updating Time Series Data for details.