
Morph

Use the Morph tool to morph together frames from two clips. This tool is useful to ease a transition or to apply a morphing effect.

| Access | To access the Morph menu, use:
|
| Inputs |
|
| Outputs |
|
All connected inputs must have the same resolution.
Settings
Frame Interpolation
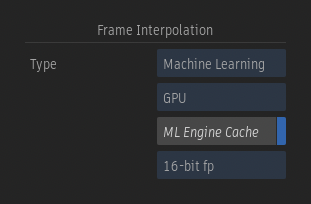
Frame Interpolation option
Select the frame interpolation mode used to create the morphing effect.
| Mode: | Description: |
|---|---|
| Machine Learning | The inference uses two frames to generate an intermediate frame. |
| Motion Vectors | The Motion Vectors mode blends frames with sub-pixel accuracy. |
Rendering Platform option
Select whether the Machine Learning inference runs on the CPU or GPU.
On Linux, an inference can be run using either the CPU or GPU. On macOS, the inference is always run on the CPU. Running the inference is faster on the GPU, but larger frames that cannot be rendered using it can be rendered using the CPU.
ML Engine Cache
Enable to use NVIDIA's TensorRT cache and improve the inference time.
This option is only available on Linux.
Bit Depth option
On Rocky Linux, when using the GPU rendering platform, you can choose between running a model in 16-bit fp or 32-bit fp.
Selecting 16-bit fp offers the following advantages:
- It allows running a model on higher resolution images, since running in 16-bit fp requires less memory.
- It provides better performance.
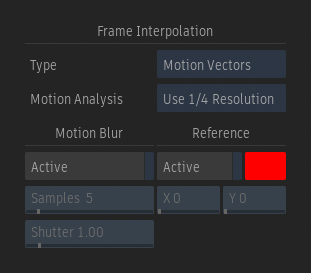
Motion Analysis Quality option
Select the level of motion analysis accuracy and rendering speed. Select Use Full Resolution to render the images at the current resolution.
Motion Blur Active
Enable to apply a motion blur to the morphing effect.
Motion Blur Samples field
Sets the number of frames to sample when creating the morphing effect. The samples include the current frame, and an equal distribution of past and future frames.
Motion Blur Shutter field
Sets the number of frames for which the shutter stays open. For example, when the shutter value is set to 3, every third frame is as a sample.
Reference Active
Enable to apply the morphing effect only to objects that do not have the same relative motion as the selected pixel. When enabled, you can edit values in the X and Y fields.
When enabled, you can edit values in the X and Y fields, or click a pixel in the image to use it as the reference position.
Reference Colour
Sets the colour of the crosshair that marks the reference point inside the Player / Viewport.
Reference X Position field
Sets the horizontal position of the pixel to use as a reference point at the selected frame.
Reference Y Position field
Sets the vertical position of the pixel to use as a reference point at the selected frame.
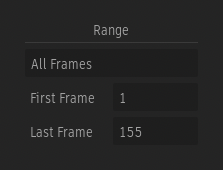
Range
The Morph effects applied in the Timeline are always applied to the full length of the timeline segment or transition they are applied to. The Range setting is set to All Frames and cannot be modified.
In Batch and Batch FX, the Range setting can be set to Custom Range. This allows you to only morph the frames inside a specified range. The frames that are outside the specified range are not affected by the morph process in the result.
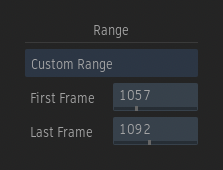
Range mode
Select All Frames to apply the effect to the duration of the clip connected to the Outgoing input. Select Custom Frames to apply the effect to a different range.
First Frame field
Sets the first frame used for the morphing effect between the Outgoing and Incoming inputs.
Last Frame field
Sets the last frame used for the morphing effect between Outgoing and Incoming inputs

When the Custom Range mode is selected, the specified range appears between green marks inside the Batch and Batch FX Timebar.
Morphing
Use the settings under the Morphing section to adjust the result of the effect.
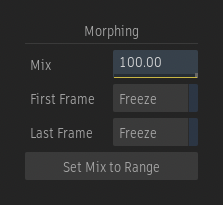
Mix field
Sets whether the result of the morphed frames looks closer to the frames of the Outgoing (100%) or Incoming (0%) input.
Freeze First Frame
Enable to only use the first frame of the outgoing clip over the duration of the effect.
Freeze Last Frame
Enable to only use the last frame of the incoming clip over the duration of the effect.
Set Mix to Range
Set the first and last keyframes of the Mix channel to the Range's First Frame and Last Frame. All keyframes manually added in-between are preserved.
Workflow
The playback and scrubbing of unrendered frames is now more interactive in the Timeline environment due to the Player option available in the Morph Preferences. By default, scrubbing and playback show a dissolve effect instead of the result of the Morph node.
The options are:
| Select | To |
|---|---|
| Result on Scrub / Play | Always display the result of the Morph node. |
| Dissolve on Scrub | Display a dissolve instead of the Morph node's result while scrubbing in a clip. |
| Dissolve on Play | Display a dissolve instead of the Morph node's result while you are playing back a clip. |
| Dissolve on Scrub / Play | Display a dissolve while you are scrubbing or playing back a clip. |