
Text Menu Settings
Timeline FX Ribbon Settings
To see the full Text menu, click the Editor button.
Alpha Rendering Mode option
Select whether a front clip, matte, or both are used to create the text layer.
General Settings
Use Transparency
Enable to create a text effect in which the background clip is used as the text's fill. Also select RGBA from the Alpha Rendering Mode box.
Rendering Mode option
Select whether to render in Automatic, Progressive or Interlaced mode.
Node Prefs
Displays the Text Node Prefs menu.
See Setup and Rendering Options.
(a) Node Prefs button (b) Animation button (c) Attribute controls (d) Text Mode box
Attributes menu
Changes the appearance of text by setting properties such as fill and shadow. See Creating Text Effects.
Animation
Creates a text animation by setting different text properties at specific keyframes in a clip.
See Animating Text.
Text Mode option
Select a text mode to select text, edit text in layers, modify text attributes, or enter text strings.
Applies various text settings to layers, paragraphs, and characters. Use text modes to manipulate layers, add text to a clip, or edit existing text in a clip. See Modifying Layer and Character Properties.
Reset option
Select an option to reset the selected text layer, the layer axis, the roll/crawl, or the style templates.
Resolution Mode option
Select Resolution List for camera resolutions, Adaptive to set the width and height based on the Frame Aspect Ratio, Scaling Presets for resolution fraction.
Resolution Presets option
Select a resolution. Select Custom Resolution to specify a non-standard resolution.
Adaptive Resolution option
With Width Based on Ratio, Width equals Height multiplied by Ratio. With Height Based on Ratio, Height equals Width divided by Ratio.
Scaling Presets option
Select a resolution as a fraction of the clip.
Bit Depth option
Select the render/output bit depth of clips.
Scan Mode option
Select the scan mode of clips.
Width field
Displays the width of the layer.
Height field
Displays the height at which to crop the text within the text roll or crawl layer.
Aspect Ratio Presets option
Select a standard frame aspect ratio. Select the Set to w:h option to set the clip to use square pixels. Select Custom to define a custom frame aspect ratio in the Aspect Ratio field.
Aspect Ratio field
Displays the custom render/output aspect ratio. Editable
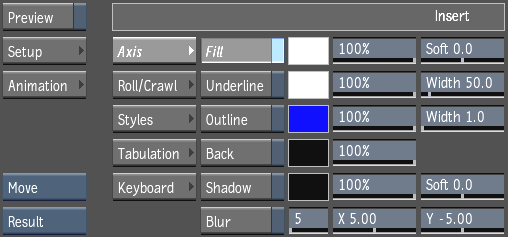
Insert Settings
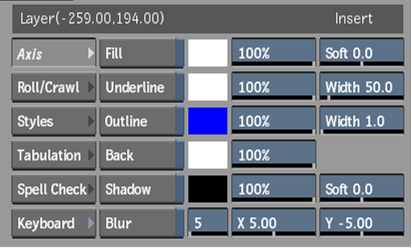
Axis menu
Opens the Axis menu to set properties for layers and characters.
Roll/Crawl menu
Open the Roll/Crawl menu to set text motion properties for vertical or horizontal text scrolling.
See Creating Text Rolls and Text Crawls.
Styles menu
Opens the Styles menu to create preset text style formats.
Tabulation menu
Open the Tabulation menu to set text tabs.
Keyboard menu
Opens the on-screen keyboard to enter text.
See Entering Text
Fill
Enable to use fill on the text selection.
Sets fill colour, transparency, and softness. Set fill softness using the Soft field. To increase the softness, enter a value close to the maximum of 100. To decrease the softness, enter a value close to the minimum of -100. Enter 0 for no softness.
Fill colour
Displays the colour of the fill.
Fill Transparency field
Displays the transparency level of the fill.
Fill Softness field
Displays the softness level of the fill.
Underline
Enable to underline the text selection.
Underlines the characters using the associated colour, transparency, and width. Click the colour pot to choose a colour from the colour picker. To set underline transparency, enter a percentage in the Transparency field. To make the underline more opaque, enter a value close to the maximum of 100. To make the underline more transparent, enter a value close to the minimum of 0. To set the outline width, enter a value in the Width field.
Underline colour
Displays the colour of the underline.
Underline Transparency field
Displays the transparency level of the underline.
Underline Width field
Displays the width of the underline.
Outline
Enable to outline the text selection.
Outlines the characters with a solid colour using the associated colour, transparency, and width. Click the colour pot to choose a colour from the colour picker. To set outline transparency, enter a percentage in the Transparency field. To make the outline more opaque, enter a value close to the maximum of 100. To make the outline more transparent, enter a value close to the minimum of 0.
To set the outline width, enter a value in the Width field. Use anti-aliasing rendering options with outlined text. These options are found in the Text Node PRefs menu. See Setup and Rendering Options.
Outline colour
Displays the colour of the outline.
Outline Transparency field
Displays the transparency level of the outline.
Outline Width field
Displays the width of the outline.
Back
Enable to apply a solid colour background using the associated text layer colour and transparency to the text selection.
Click the colour pot to choose a colour from the colour picker. To set back transparency, enter a percentage in the Transparency field. To make the back more opaque, enter a value close to the maximum of 100. To make the back more transparent, enter a value close to the minimum of 0.
Back colour
Displays the colour of the background.
Back Transparency field
Displays the transparency level of the background.
Shadow
Enable to apply a drop shadow to the text selection.
Applies a shadow to text characters using the associated colour, softness, transparency, and Pos X and Pos Y fields. Click the colour pot to choose a colour from the colour picker. To set shadow transparency, enter a percentage in the Transparency field. To make the shadow more opaque, enter a value close to the maximum of 100. To make the shadow more transparent, enter a value close to the minimum of 0. To set shadow softness, use the Soft field. To increase the softness, enter a value close to the maximum of 100. Enter 0 for no softness.
To set the shadow position on the X-axis, enter a value in the X field. A positive value places the shadow to the right and behind the text characters. A negative value places the shadow to the left and in front of the text characters. To set the shadow position on the Y-axis, enter a value in the Y field. A positive value moves the shadow up. A negative value moves the shadow down.
Shadow colour
Displays the colour of the shadow.
Shadow Transparency field
Displays the transparency level of the shadow.
Shadow Softness field
Displays the softness level of the shadow.
Shadow X field
Displays the shadow position along the X-axis.
Shadow Y field
Displays the shadow position along the Y-axis.
Blur Shadow
Enable to apply a blur effect to a drop shadow created with the Shadow button.
The type of blur applied depends on whether Box Blur or Gaussian Blur is selected in the Text Node Prefs menu. Choose a higher value for a greater shadow blur effect. Using Blur Shadow with animated text decreases processing performance.
Blur Shadow field
Displays the level of blur applied to the drop shadow.
Font Settings
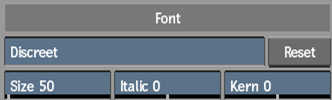
Font field
Displays the current font. Click to open the font browser to select a different font.
Reset
Resets to the default font.
Font Size field
Displays the character size for the selected font.
Font Italic field
Displays the angle of italicized text. Positive values make the characters slope to the right. Negative values make them slope to the left.
Font Kerning field
Displays the amount of spacing between characters. Positive values increase the spacing. Negative values decrease the spacing.
Paragraph Settings
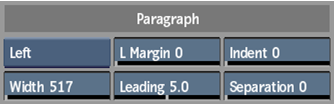
Justification option
Select an alignment option for the paragraph.
Select Left, Right, Centre, or Justified.
Width field
Displays the width at which to crop the text within the text roll or crawl layer.
Left Margin field
Displays the amount of space in the left margin.
Leading field
Displays the space between lines in the selected paragraph.
Indent field
Displays the left indentation value for the first line in the paragraph.
Separation field
Displays the space between the selected paragraph and the one above it.
Character Channels
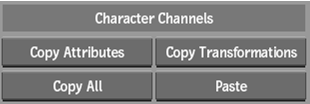
Copy Attributes
Copies attribute settings from the selected text character.
Copy Transformations
Copies transformation settings from the selected text character.
Copy All
Copies both attribute and transformation settings from the selected text character.
Paste
Pastes any copied text character channel information.
Text on Path
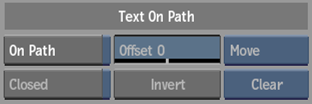
On Path
Enable to place the selected text on a motion path.
Closed
Enable to close the path by connecting the first and last vertices. Text continues around the shape.
Offset
Displays the position of the text on the path. Animate the Offset value to make the text follow the path for the duration of the clip.
Invert
Reverses the order of the vertices on the path so that the text follows the opposite side of the path.
Text On Path Mode option
Select an option to manipulate the selected path spline.
Clear
Resets the text path at the current frame. To reset the path for the entire duration of the clip, click Reset Layer.
Axis Settings
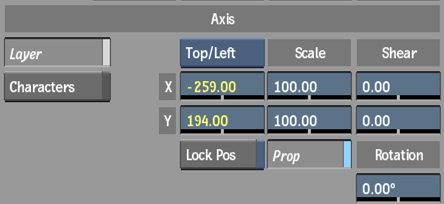
Axis option
Select whether to display the Layer Axis menu or the Characters Axis menu.
Show Axis
Enable to display the axis in the image window.
This button is only available when the Character Axis menu button is selected.
Position X field
Moves the layer or selected characters along the X axis.
Increase the value to move right and decrease it to move left.
Y Position field
Moves the layer or selected characters along the Y axis.
Increase the value to move up and decrease it to move down.
Lock Position
Enable to lock the position of the text layer to either the Top/Left or Centre position.
Centre Axis
Moves the axis to the center point of the character.
This button is only available when the Character Axis menu button is selected.
X Position Character Axis field
Sets the X-axis for the selected characters. Set each letter in a word spinning on its own axis in a different way.
This button is only available when the Character Axis menu button is selected.
Using the Axis Pos X field, you set each letter in a word spinning on its own axis in a different way.
Y Position Character Axis field
Sets the Y-axis for the selected characters. Set each letter in a word spinning on its own axis in a different way.
This button is only available when the Character Axis menu button is selected.
Using the Axis Pos Y field, you set each letter in a word spinning on its own axis in a different way.
X Scale field
Scales the layer or selected characters along the X-axis.
This value is a percentage, so entering 50 means 50 percent. Use a larger value to increase the scale along the X axis. Use a negative value to create a mirror image on the X axis. Enter 0 to make a layer or selected characters disappear.
Y Scale field
Scales the layer or selected characters along the Y-axis.
This value is a percentage, so entering 50 means 50 percent. Use a larger value to increase the scale along the Y axis. Use a negative value to create a mirror image on the Y axis. Enter 0 to make a layer or selected characters disappear.
Proportional Scale
Proportionally changes the Scale X and Y values.
X Shear field
Shears or slants the layer or selected characters along the X-axis.
Use a positive value to slant right and a negative value to slant left.
Y Shear field
Shears or slants the layer or selected characters along the Y-axis.
Use a positive value to slant right and a negative value to slant left.
Rotation field
Rotates a layer around its axis or selected characters around their axis.
Use a negative value to rotate clockwise and a positive value to rotate counter-clockwise.
Roll/Crawl Settings
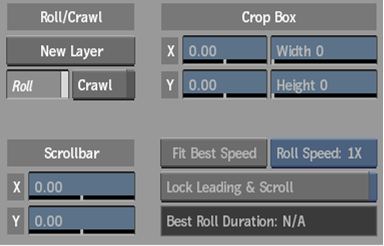
New Layer
Creates a layer to contain a text roll or text crawl.
Roll
Enable to create text that scrolls vertically over an image.
Crawl
Enable to create text that scrolls horizontally across an image.
Scrollbar
Scrollbar X field
Displays the X position of the roll or crawl layer inside the crop box. The value changes when you move the scrollbar at the right of the text layer for a roll or at the bottom of the layer for a crawl.
Scrollbar Y field
Displays the Y position of the roll or crawl layer inside the crop box. The value changes when you move the scrollbar at the right of the text layer for a roll or at the bottom of the layer for a crawl.
Fit Best Speed
Creates a broadcast quality text roll based on the number of frames in the clip and the lines of text in the text roll. Enable this button to make corrections to a text roll without altering the speed or duration of the clip.
For NTSC and PAL, broadcast quality is calibrated at four pixels per frame. This rate ensures no flicker in the text roll.
Roll Speed
Select the speed of the text roll, in pixels per second.
Changes the speed of the text roll. For 1X, the speed rate is 120 p/s (pixels/second) in NTSC, and 100 p/s in PAL. For 2X, it is 240 p/s in NTSC, and 200 p/s in PAL, and so on.
Lock Leading & Scroll
Enable to lock the leading of the paragraph text so that you can insert another paragraph into the text roll. If the duration of the clip lengthens after you make modifications, click Fit Best Speed to adjust the length.
Best Roll Duration field
Displays the suggested duration for the text roll. The duration is calculated using the start/end position of the roll and the currently selected speed.
Crop Box
Crop Box X field
Displays the X position of the crop box inside the image window. The crop box determines the X coordinates of the text roll or text crawl on the clip.
Crop Box Y field
Displays the Y position of the crop box inside the image window. The crop box determines the Y coordinates of the text roll or text crawl on the clip.
Width field
Displays the width at which to crop the text within the text roll or crawl layer.
Height field
Displays the height at which to crop the text within the text roll or crawl layer.
Styles Settings
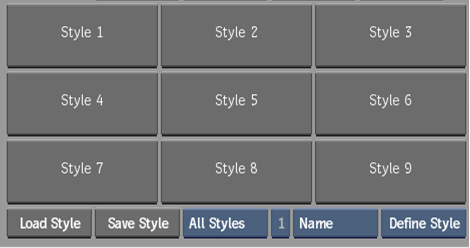
Apply Style 1
Saves or applies Style 1.
Apply Style 2
Saves or applies Style 2.
Apply Style 3
Saves or applies Style 3.
Apply Style 4
Saves or applies Style 4.
Apply Style 5
Saves or applies Style 5.
Apply Style 6
Saves or applies Style 6.
Apply Style 7
Saves or applies Style 7.
Apply Style 8
Saves or applies Style 8.
Apply Style 9
Saves or applies Style 9.
Load Style
Opens the file browser where you can select a saved style to load.
Save Style
Opens the file browser where you can save a style.
Style Mode option
Select whether to work with all styles or one style.
Style Save Number option
Select the number of the style to save. Available when One Style is selected from the Style Mode box.
Style Name
Sets the name of a defined style.
Style Option option
Select an option for creating styles. AutoStyle assigns styles from an existing layer.
Tabulation Settings
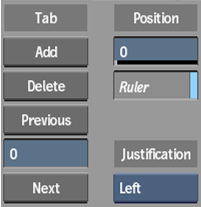
Add
Adds a tab stop on the text layer ruler. By default, tab stops are set at every 100 pixels.
Delete
Removes the selected tab stop.
Previous
Selects the previous tab stop on the text ruler. Tab stops appear in yellow when selected.
Tab ID field
Display the tab number in the current paragraph. When you click Next or Previous, the Tab ID field changes, showing the number of selected tab stops.
Next
Selects the next tab stop on the text ruler. Tab stops appear in yellow when selected.
Position field
Displays the exact tab stop position on the X-axis, in pixels. This value is set in pixels.
Ruler
Enable to display the tabulation ruler in the text layer.
Justification option
Select the text alignment at the tab stop.
Hardware Anti-Aliasing
Use HWAA
Enable to apply the hardware anti-aliasing level set in the Rendering tab of the Project Preferences to this Text setup.
Hardware Anti-Aliasing indicator
Displays the hardware anti-aliasing level set in the Rendering tab of the Project Preferences.
Software Anti-Aliasing
Software Anti-Aliasing option
Sets the auto-softness and software anti-aliasing level.
Anti-Aliasing Softness field
Sets the softness value of the anti-aliasing sample.
Wireframe colour
Displays the colour of the text path.
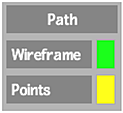
Points colour
Displays the colour of the vertices on a text path.
See Animating Text on a Motion Path.
Global/Layer Blur option
Select whether to apply blurring globally or on a per layer basis.
Global Blur makes all shadows appear together, blurred with a single unique colour, on top of the background of all layers. Layer Blur blurs each layer individually according to its priority—background, blurred shadow, and fill.
Shadow Blur option
Select whether to use a smooth blur with rounded edges (Gaussian), or a rectangular, rougher edged blur (Box).
Entering Text
Font Type option
Select the type of font to display in the font browser list.
Font Preview window
Previews the selected font. Click to enter text.
Modifying Layer and Character Properties
Layer Axis option
Select an alignment option for the selected text layer.
| Select: | To move the axis: |
|---|---|
| Top/Left | To the upper-left corner of the text layer. |
| Centre | To the centre point of the text layer. |
X Scale field
Displays the scale of the text layer along the X axis.
This value is a percentage, so entering 50 means 50 percent. Use a larger value to increase the scale along the X-axis. Use a negative value to create a mirror image on the X-axis. Enter 0 to make a layer or selected characters disappear.
Y Scale field
Displays the scale of the text layer along the Y axis.
This value is a percentage, so entering 50 means 50 percent. Use a larger value to increase the scale along the Y-axis. Use a negative value to create a mirror image on the Y-axis. Enter 0 to make the layer or selected characters disappear.
Proportional Scale
Enable to proportionally change the X Scale and Y Scale values.
X Shear field
Displays the shear or slant value of the text layer along the X axis.
Use a positive value to slant right and a negative value to slant left.
Y Shear field
Displays the shear or slant value of the text layer along the Y axis.
Use a positive value to shear up and a negative value to shear down.
Rotation field
Displays a rotation value for a layer rotating around its axis.
Use a negative value to rotate clockwise and a positive value to rotate counter-clockwise.