
Chunk Material
Create > Create Material > Chunk Material
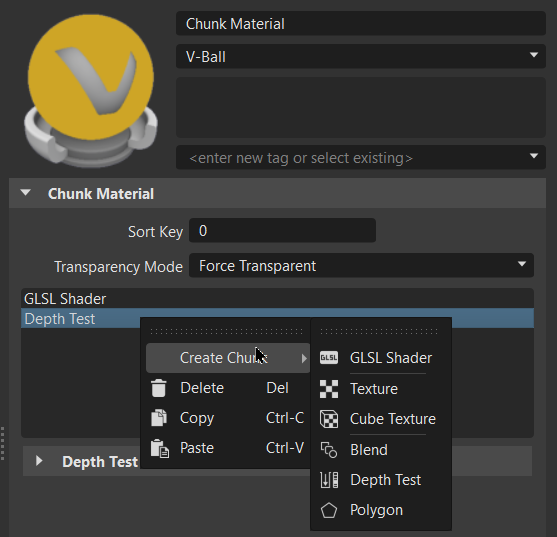
In the Material Editor, when Chunk Material is selected, it creates a chunk material node. The chunk material node is an empty material bin node, which can be customized by adding extra chunk attributes.
What is a GLSL Shader
A GLSL Shader is a chunk used when programming your own material. To do this, use OpenGL Shading language or GLSL for short. When you create a GLSL shader chunk, it is created with an already functioning example, SHLChunk, which renders the complete object orange.
Chunk Material
- Sort Key - Changes the order in which transparent materials are rendered in OpenGL. Transparent surfaces with the same sort key are sorted back to front.
- Transparency Mode - Offers a total of three transparency modes, Auto Detection, Force Transparency, and Force Opacity. It sets a material to be transparent or opaque.
Right-click the area below these attributes to access the following context menu options:
Create Chunk - Creates a material chunk of the type selected. Choose from GLSL Shader, Texture, Cube Texture, Blend, Depth Test, and Polygon.
Important:The type of material chunk selected determines the attributes section that appears next.
Delete (Del) - Deletes the selected material chunk(s) from the list.
Copy (Ctrl+C) - Copies the selected material chunk(s) from the list. Use Paste to add them to the list.
Paste (Ctrl+V) - Pastes the copied material chunk(s) to the end of the list.
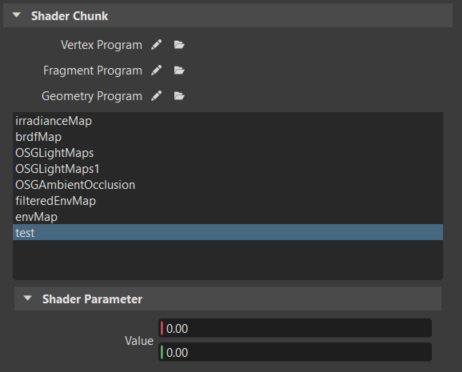
Shader Chunk
This section appears when GLSL Shader is selected from the material chunk list above and contains the following attributes:
Vertex Program, Fragment Program, and Geometry Program - To access the Chunk Material Program for the selected attribute and edit its content, click
 . Once finished with your changes, click Apply to enact them. To select another file to use, click
  , locate and select a file, then click Open.
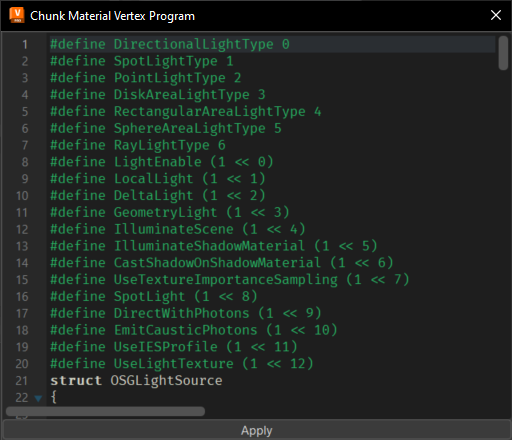
Right-click the area below these to access the following context menu options:
Auto Create Parameters - Parses the vertex and fragment and auto creates the parameter user interface. This will destroy all your parameter settings. It resets values set in the Shader Parameter section that follows. Therefore, a warning dialog appears. If this concern isn't valid for your case, click OK.
Create Parameter - Creates a parameter of the selected type, adding them to the list. Choose from Int, Real, Vec2, Vec3, Vec4, and Matrix. Enter a name in the Create Shader Parameter dialog that appears, then click OK.
Delete (Del) - Deletes the selected parameters from the list.
Texture Chunk
This section appears when Texture is selected from the material chunk list and contains the following attributes:
- LOD Bias - Sets the bias of the LOD calculation for texture access.
- Anistropy - Sets texture anistropy filtering.
- Image - Sets the image texture. Click to locate and select a file,
 to save any changes,
  to reload the image and capture any changes made to it, and
  to delete the current image.
 - Internal Format - Sets the internal texture format. Click
 to select a format.
 - Min Filter - Sets the minimization filter. Choose from Fastest, Fast, Medium, Nice, Nicer, and the default, Nicest.
- Mag Filter - Sets the magnification filter. Choose from Fast or the default, Nice.
- Wrap Mode S - Sets the texture coordinate S wrapping. Choose from Clamp. Clam To Edge, Clamp To Border, Mirrored Repeat, and the default, Repeat.
- Wrap Mode T - Sets the texture coordinate T wrapping. Choose from Clamp. Clam To Edge, Clamp To Border, Mirrored Repeat, and the default, Repeat.
- Wrap Mode R - Sets the texture coordinate R wrapping. Choose from Clamp. Clam To Edge, Clamp To Border, Mirrored Repeat, and the default, Repeat.
Cube Texture Chunk
This section appears when Cube Texture is selected from the material chunk list, as well as a Texture Chunk section, and contains the following attributes:
- Pos X, Y, and Z Image - Sets the image for the positive X, Y, or Z direction of the cube texture.
- Neg X, Y, and Z Image - Sets the image for the negative X, Y, or Z direction of the cube texture.
Blend Chunk
This section appears when Blend is selected from the material chunk list and contains the following attributes:
- Source Factor - Sets the value the incoming pixel is multiplied by. Legal values are directly taken from the
glBlendFunc()main page. Click to select a value. - Destination Factor - Sets the value the frame buffer pixel is multiplied by. Legal values are directly taked from the
glBlendFunc()main page. Click to select a value. - Equation - Sets the equation used to combine the two values. Click to select a value. This is only available where
GL_ARB_imagingis supported.SeeglBlendEquation()for details. - Color - Sets the constant color used by blend modes.
Depth Test Chunk
This section appears when Depth Test is selected from the material chunk list.
- Source Factor - Sets the depth comparison function. Click to select a value.
Polygon Chunk
This section appears when Polygon is selected from the material chunk list and contains the following attributes:
- Offset Factor - Defines the offset factor.
- Offset Bias - Defines the offset bias.
- Offset Fill - Enables offsetting for polygons.
- Offset Point - Enables offsetting for points.
- Offset Line - Enables offsetting for lines.
- Smoothing - Defines the polygon antialiasing used.
- Cull Face - Defines which side of the polygon is invisible. To not cull a thing, set this to None.
- Front Face - Defines which side of the polygon is considered the front. The default is Counterclockwise.
- Front Mode - Defines if the polygon front sides are rendered as filled, which is the default, outlined, or as points.
- Back Mode - Defines if the polygon back sides are rendered as filled, which is the default, outlined, or as points.