
Paint Masking Workflow Example
TruLaser can project or wrap any 2D image file onto a 3D surface or solid. This is useful for paint masking where a 2D logo or image needs to be converted to a 3D format before it can be sent to a laser projection system.
- Open Inventor and click the 3D Model tab.
-
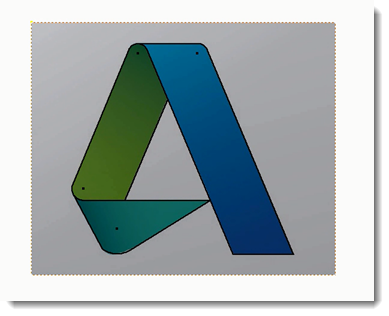
Open the logo image. This example shows a 2D .jpg image.
-
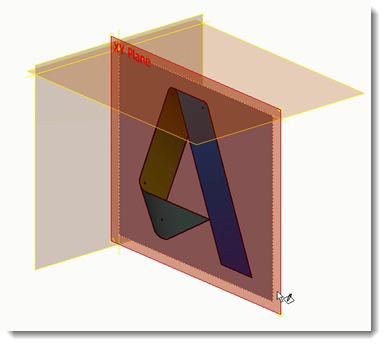
Click Start 2D Sketch. The curves that make up the logo are created in a 2D sketch that can be scaled to match the size of the 3D geometry.
-
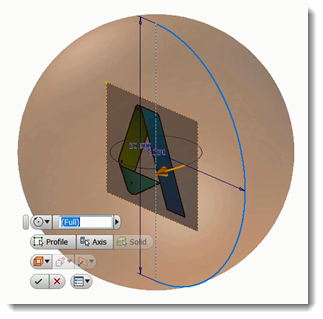
Adjust the sketch based on the projection method that best fits your needs. Each of these methods allows the 2D image to be extended to a 3D shape with a minimum of distortion or warping.
Project data along a single projection vector: This method is best if you want the 3D image to closely resemble the original 2D geometry when seen from a long distance.

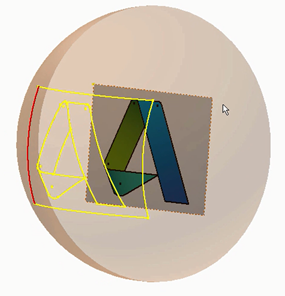
Project data to the closest point to your 3D shell: This method is best if your 3D shell has a high degree of curvature.
Wrap the 2D shape onto the 3D geometry: This method places the logo onto the 3D shape as if it were a sticker. It maintains a great representation of the original 2D information when your 3D shell is not overly complex.
-
Click Finish Sketch.
- Click the TruLaser tab.
- Click From Sketch in the TruLaser ribbon. The laser data is tessellated to match the format required by all laser projector brands.