
Add Projection Set Properties
A projection set shows all groups and subgroups to include in the projection. Managing projection settings can help to prevent flicker and improve quality.
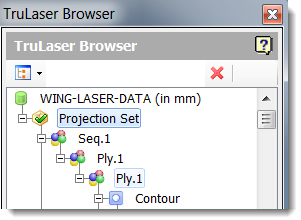
To access the settings, double-click on a projection set in the tree:
The settings window appears:
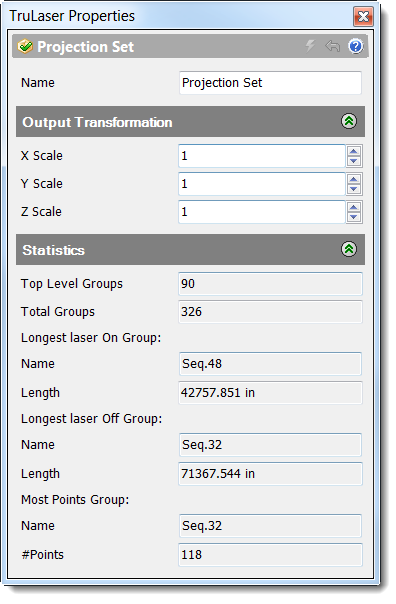
Enter your settings and click Apply. Refer to the table below for property details.
| Name | A unique name that helps you easily identify the projection set. |
| X Scale | Horizontal scale |
| Y Scale | Vertical scale |
| Z Scale | Depth scale |
| Top Level Groups | The number of first-level groups in the projection set |
| Total Groups | The total number of groups (first-level and sub-groups) included in the projection set |
| Longest Laser On Group Name | The group containing the longest distance for the laser to travel before repeating. |
| Length | If you are experiencing flicker you could optimize the group or break the group into multiple groups to shorten the distance. |
| Longest Laser Off Group Name | The group containing the longest laser off distance. |
| Length | Laser off means that the laser comes to the end point and turns off to get back to the start point. If you are encountering issues, adjusting the start and end points could improve the laser quality. |
| Most Points Group Name | The group containing the most points. |
| # Points | The laser must start and stop at each point it encounters in its path. If, for example, this value is 100, the laser must stop and start 100 times in less than a second. If this value is above 100, there is a good chance you'll experience flicker. Lowering this value might improve laser projection quality. |
Access Projection Set Context Menu Options
Right-click the projection set name to view a menu of options. In addition to the standard menu options (see Navigating the TruLaser Browser in Finding Your Way Around for descriptions), the following options are available for projection sets:
- Add Group: Add a group to the projection set.
- Convert to Sketch: Convert the laser data to a sketch so that you can make detailed adjustments.
- Optimize Laser Data: Optimize laser data to help eliminate flicker.
- Clone Projection Set: Create a copy of the projection set and all its components.
- Set Active Projection Set: Set this to be the projection set used for the project. Only one projection set can be active at a time.
Cloning a Projection Set
Cloning a projection set creates a copy of the set so that you can make adjustment and compare outcomes without losing the original settings.
Because you cannot undo filters, it is a good idea to clone your projection set before making any changes. Doing so:
- Keeps your original data intact.
- Lets you easily compare original and changed data.
- Run multiple "what if" scenarios to find the best way to optimize your laser projection.
Complete the following steps to copy an existing projection set and run comparisons:
- In the browser, right-click the projection set to copy.
- Select Clone Projection Set. A new copy of the projection set appears at the bottom of the tree.
- Right-click the copy and select Set Active Projection Set.
-
Right-click the copy and select Edit Properties to change the settings and click Apply to save the changes.
The following new property fields appear when you clone a projection set:
- Geometry Compression Filters: Name, Tolerance, Shortest Segment, Longest Segment
- Volume Filters: Model, Volume Filter Inside/Outside
-
Run a simulation to view the results. To create a laser projection file with the filtered data, click Write Laser Data in the ribbon. See Export Data for details.
At any point, you can switch back to the original set, but right-clicking on the original and selecting Set Active Projection Set.