
Use the Attachment Info dialog to select the attachment point and direction axis for:
- a tool post to a holder;
- a holder to a tool post; or
- a tool to a tool post.
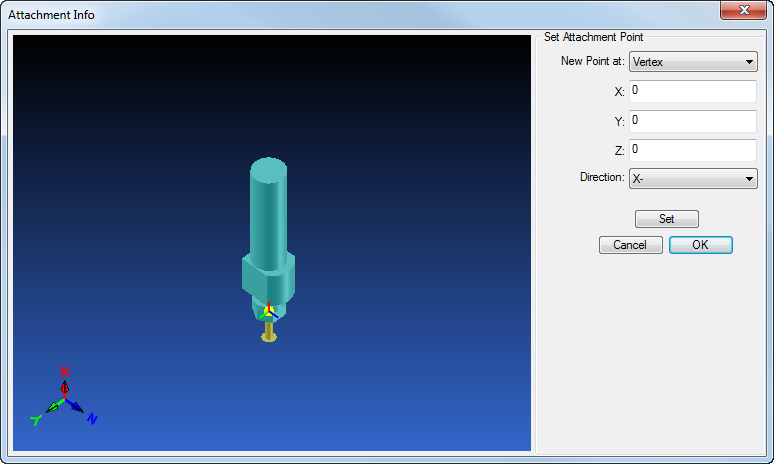
Specify the attachment point by completing the Set Attachment Point options on the right of the dialog and then click on the solid model of the tool post or holder. The attachment point is shown as a bright magenta, yellow, or orange spherical point (depending on where the dialog was opened from).
To display the
Attachment Info dialog, click a
Set Attachment Point button (for example,
 ) in the
Holder Data dialog or the
Tool Post Layout dialog.
) in the
Holder Data dialog or the
Tool Post Layout dialog.
The following settings are available:
New Point at — Select an option from the list to choose how you want to specify the attachment point:
- Vertex — Click on any vertex on the solid model to select the attachment point.
- Arc / Circle Center — Click on an arc edge and select its center as the attachment point.
- Face Center — Click on a surface and select its center as the attachment point. This type of selection is restricted to planar, spherical and toroidal surfaces.
- Edge MidPoint — Click on an edge and select its midpoint as the attachment point. This type of selection is restricted to linear edges.
X, Y and Z coordinates — PartMaker updates these values automatically if you are selecting the attachment point interactively by clicking on the solid model of the tool post or holder. If you want to specify an attachment point manually, enter the X, Y and Z coordinates of the point in these fields and then click Set to verify the location on the solid model.
Direction — Select the axis of attachment.
Set — Click to verify the location of the attachment point on the solid model if you have entered coordinates manually.
Cancel — Click to close the dialog without saving any changes.
OK — Click to save your changes and close the dialog.